Blackboard - Tools and functionality - Kunnskapsbasen
Blackboard - Tools and functionality
This page contains an overview of the different functionalities in Blackboard. Use the table of contents to easily navigate to the tools of interest to you.
Norsk versjon - Blackboard - Verktøy og funksjonalitet
Topic page on Blackboard | Pages tagged with Blackboard
Tools
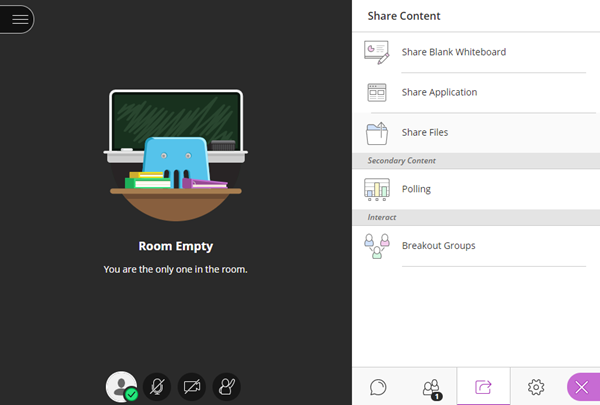
Blackboard Collaborate Ultra
Collaborate is a built-in tool for video and oral communication that is suited for giving lectures or group guidance over the web. It has a raising you hand -function that puts students in a prioritized queue, a digital whiteboard for brainstorming, screen sharing, a chat and polls.
Teachers also have the option to distribute the students into smaller groups who work in separate virtual Collaborate-rooms, where teachers can enter and participate in the group activities. After the group work is finished, the teacher can gather all participants back into one classroom. If there are students who are unable to participate at the day of the Collaborate-meeting, they can still see the lecture afterwards because of Collaborate's recording function.
Collaborate is also available through the Blackboard-app on both iPhone, Android and Windows PC. You can easily share a collaboration room as a link with your students, and from their phones they can gain immediate access.
Blog
A blog is a communication tool for use in courses. Blogs can be used by students to share their thoughts on course topics, either individually or in groups. The text editor is the same as in all other places in Blackboard, with the option to add photos, videos etc.
Journal
Journal is a tool that gives students the opportunity to reflect on topics or their own work in a course. Each Journal is private, meaning that only the student who owns the Journal can read and write new entries. Instructors are able to add entries and comments on every student Journal, and can also choose to make the diaries public to all students in the course. Journals can also be used as a group tool, but it's function is then identical to that of a Blog as all entries made in group Journals can be read by all group members and instructors.
Date management
Date management can be used to create an overview of everything that is going on in the course, and to automatically adjust content dates in the course.
Discussion board
The Discussion board is a platform where students can ask questions about anything course related. Both teachers and other students can post and comment on the board which allows the students to discuss amongst themselves, leaving the teachers free to comment only when necessary. Courses can have a discussion board open for all registered students, as well as a discussion board for each course group.
Course portfolio
Portfolio is a tool for making content with more control over how the content is presented. It is a useful tool for presenting larger projects or important concepts from the curriculum.
Course Calendar
In the Course Calendar you can see all events from all the courses where you are assigned a role. You can filter out courses, and toggle between month, week and day view. To create an event you only need to double click on a date, write the name of the event and whether or not is should reoccur on later dates. You can change deadlines for assignments and other events by simply dragging and dropping the event from one date to another. 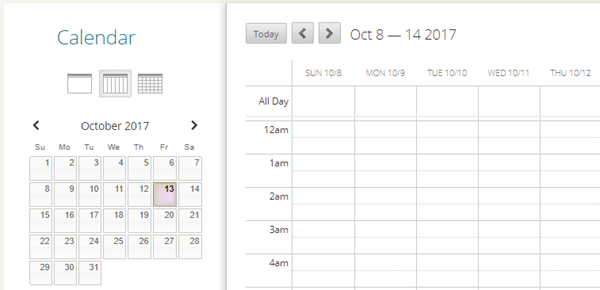
Contacts
Blackboard has its own tool for contacts, where all course administrators and teaching assistants can add their contact information. The contacts can also be organized into folders, which is especially useful in courses with multiple projects and contacts.
Announcements
With Announcements you can efficiently communicate messages to the students in the course. Students will be immediately notified on Blackboard when a new announcement is made, and students who use the Blackboard app will receive a push notification. For important announcements, you also have the option to send it as an email.
Glossary
Most courses use a number of technical terms that are extra important for the students to understand. With the Glossary tool, you can add terms, along with a short description, to a glossary list the students can consult.
Sending email
Unlike It's learning, Blackboard does not have its own messaging system. Instead, Blackboard relies on email to students where participants in the course have the option to send an email directly from Blackboard.
Wiki
A wiki is an important tool for co-writing, which allows the students to create and collaborate on texts. You can have one common wiki for the entire course, or separate wikis for each group. As course manager you can see how many percent of a text a student has contributed with.
Assessments
Grades
As a rule of thumb, grades that require anonymous assessment should be evaluated through Inspera. Beyond that, you are free to use Blackboard for assignments marked Approved/Not Approved, and for graded assignments where the student’s anonymity is not a requirement.
Assignment
An Assignment in Blackboard is just as its name implies, a regular assignment, and it acts very similarly to what we are used to from both It's learning and Fronter. Students can hand in their assignments individually or in groups. Assignments can be graded directly in Blackboard, and you can save a lot of time by using Rubrics.
Grade Center
When you want to grade an assignment, you can either go to the page Needs grading or to the Full Grade Center. You find both of these pages in the Course Tool menu under Grade Center. The Needs Grading page shows you all the assignments you have yet to grade, whereas the full Grade Center gives you an overview of all grading activities in the course. In large courses it can be helpful to learn how to organize the Grade Center.
Grading tool
To grade an assignment, it is not necessary to download the file to your computer. Assignments delivered in either PDF or Word formats can be graded directly in Blackboard. With the inline grading tool you can highlight and add comments at any location in the text.
Tests
Tests in Blackboard resemble tests in It's Learning. However, Blackboard supports many more question types.
After a test has been created, it needs to be distributed to a content area before the students can access the test. Be aware that some of the question types will not be graded automatically.
To save time you can reuse questions in as many tests and surveys as you like. It is also possible to create the questions in Excel and import them into Blackboard.
Some teaching networks have their own webpages where you can download large sets of questions. These can be uploaded to Blackboard.
General
Qwickly
Qwickly is a tool in Blackboard which allows you to send emails, create announcements, create course content and more from the start page in Blackboard. Here you can save a lot of time! For instance, if you need to cancel several lectures one day due to illness, you can send an announcement in several courses at the same time with the use of Qwickly. 
Mathematic formulas and Latex-format
It is possible to write mathematic formulas in Blackboard, either with the use of the graphical interface, or by pasting a Latex code you have saved. The tool for mathematic formulas is available in the content editor in Blackboard by pressing the Fx button. If you do not see this button among your text tools, it is possible that you have hidden some of the buttons.
Groups
Blackboard can arrange for students to work in groups. It is possible to create groups in three different ways: with manual enrolment, random enrolment, or self-enrolment. Manual enrolment means that the course instructor decides who should be in which group by adding each student manually. Random enrolment means that the students are randomly enrolled by the system into different groups, but the course instructor still decides the maximum number of students per group. Self-enrolment means that the groups are created by the course instructor, but it is the students themselves that choose which group they want to join. You can decide if you want to create a single group, or a group set.
All groups have a series of built in group tools.
Student Preview Mode
When you are working in Blackboard, please note that students and instructors usually do not see the same view or content. To check how the course looks like as a student, enter Student Preview mode. This is a useful function if you want to ensure that all content is available to the students. Another reason why Student Preview Mode is useful is because not all content is displayed in the same manner for instructors and students, such as learning modules.
Not only do you get to view the course as a student, but Blackboard also generates a "dummy" student user in the course, which makes it possible for you to do various student-actions, such as handing in an assignment. When you exit the Student Mode, you can choose whether you want to save the changes you have made, or delete them.
Menu
The menu in the course is divided into two parts. The lower part of the menu is called The Course Management and is only visible to the instructor(s) in the course. Here you can find the course tools, the Grade Center and more. The upper part of the menu is visible to anyone in the course, including the students.
New page
You have a great deal of freedom when it comes to customization of the course menu, and it is possible to create the following types of links:
- Content Area: This is usually the page you create in order to upload course content, such as teaching materials, assignments, etc. See the bullet point on Content Areas for more information.
- Module Page: An example of a module page is the course homepage. You can add your own modules as you like, such as Announcements, Quick Links, Alerts, etc.
- Empty Page: An empty page works in the same way as an "Item" without being placed in a content area. You can read more about items under the bullet point on Content Areas further down.
- Tool Link: A tool link is a link that directs you to one of the course tools. For example the Course Calendar, Collaborate, etc.
- Web Link: You can create a web link if you want to direct the students to an external web page.
- Course Link: A course link directs you to another page inside the course.
- Subheaders: You can use a subheader to organize the list of links in the course menu into different groups or categories.
- Dividers: A divider is a line that you add to the menu in order to organize the links in groups or categories.
Quick Links/shortcuts
All courses have a home page with a shortcut module, which makes it easier to access tools that are frequently in use. If it is not already on your home page, it can be added manually by clicking "Add Course Module", and choosing "Snarveier/Quick Links".
Content Area
In the Content Area you can upload and create resources for the course, create assignments and add shortcuts to tools.
Build Content
- Item: An Item is a multimodal element where you can create text that also contain images, video, audio and embedded third-party content (e.g. Flickr, YouTube). You can create hyperlinks that can direct to external content, such as Youtube or files from "My Content". It is also possible to create Items using HTML and CSS. An item may have several files attached to it at once.
- File: Use this option if you wish to upload a single file from "My Content" or your computer to the content area. Note that when you upload files from your computer, it is automatically also added in "My Content".
- Audio, Images and Video: These options lets you upload audio, image and video files to the content area with embedded media players, so that it is possible for students to use the files without having to download them or open them externally.
- Learning Module: A learning module is a type of content area where you can structure the material into chapters, and if you wish, force the students to read the chapters in a set order.
- Web Link and Course Link: Web Link and Course Link function the same way as in the course menu. Web links are used to direct students to external web pages, whereas course links direct to pages inside the course.
- Content Folder: Usually, one has to upload quite a lot of learning resources into a content area. Therefore it may be useful to structure files, items, etc. by putting them into content folders. Content Folders are also Content Areas, with the same options for adding and creating content.
- Module Page and Blank Page: An example of a Module Page is the course home page. Here you can add To-Dos, Announcements, Quick Links, etc. A Blank Page is an Item that cannot be shown directly in the Content Area, but has to be clicked on in order to be read.
- Flickr, SlideShare and Youtube: If you wish to share a Youtube video, a Flickr image, or a SlideShare presentation without adding these to an item, you can embed them directly into the content area as external content.
- Learning Resource: This functionality is not yet available, and is still being developed. By clicking on Learning Resource, you are redirected to LOR (Learning Object Repository). This is a database with learning resources that will be the common platform for all higher education in Norway. You can search for topics that are relevant for your course and find material that already exists. Note that the LOR resources cannot be used outside of NTNU’s framework.
Assessments
From here you can create tests, surveys and assignments as described earlier under "Assignments". If you wish to create a Question Pool, you will find that option amongst the course tools in the Course Management Menu. An important difference between Tests and Surveys is that Surveys are anonymous. If you need to see the name of the students, you have to make a Test.
Tools
In the drop-down menu "Tools" you can create links to all of the course tools. This link will then be added to the content area you are currently in.
My Content
My Content is an area in Blackboard where you can save files in the cloud. All files that are uploaded to a Content Area, will also be saved in My Content. If you delete a file from My Content, the file becomes unavailable in all the Content Areas in all Courses where it was being used.
Inside of My Content, the files are organized in different levels. Files that are used in courses are stored under Course Content in the folder of the relevant course. If you have files that will be used in several courses, you can put this under "Organization Content". Files that you do not know if will be used, or which you are simply saving for later, may be stored under My Content. The files under My Content is only available to you.
Office 365
In the menu at the top of the page there is a button called O365. Here you can find shortcuts to Outlook, OneNote, Sharepoint, OneDrive and other cloud-based services. You also have access to TeamSite and the groups that are connected to your FEIDE user.
Global Navigation Menu
No matter where you are in Blackboard you will see your name in the top right-hand corner. If you click on your name, a drop-down menu with shortcuts to several locations in Blackboard appears. At the top you will find your recently visited courses. This way you can quickly get back to the recent course you were working on. There are also other short cuts, like links to Innsida under Links. In the left menu there are icons which link to Announcements, the Calander, and more.
Adaptive Release
Adaptive release is a functionality in Blackboard that gives the course instructor the option of making the availability of resources conditional. For instance, you can add a restriction so that a Group Assignment in a course is only visible to students after they have signed up for a group. You can also customize the assignments such that each group only has access to their assignment. Adaptive release makes it possible for you to create a course page that fits your specific needs.
Advanced functions
Achievements
Achievements is a course tool that makes the user experience in Blackboard more interactive by giving digital medals to students during the semester based on their completion of learning activities. Achievements are not added to the course tools automatically. In order to activate them, go to Course Management and click on Tool Availability under Customization. From here you have the option to make Achievements available. After you have done this, you can find the tool together with all the other course tools in the Course Management Menu.
Embedding third-party applications
Since you have the option to enter HTML mode when creating items in the content area, it is entirely possible to add embed codes that show content from third-party applications. Some examples of this are Padlet, Quizlet, MazeMap etc.
See also
- Groups and tools for group work
- Overview of the grade center
- Video conferencing with Collaborate Ultra
Contact
The Oracle Support Services can help you if you encounter any difficulties.