Blackboard - Edit groups - Kunnskapsbasen
Blackboard - Edit groups
This guide shows you how you can create, edit or delete single groups in your course. To learn about group sets, click here.
Norsk versjon - Opprett og rediger gruppesett
Temaside om Blackboard | Sider merket med Blackboard
In Blackboard, you can create groups one at a time or in sets. A student can be a member of several single groups. Each group has its own homepage with tools to help students collaborate. Only you as an instructor and group members can access the group tools. Read more about group tools here: Groups and tools for group work
Group enrollment methods
You can enroll students in single groups in two ways:
- Self-Enroll: Allows students to add themselves to a group with a sign-up sheet. Self-enrollment is an option available for both single groups and group sets. For example, if you, as a lecturer, are going to arrange an excursion, you can create a single group where the first 20 people who sign up can participate in the excursion.
- Manual Enroll: Allows you to assign each student in your course to a group. Manual enrollment is available for both single groups and group sets. An example is that when creating a reference group, you as a lecturer can sign up the reference students into a group manually.
Create a single group
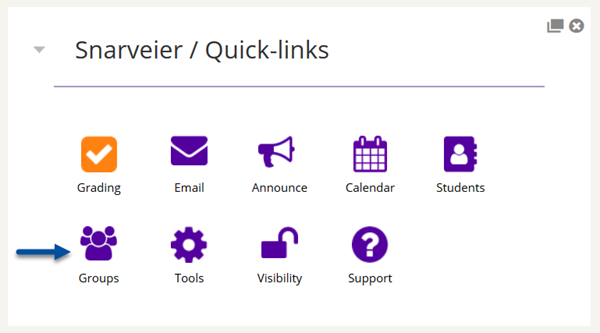
- To create a single group, navigate to the Course front page, you will find Groups under Snarveier/Quick-links. Click on Groups.
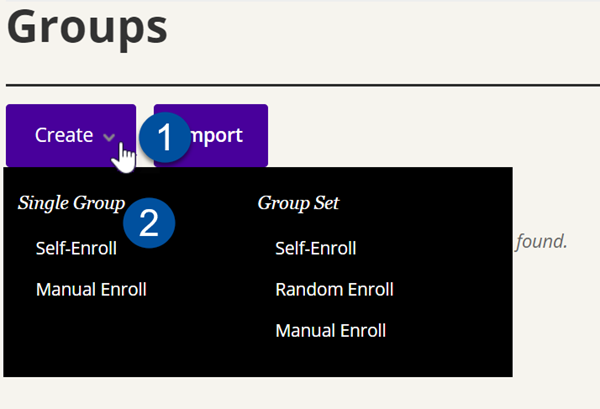
- Click on Create(1). In the Single Group list, select Self-enroll or Manual enroll (2).
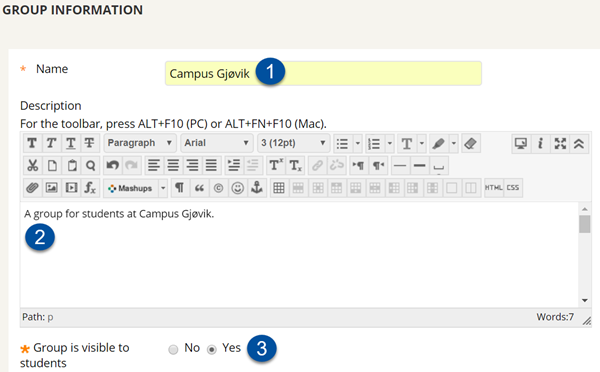
- Type a Name(1) and optional description of the group (2). Make the group visible to students (recommended) (3).
- It is not necessary to keep all Group Tools if they are not going to be used. Therefore, remove the check boxes for the Group Tools which should not be available. Read more about group tools here: Groups and tools for group work

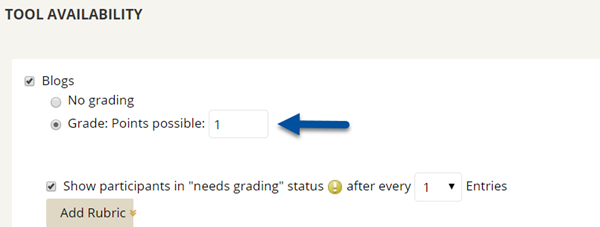
- If you want to grade students submissions for blogs, wikis, and journals, select Grade option and type 1 in Points possible to grade it with approved/not approved.
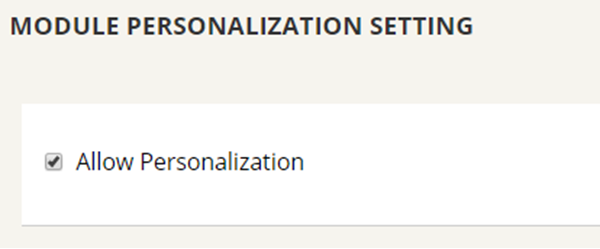
- We recommend not allowing students to make adjustments on the group's side, remove the mark at Allow Personalization.
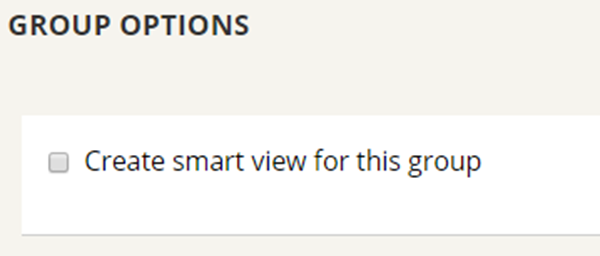
- You can choose to create a Smart View for the group. By using Smart View the Grade Center becomes more organized. You can use smart view to filter the grade center based on group enrollment, making it easier to find grading within a group.
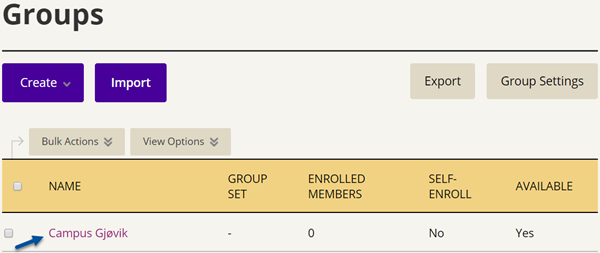
Read more about smart views on Blackboards own help-site: Smart View - When you are ready to create the group, click on Submit. The new group will appear on the Group-side.
Then, depending on whether you chose Self - enroll or Manual enroll, do this:
Manual Enroll
Under membership press Add Users to add a student to the group.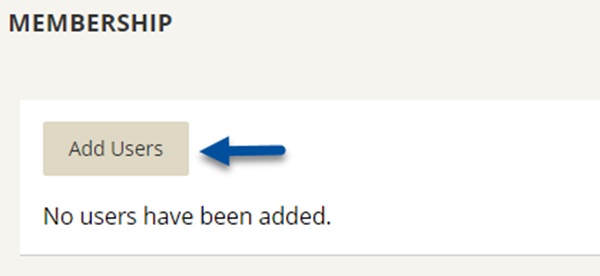
In this user guide, we have set the search settings to Any, Contains and searched for Wesley. The search result shows all users that contain Wesley. Select the student you want to add, and click on Submit.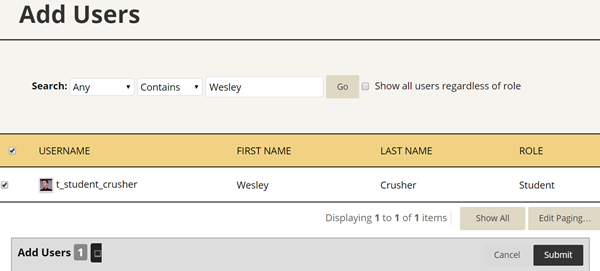
Self - Enroll
Here you must select settings for sign - up. Give the sign - up sheet a Name(1). Write instructions for registration (2). Set Maximum Number of Members to join the group (3). Check the box for Show Members(4) if you want to allow students to see names of other members in a group before they sign up. Allow students to sign up from the groups listing page (5).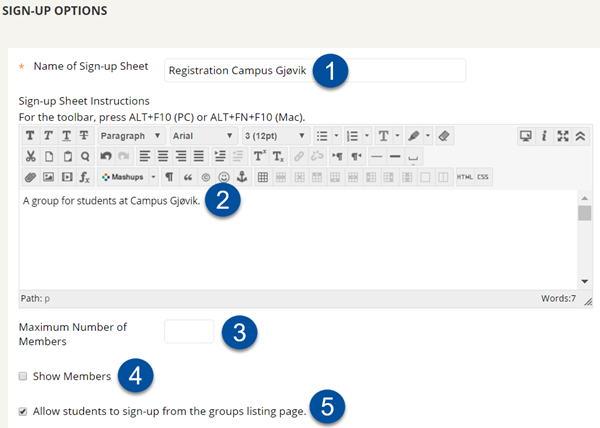
Manage groups
On the groups listing page (1), you can create groups as well as edit and manage them. Each group's menu provides quick access to the group homepage and group email. You can also access the options to edit group properties, delete groups, and create smart views (2).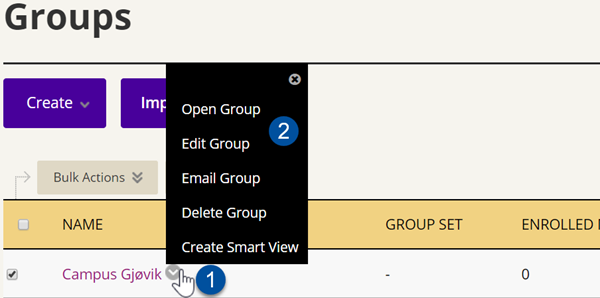
Edit group
When you edit a group, you can add or remove members as well as change its name, availability and tools.
Remove a group member
Only course instructors can remove group members. Students can't remove themselves or other students from a group.
- On the group page, select Edit Group in the group's drop-down menu.
- On the Edit Group page, select the X(1) in a member's row to remove the user from the group. Select Remove All Users to delete all members from a group.
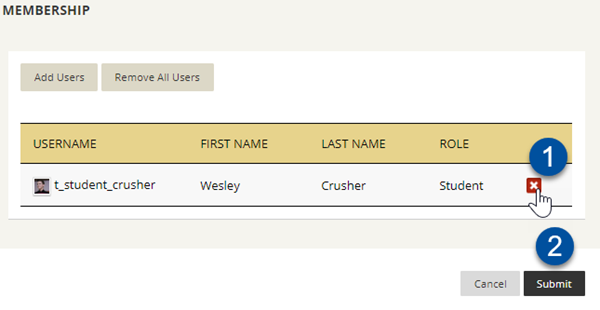
- Select Submit(2).
The group member is now removed from the group. To verify that a user has been removed, go to the group homepage to check the list of members.
Delete a group
You can delete a group you no longer need.
NOTE: If you delete a group all associated group assignments gets deleted. The students loses access to comments that is written in Box.
- On the Group page, select Delete Group in the drop-down menu.
- Confirm by clicking OK. This action is final and cannot be undone.

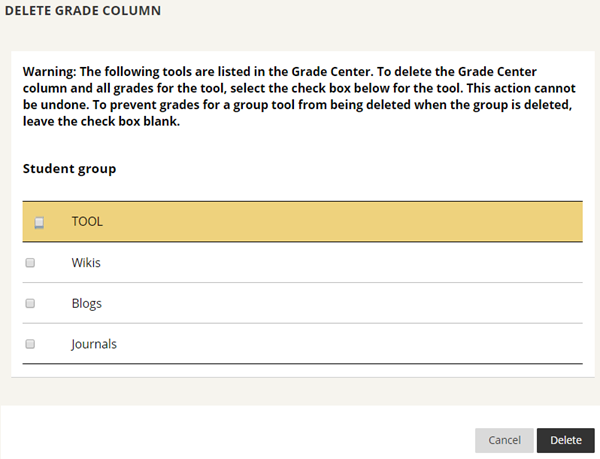
- You get a choice to retain any group-related grade columns that exist in the grade center, such as gradable group blogs, journals or wikis. On the delete confirmation page, don't select the check boxes for any columns that you need to preserve.
Student Created Groups
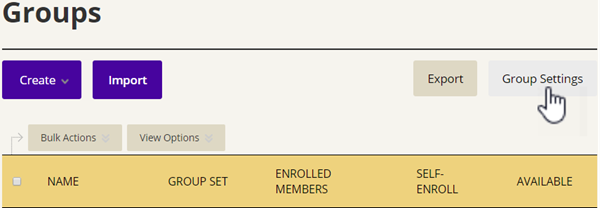
- On the Group page, click on the button Group Settings.
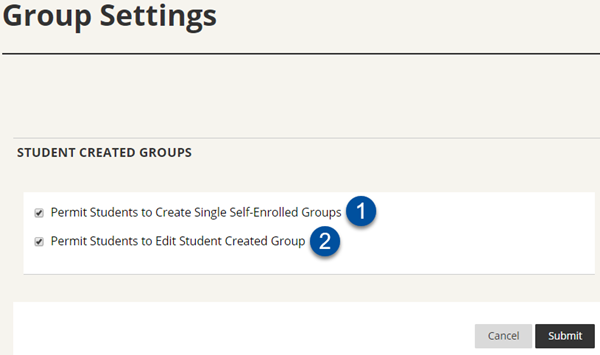
- You can allow students to create their own self-enrollment group from the groups listing page (1). You can also permit students to edit student created groups (2). Student Created Groups can be used to communicate in Collaborate Ultra.
Note: Student Created Groups are not automatically included in group assignments.
See also
Contact
For questions or need for assistance contact Orakel Support Services.
