KASPER - Reference group certificate - Kunnskapsbasen
KASPER - Reference group certificate
In this guide you will learn how to use KASPER to create a certificate for students who participated in reference groups. Both course coordinators and the institute administrators may use this feature. You may also watch our Panopto-video on the same topic (norwegian with english subtitles).
Norsk versjon – KASPER – Bekreftelse til student
If some other method of student evaluation has been registered, or the reference group was not created in KASPER, you cannot create a reference group certificate as described in this guide. An alternative form of certification may be provided by the institute.
All KASPER-wikis|Theme page on course evaluation and development|Pages with "KASPER" tag
Getting Started
Log in to KASPER by clicking "Log in" below. This will redirect you to the page entitled "Bekreftelse på deltakelse i referansegruppe" [Reference group participation certificate]. Log in
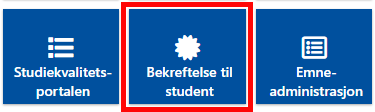
From the KASPER start page you may also locate this module both under "Emneevaluering" [Course evaluation] and "Administrasjon" [Administration].

Search by Student or Course
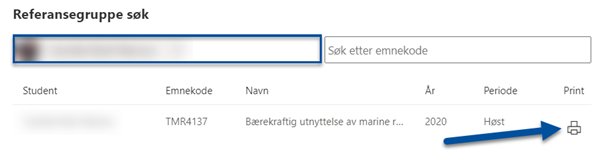
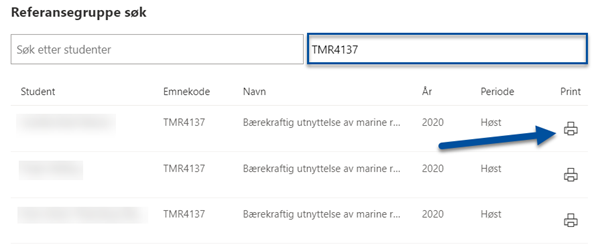
On this page there are two search bars. You can choose between searching for a specific student you wish to create a certificate for (1), or for a specific course (2).
NB: Have some patience when searching, as it may take up to several seconds before the results appear.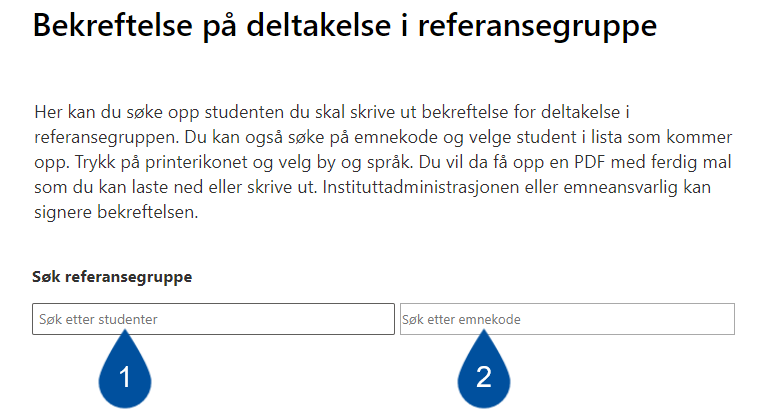
- "Søk etter studenter" [Search by student]: Here you enter the name of the student, and the search result gives you all the courses for which the student has participated in a reference group. Then you select the course for which you want to create a certificate.

- "Søk etter emnekode" [Search by course code]: Here you enter the course code, and the search result gives you all students who have been reference group members for this course for all years. Remember to select the student for whom you want to print a certificate. Then you select the student for which you want to create a certificate.

In both instances you click the printer icon on the righthand side of the screen to create the certificate.
Select City and Language
After clicking the printer icon, a dialogue box will appear, where you must enter the "By" [City] where the course was held (1), and the "målføre/språk" [language] in which the certificate will be printed (2). 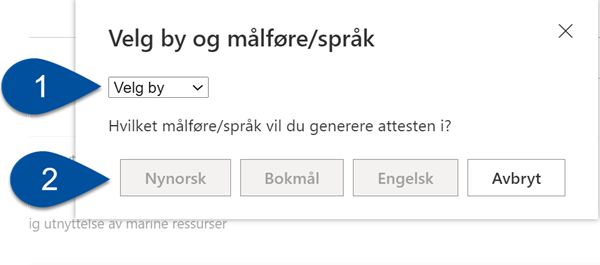
When you have made your choices a PDF-document will be generated, which includes the relevant information. You may then choose if you wish to download the document and send it to the student digitally (1), or print it out and send a physical copy (2). NB: Either way, the certificate must be signed by the course coordinator or someone from the institute administration. To learn how to add a digital signature, see the following section below. 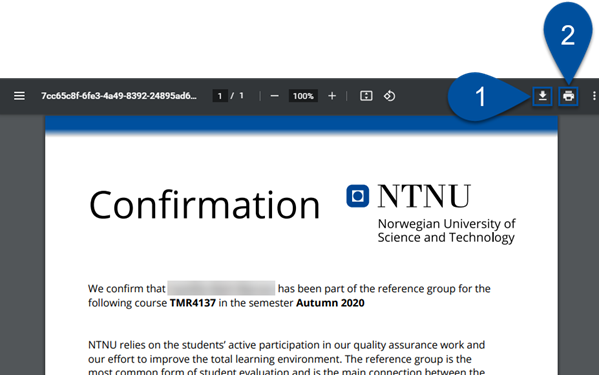
Adding a Digital Signature to the Certificate
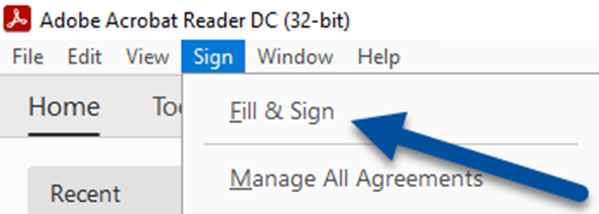
As NTNU provides licenses to Adobe Acrobat Reader DC for all employees, this guide will show you how to add a digital signature in that software. You are free to use some other equivalent software you have available.
- Open the PDF in Adobe Acrobat Reader and locate the "Sign" tab in the top toolbar. Click "Fill & Sign" (see arrow).
- This will make some new buttons appear in the top of the document, below the editing toolbar. Here you click "Sign yourself" (1). If you do not already have a digital signature saved in Acrobat, you must create one by writing, drawing, or selecting an image of your name.
- Then place the signature on the signature line (2), and save the document (3).
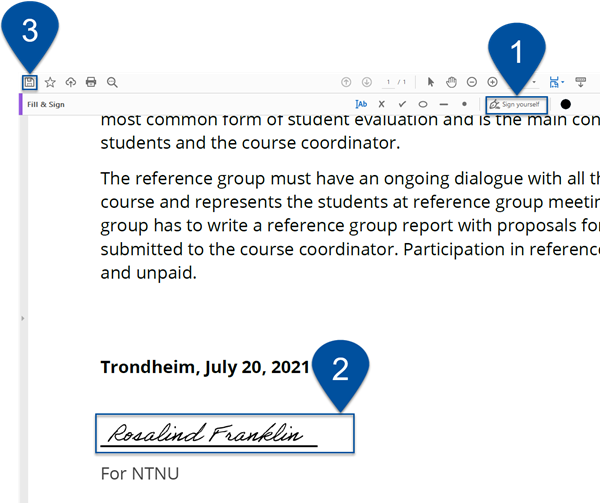
- The signed certificate can be printed and delivered to the student physically, or sent to them digitally.
See Also
- KASPER – Create reference group
- Reference Groups Tool for Students
- Office 365 - Teams
- KASPER - FAQ
- About the quality assurance system for education