KASPER - Create reference group - Kunnskapsbasen
KASPER - Create reference group
This wiki describes how you as a course coordinator [emneansvarlig] can create a reference group in KASPER, how to manage the reference group members in the Microsoft Team after creation. You may also watch our Panopto-video on the same topic (norwegian with english subtitles).
Norsk versjon - KASPER - Opprette referansegrupper
Please note that a survey of all students taking a course must be performed at minimum every third year the course is held to ensure that an accurate representation of the student body is obtained. You can read more about this on the theme page on course evaluation and development
Should you wish to use a different form of student participation for your course, check out the wiki on how to register an alternative form of evaluation.
Note: When you have created the reference group through KASPER, you cannot change to another form of student evaluation.
All KASPER Resources | Reference Groups Tool for Students|
Getting started - Creating the reference group
- Log in to KASPER by clicking the link below.
 Log in
This will redirect you to a page that lists all the courses you are the coordinator for. This is the equivalent of starting from the front page in KASPER and clicking "Emneevaluering" -> "Starte studentevaluering".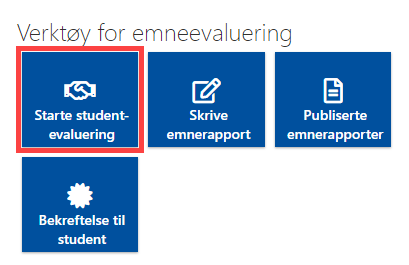
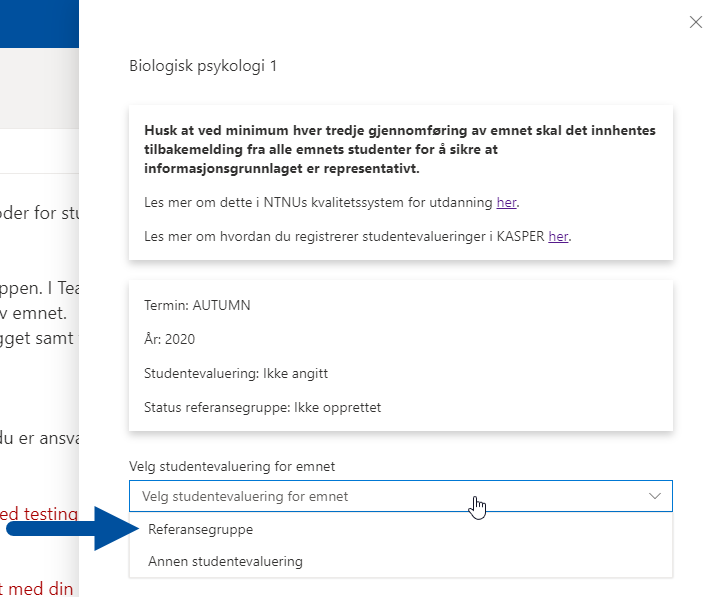
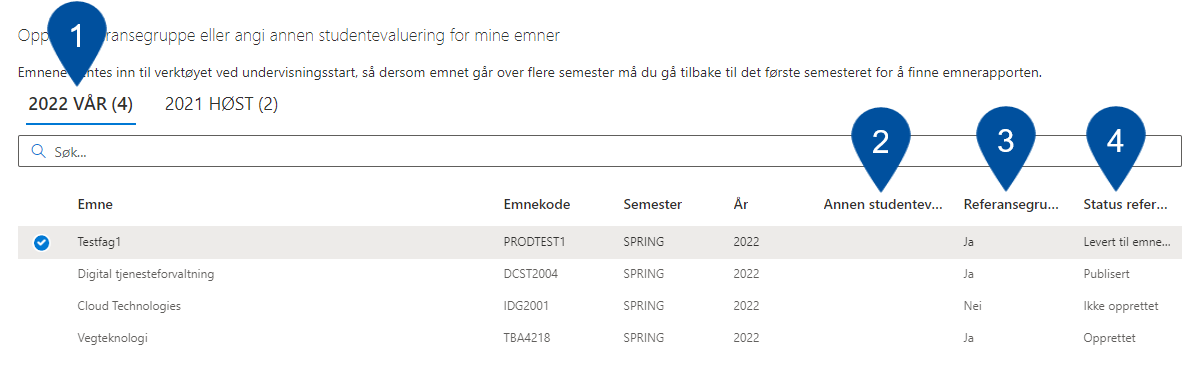
- Here you will see a list of the courses you are coordinating. The courses are sorted in columns based on their start semester (1). For every course this table informs you of the alternative student assessment (2) or a regular reference group (3) has been established, in addition to a report status (4). Click the course you wish to establish a reference group for.

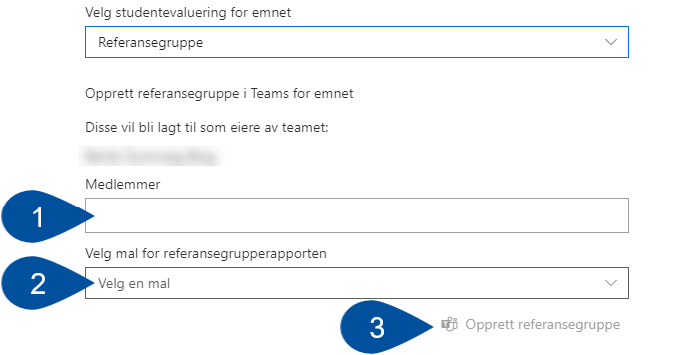
- A pop-up window will appear to the right of the screen. In this window, there is a drop-down menu from which you choose "Referansegruppe" [Reference Group].

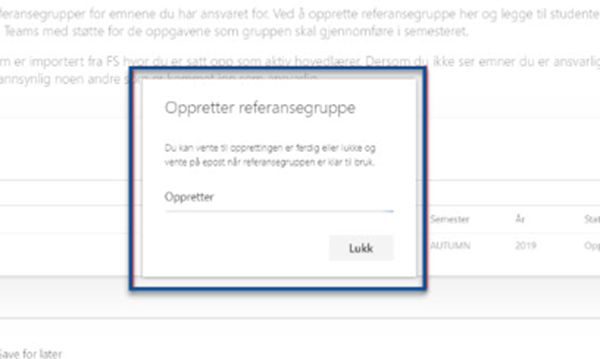
- Then you add members to the group (1) and select the language in which the report is to be written (2). When you have finished, click "Opprett referansegruppe" [Create reference group] (3). When adding students to the group, you either search by name or by NTNU email address. NTNU email addresses have the following format: username@stud.ntnu.no. You do not have to add yourself to the group.
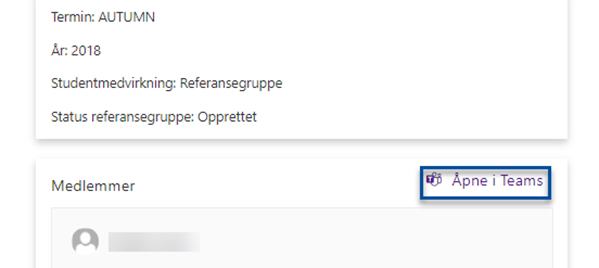
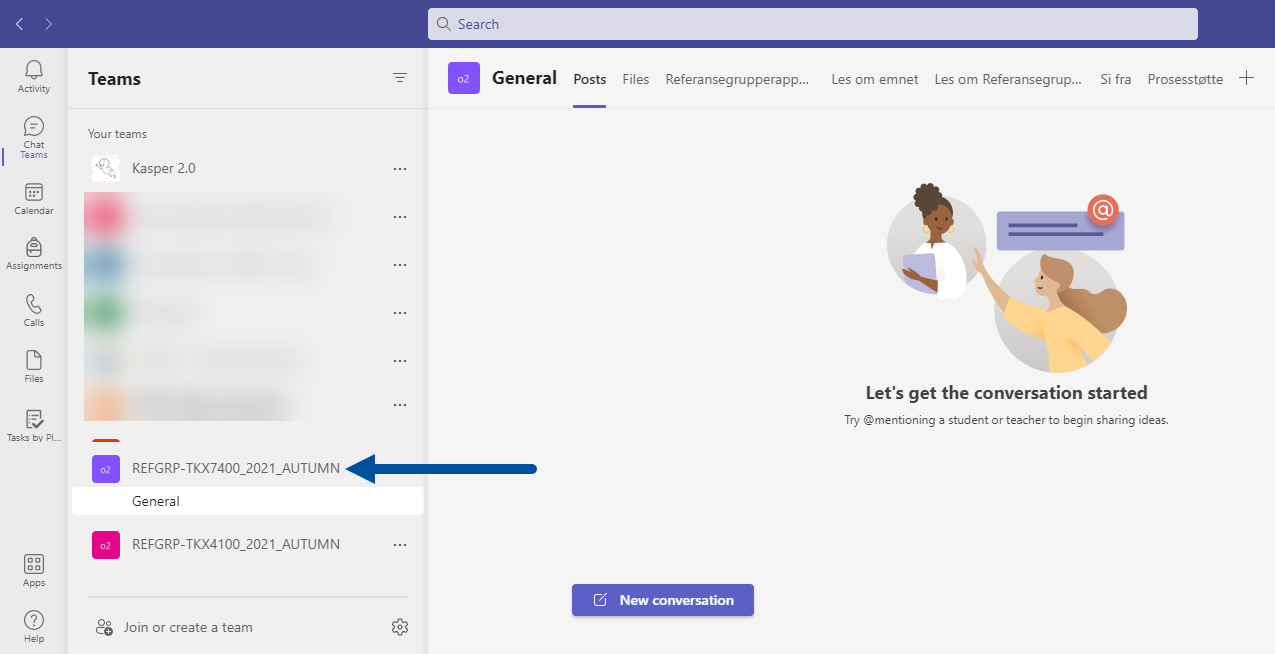
- When your team has been created, all members will be notified via email. The team will be available in your Teams app, with yourself listed as the owner. The team will automatically be named using the following template: "REFGRP-COURSECODE_YEAR_SEMESTER".

An alternative way of locating the group in Teams is to follow the link in KASPER, by clicking the course as explained above, and following the "Åpne i Teams" [open in Teams] link that now appears in the side menu, above the list of membrs.
Add/remove reference group members
If you need to edit group membership after it has been set up in Teams, you may do so through the "Prosesstøtte" tab. Click "Rediger medlemmer" [Edit members] (1). A menu will pop up on the righthand side of the window, where you may search for people (2) and select "Legg til" [Add member] (3). To remove an existing member, click their name and select "Fjern" [Remove member] (4).
