Teams - create a team - Kunnskapsbasen
Teams - create a team
On this page you will find information about:
- the difference between private and public teams
- how to create a team
- how to add members
- how to create a team with an existing team as a template.
Norsk versjon - Opprette et team
Topic page on Teams|Topic page on Microsoft 365
Private or public team
When creating a team, you must decide whether the team is to be private or public:
Private team:Only those you add as members will have access. The team is also not searchable in Teams.
Public team: Everyone at NTNU can find the team and join it. All users – including non-members – have full read and write access to any files added. In addition, the files become searchable across all Microsoft 365 applications. For security reasons, you must contact The Orakel Support Services/NTNU Help if you wish to create a public team.
Create a team
- Click on the Team icon on the right-hand side menu.

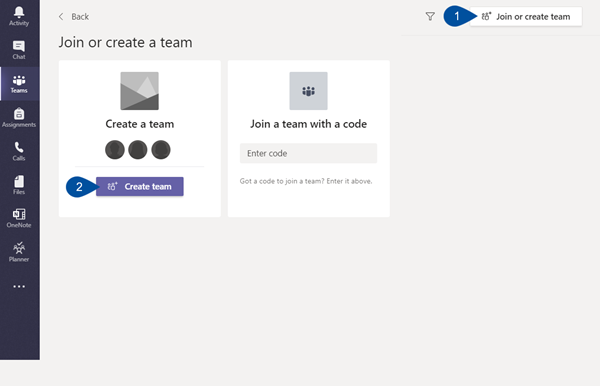
- Click on Join or create a team in the top right corner of the overview.

- You will now have two options: Create a team or Join a team with a code.
Select Create a team to begin the creation process. - You can now choose between four different templates: Class (1), Professional Learning Community (PL) (2), Staff (3), and Other (4).
The predefined templates are not adapted for use at NTNU and impose limitations on functionality. The IT Division therefore recommends that you always select Other. This template provides the most flexible collaboration features compared with the other options.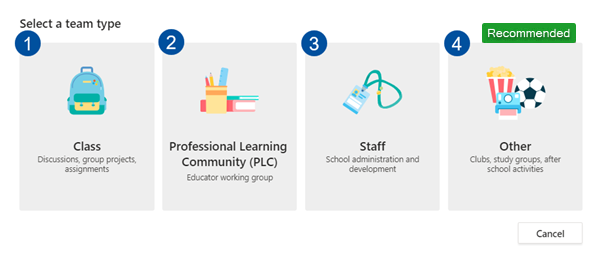
- After selecting the Other template, a window will appear with information about the template. Click the button Use this template.
- You will then be asked: “What kind of team will this be?”. Click the Private button. It is not possible to select a public team yourself. For security reasons, you must contact The Orakel Support Services/NTNU Help if you wish to create a public team.

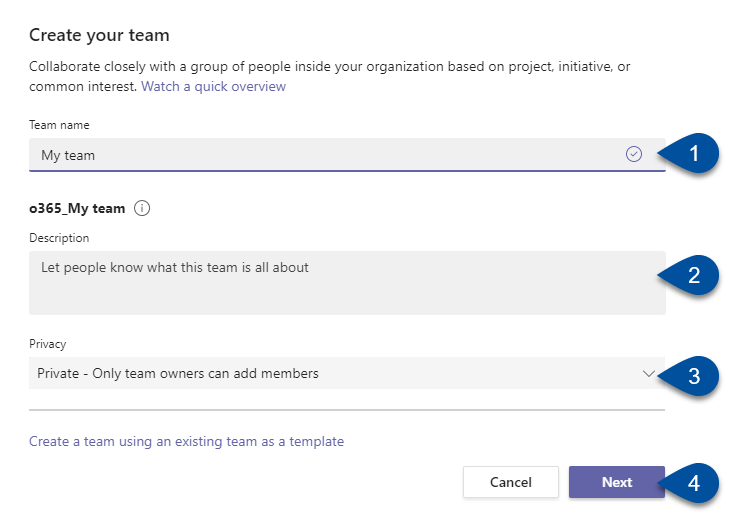
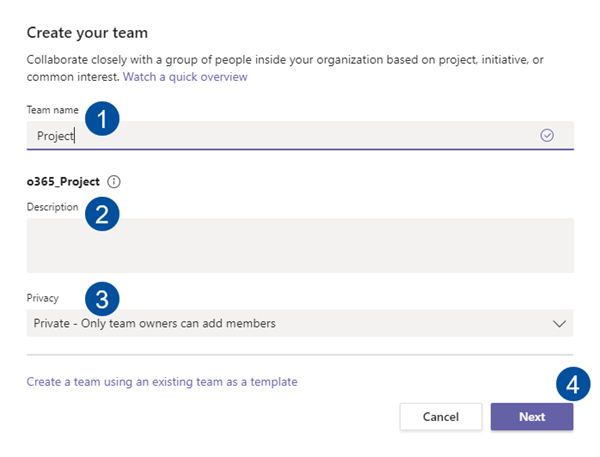
- Enter a team name (1). The team name can, for example, be linked to a project or an internal working group. The name will receive the prefix “o365_” when the team is created. This prefix is automatically removed within 10 minutes after the team has been set up. Add a description if needed (2), and click Create (3).

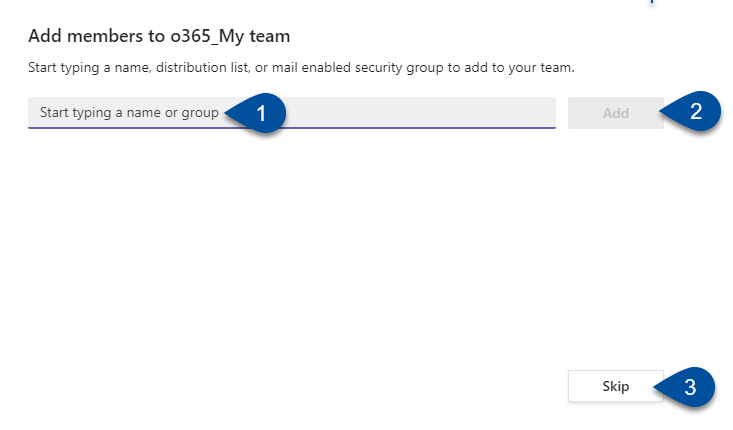
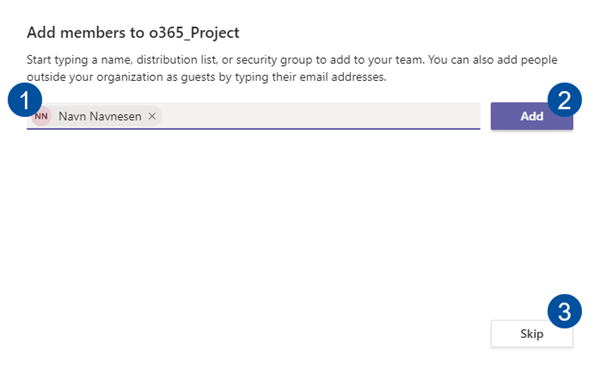
- You may now add members to your team.
- Enter the name or e-mail (1) in the search field.
- Click Add (2).
- Select Skip if you want to add members later.

- Permissions: Remember to assess which permissions the members of your team should have. You do this by clicking on the three dots next to your team name on the left-side menu > Settings in the tab at the top next to the team name > Member permissions.
- Roles: Also consider what role the members will have. You can do this by clicking the three dots next to the team name in the menu on the left > Members at the top of the team name and Role at the far right in the member overview.
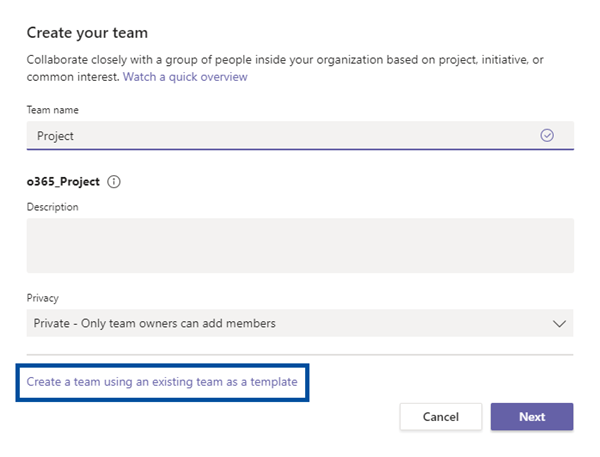
Create a team using an existing team as a template
When you create a new team based on an existing one, you reuse the structure of the current team – for example channels, tabs and certain settings. Messages and files are not copied.
This allows you to quickly set up a new team with the same organisation, while choosing which elements you want to carry over.
How to do this:
- Click the button Join or create a team and then Create team, as described in the guide above.
- In the menu on the left-hand side under "Create team", you have three options: From template, From an existing team, From a group. Select From an existing team (1) and choose the team you want to copy the template from (2).

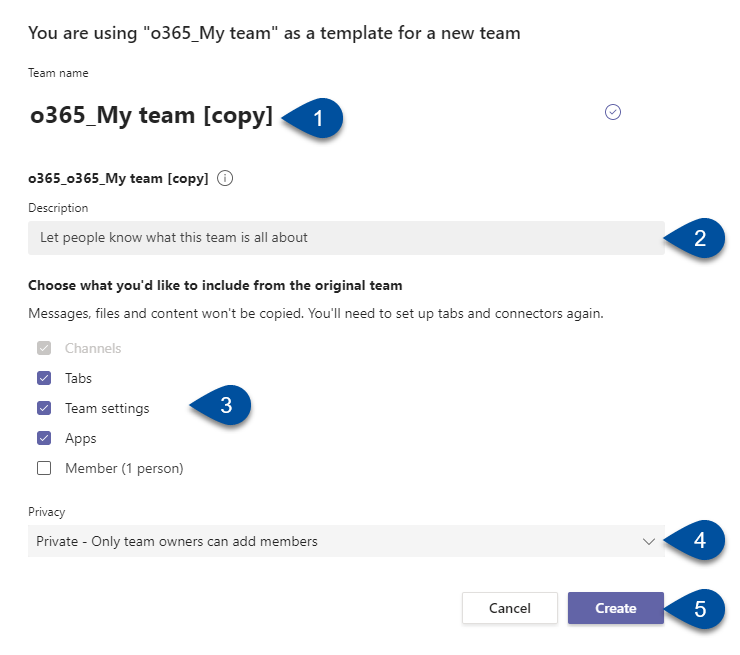
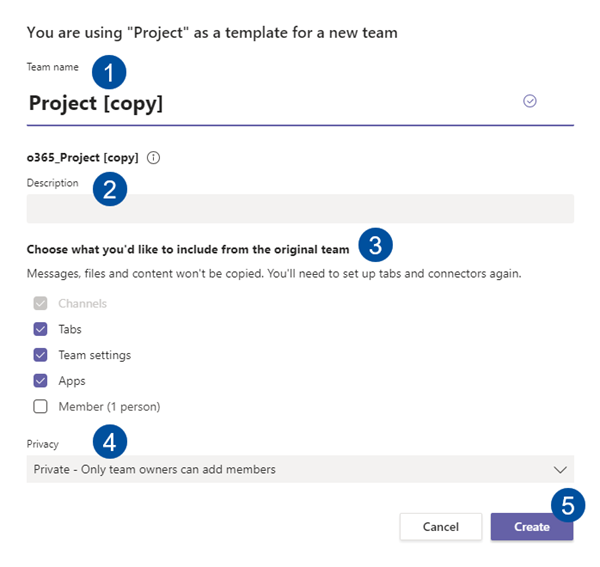
- Enter a name (1) for the team, add a description if needed (2), and scroll down in the window to choose what you want to include from the original team (3). Click Create (4).


- Add members, or skip this step and do it later.
You should also take the following information into account
- If confidential information is to be stored in the team, documents containing red-classified data MUST ble labelled with a sensitivity label. Read more about classification of files and documents
- All members of a team have access to the team's file area. If you want to restrict access to certain files so that only part of the team can see them, you can create a private sub-channel and specify who should have access when creating the channel.
- The owner of the team is responsible for all channels within the team, even if the owner is not a member of one or more of the team's sub-channels. Make sure that anyone assigned the ownership is aware of the responsibility.
- The IT Division recommends having at least two owners per team, so that the team is not left without an owner if one leaves NTNU. The team will be deleted if it has been inactive for 1 year. It is the team owner who is notified when a team is about to expire due to inactivity. If the team has no owner, no one will be notified. Contact the IT Division via NTNU Hjelp if you need assistance assigning an owner to a team.
See also
Contact
The Orakel Support Services can help you if you have questions or encounter any problems.