Blackboard - Create groups - Kunnskapsbasen
Blackboard - Create groups
In this user guide, you will get information on how to create single groups and group sets in your course in Blackboard.
Norwegian version - Opprette grupper
Innholdsfortegnelse [-]
Topic page Blackboard | Pages labeled Blackboard
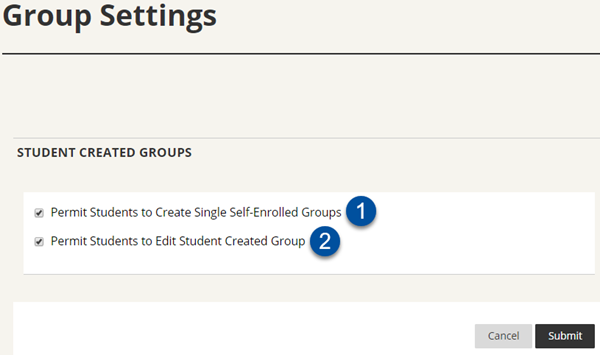
Single groups and group sets
In Blackboard, you can choose to create single groups and group sets:
- Single groups: The instructor creates and edits the groups separately. Students can be members of several single groups.
- Group sets: The instructor creates and edits all the groups in the set at the same time, and can also edit the groups separately. Students can only be member of one of the groups in the group set.
Every group and group set has its own page in the course where you as an instructor can choose to activate group tools that students can use to collaborate. Only instructors and the group members have access to the group and the group tools.If you want to read more about group tools, see this user guide: Groups and tools for group work
Methods of group enrollment
You can add students to groups in three different ways:
- Self-enroll: Allow students to join groups themselves by using a sign-up sheet. Self-enrollment is available for both single groups and group sets.
- Manual enroll: Allow you to assign each student in your course to a group. Manual enrollment is available for both single groups and group sets.
- Random enroll: With random enrollment, the students are divided into groups based on the settings you have set for the group. Random enrollment is only available for group sets.
Create groups
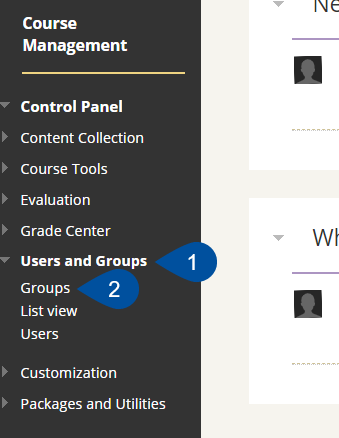
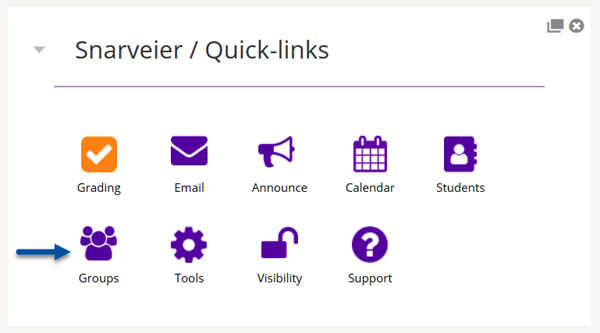
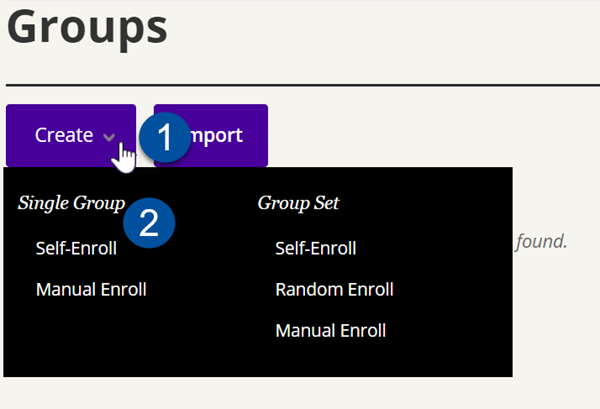
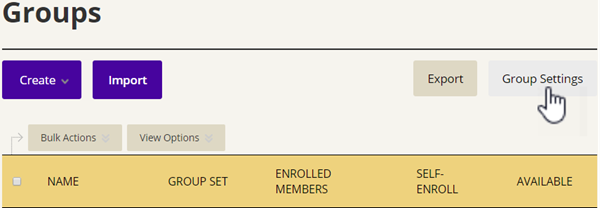
- To create groups, go to Users and groups (1) in the course management menu and click on Groups (2).
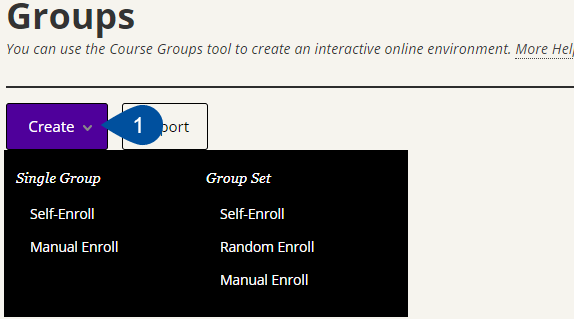
- Click Create (1) and choose whether you want to create a single group or a group set. Also choose what kind of enrollment method you want to use.

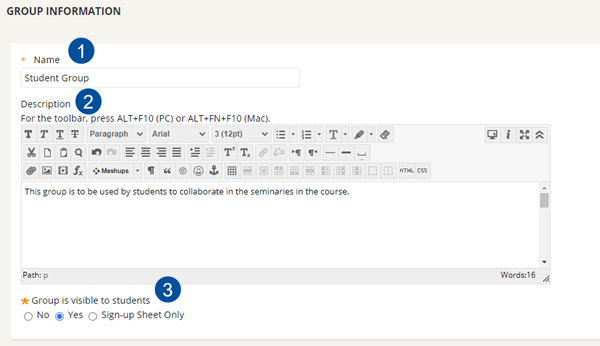
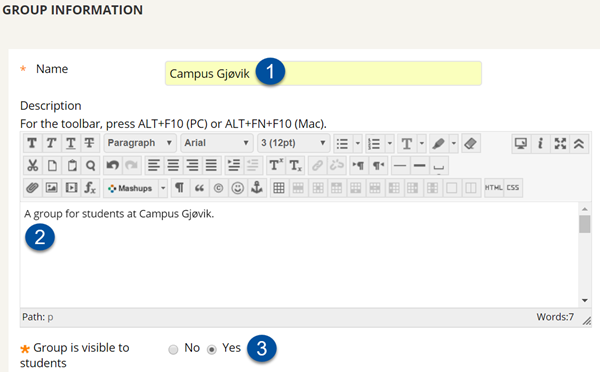
- You will now come to a page where you can fill inn information about the group or groups you want to create. Enter Name (1) and optionally a description (2) of the group. Choose if you want to make the group visible to your students (3). This is recommended. If you have chosen to create a group with self-enrollment, you can also choose to only make the sign-up sheet visible to your students.
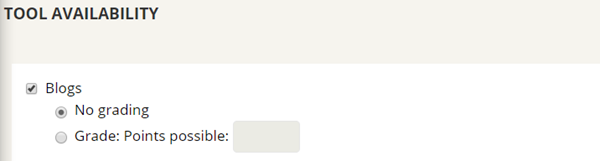
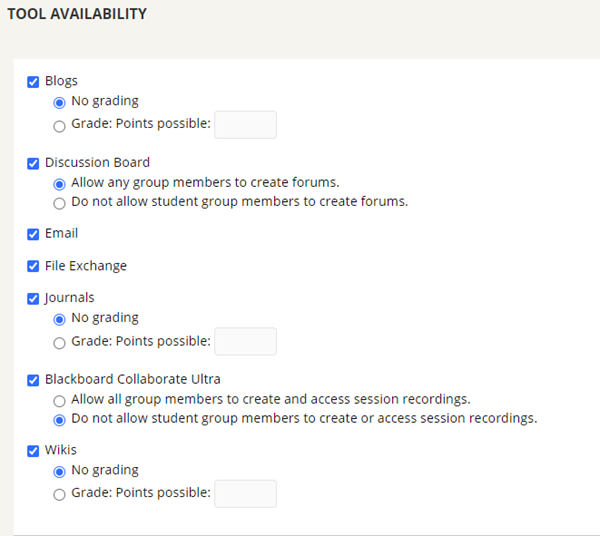
- Under Tool Availability, you can choose the group tools you want to be available to the group members of the group. To read more about the various group tools, see the user guide Groups and tools for group work.

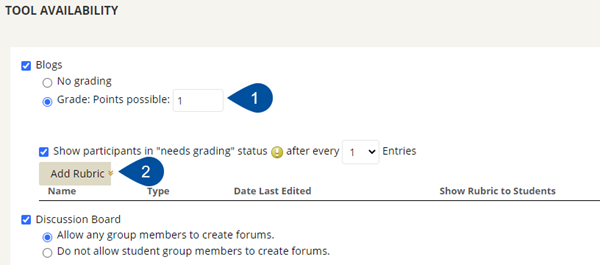
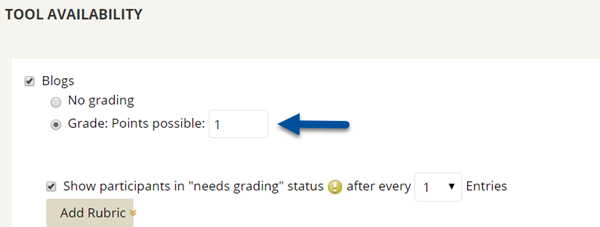
- If you want to grade student submissions by using blogs, wikis or journals, clik on Grade (1) below the relevant tool and type 1 in possible points to grade it approved/not approved. You also have the option to add rubrics by clicking on Add rubric (2).
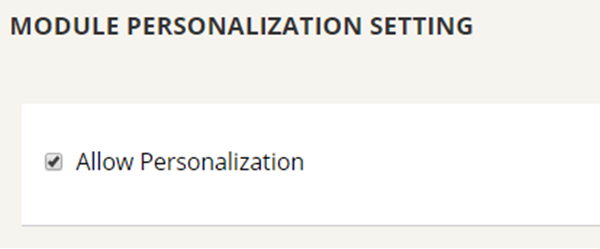
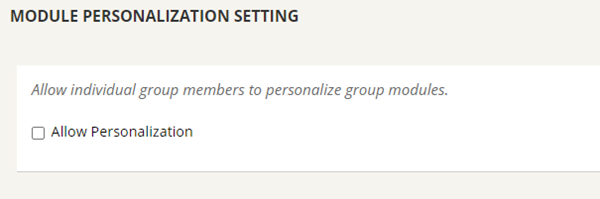
- Under Module Personalization Settings, you can give students permission to personalize the group area. It is recommended that you remove this option.

- Depending on the type of enrollment you have selected, you must do the following:
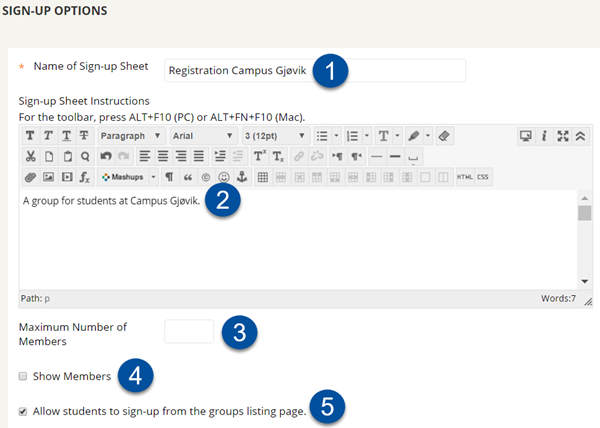
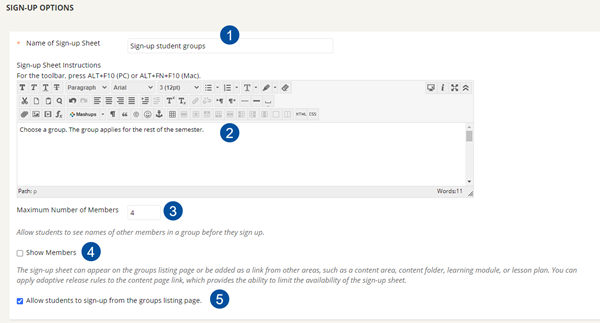
- Self-enroll: Under sign-up options, enter a Name (1) for the sign-up sheet and optionally write an instruction for enrollment (2). Enter the maximum number of members (3) who can join the group. You can choose to make signed-up members visible to other users by ticking off Show members (4). Finally, you can choose to give students permission to sign up from the groups listing page (5). This process is identical for single groups and group sets.

- Manual enroll: The process for single groups and group sets are somewhat different.
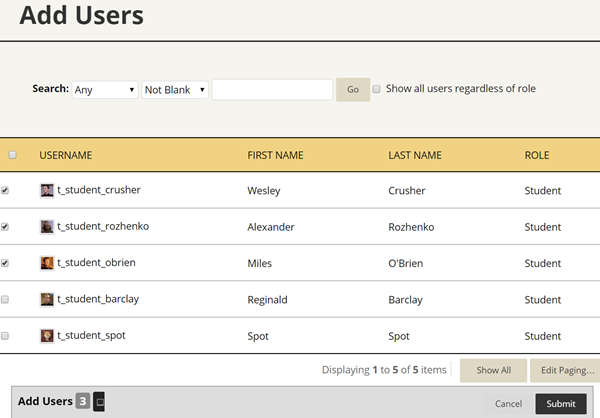
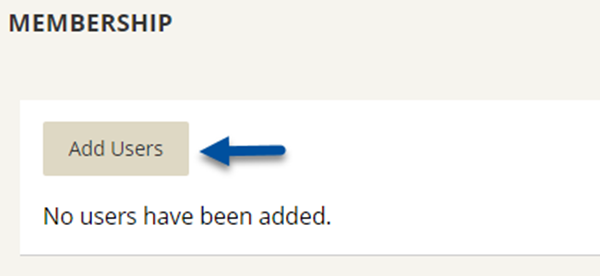
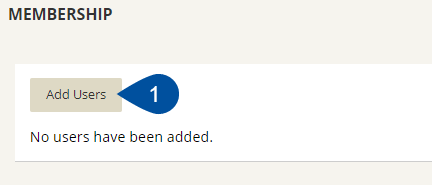
Single group: Under membership, click on Add users (1).
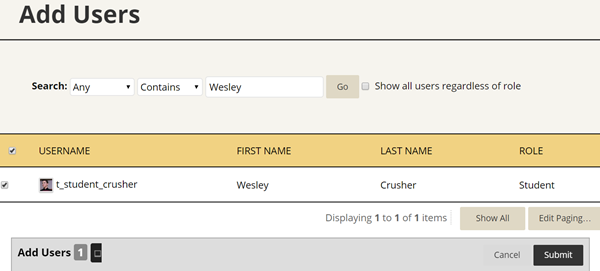
In the page you come to, tick off (1) for the students you wish to add to the group. Click Submit (2).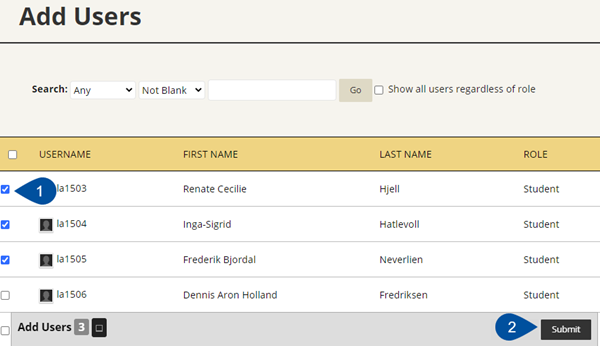
Group set: Under Group Set Options enter the Number of groups you wish to create. Then click Submit (2).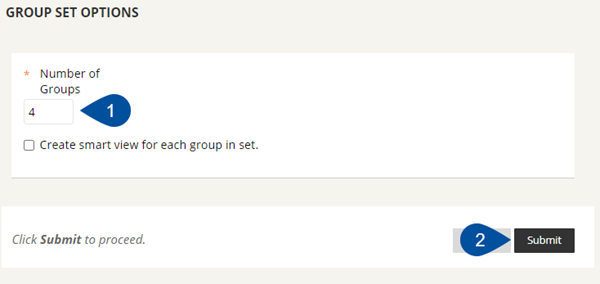
On the next page, you can add users for each of the groups by clicking on Add users (1).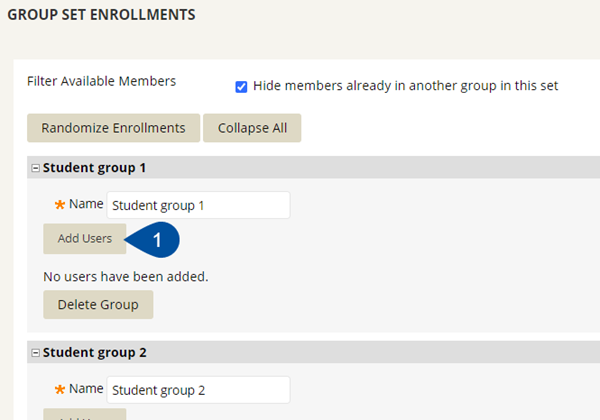
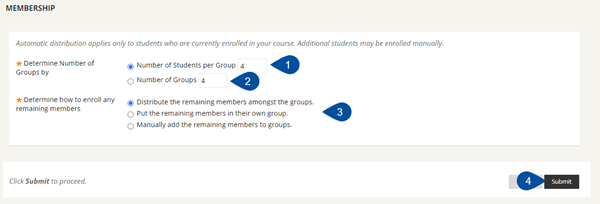
- Random enroll: Applies only for group sets. Under Membership, enter Number of Students per Group (1) and/or Number of groups (2) you wish to create. Choose an option (3) to determine how you enroll any remaining members. Then click Submit (4).

- Self-enroll: Under sign-up options, enter a Name (1) for the sign-up sheet and optionally write an instruction for enrollment (2). Enter the maximum number of members (3) who can join the group. You can choose to make signed-up members visible to other users by ticking off Show members (4). Finally, you can choose to give students permission to sign up from the groups listing page (5). This process is identical for single groups and group sets.
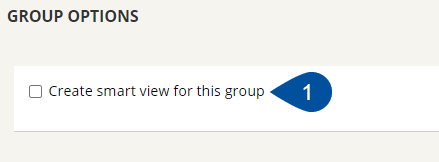
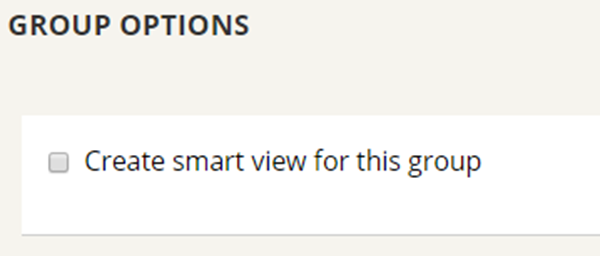
- You can choose to create Smart Views for the group or the groups you are creating. Smart View can be used to organize the Grade Center better, in addition to giving you the option to filtrate the Grade Center based on group enrollment. To activate Smart View, tick off Create smart view for this group (1) under Group Options. For group sets you will find this option under Group Set Options. Read more about Smart View on Blackboards help page: Smart Views.
- When you are ready to create the single group or the group set, click Submit. The group or groups you have created will now appear on the Group-page.
See also
- Blackboards help page
- Blackboard for employees
- Blackboard - Groups and tools for group work
- Blackboard - Creating group assignments
- Blackboard - Edit groups
Contact
Orakel Support Service can help you if you have questions or encounter difficulties.