KASPER - Tools for study programme components - Kunnskapsbasen
KASPER - Tools for study programme components
In this guide you will learn about to use KASPER's "Verktøy for studiets oppbygning" [Tools for study programme components] to revise the study plan's course groups. You may also watch our Panopto video on the same topic (norwegian with english subtitles available).
You can read more about the study plan revision process in the wiki revise study plan.
Norsk versjon - KASPER - Verktøy for studies oppbygning
All KASPER-wikis | Theme page on study programme evaluation and development
Getting started
To start using tools for study programme components, do the following:
- Log in to KASPER by clicking the link below.
 Log in
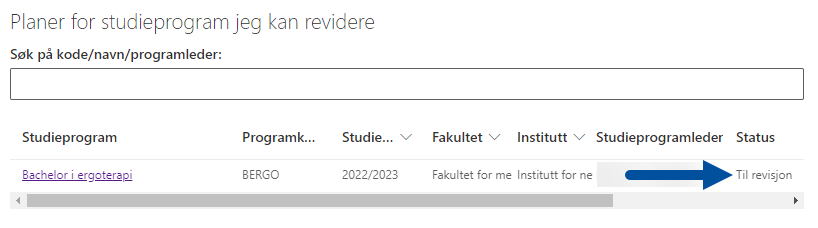
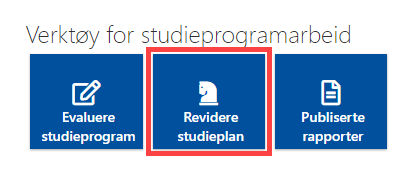
This will send you to your study plan overview. This is the equivalent of starting on the KASPER home page and clicking "Studieprogramleder" [Study programme coordinator] -> "Revidere studieplan" [Revise study plan].
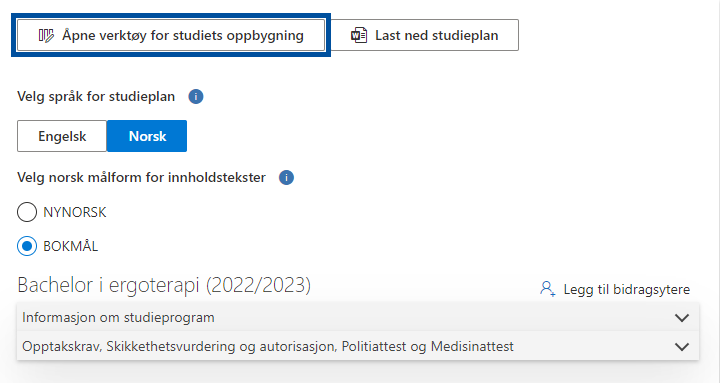
- Click the study plan in which you wish to make edits to the components. To open the tools for study programme components, click the button at the top of the study plan.

How to locate the course groups
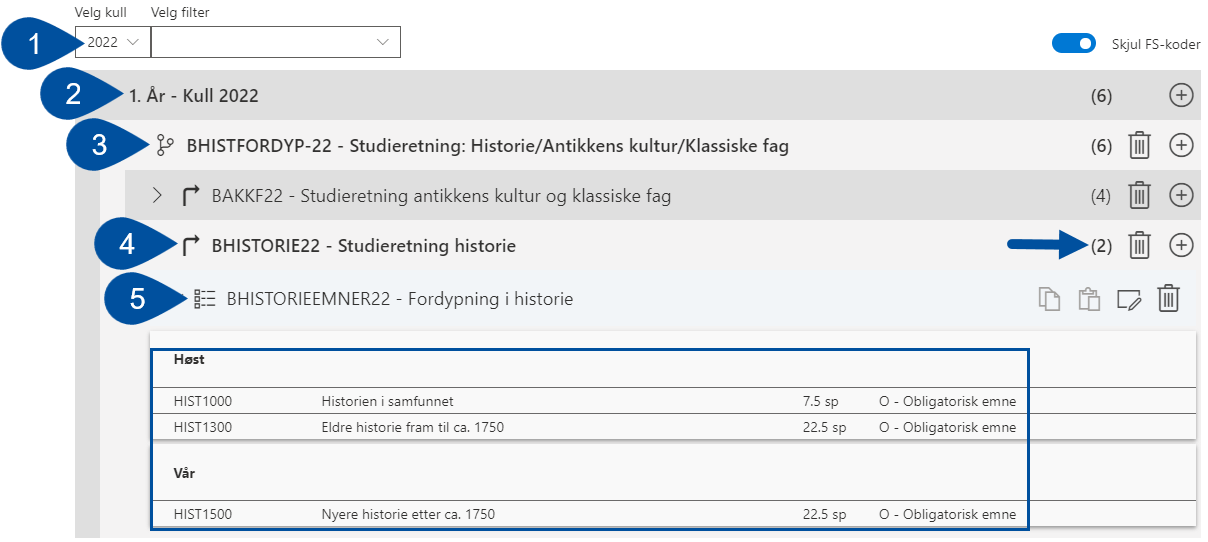
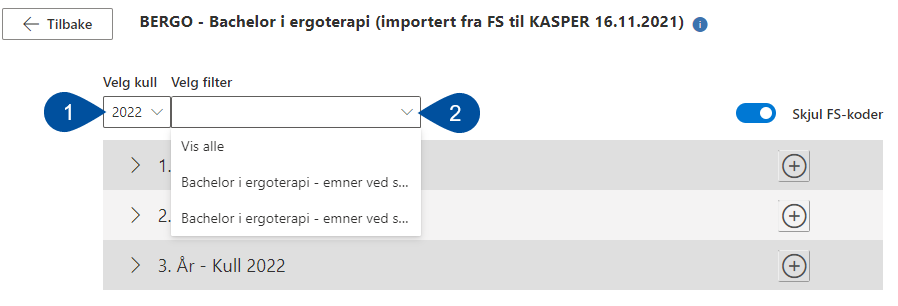
When opening the tool, the course groups in the study plan will be grouped by the year of initial study start (1), which year in the progression they belong to (2), and which study paths (3) or specializations (4) they fall under. You open the drop-down levels by clicking on the rows. When you reach the intended course group, the courses will be displayed by semester (5). The numbers displayed to the right (see arrow) shows you how many course groups are contained at each level.
Filtering by study profiles
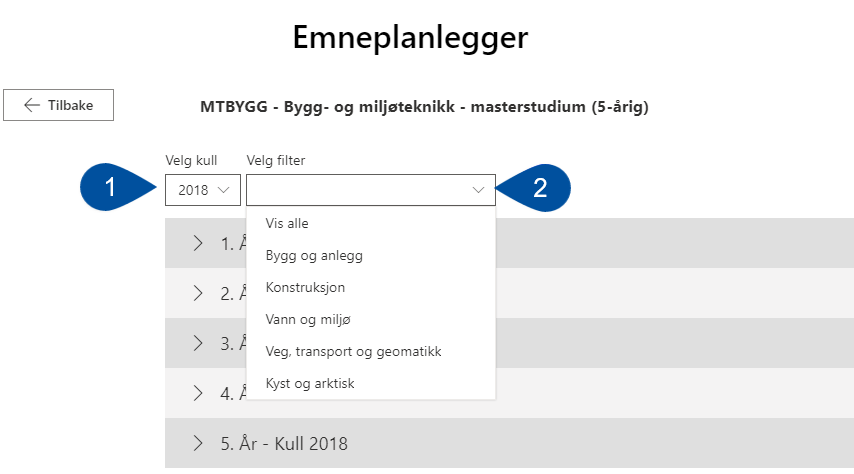
- To simplify this menu you may apply filters by year and study profile. First use the drop-down menu at the top left (1) to select for which initial year you wish to view the plan. This makes a second drop-down menu called "Velg filter" [Select filter] appear (2), if the study program has more than one to choose from.
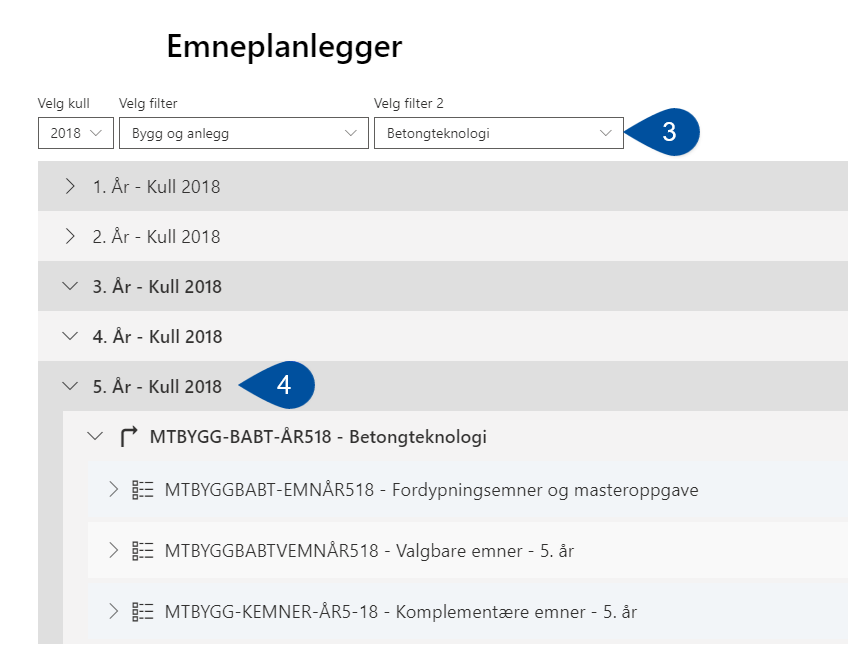
- If the study profile has even further specializations, a second drop-down menu will appear (3). When you have selected the preferred filters, only the relevant course groups will appear below.
Editing course groups
The color-coding
All changes you make in this tool will be color-coded, and sometimes registered with your name. New courses and groups will be colored green, deleted ones will be colored red and have a line struck through its text, and courses and groups where the details have been changes will be colored yellow. NB: One exception is when you delete courses or groups that have been created in the current revision cycle. These will disappear completely.
How to make edits
When you open a course group you will see the courses listed with course code, course name, number of study points, and course type. At the top right there are several clickable icons that work as follows:
- "Add course group" (1): This is used to create a new, empty course group, that you may design from scratch. Should the study plan have different paths/fields of study/specializations, the same icon is clicked to add those.
- "Copy changes" (2): This allows you to copy all the changes that have been made to a course group during the current revision process.
- "Paste changes" (3): This allows you to paste the changes you have copied into another course group, given its contents were identical before revision started. This feature is meant to expedite the job of editing different paths or specializations that use the same course groups.
- "Edit course group" (4): This allows you to edit the properties of the course group, including its name and contents.
- "Delete course group" (5): This deletes the course group. As mentioned above, deleted courses and groups are not removed entirely, but will be color coded red and have a line struck through its texts. In addition, the delete icon (trash can) will change into an undo icon (an arrow bending to the left). In other words there is no danger of accidentally deleting something and losing all the information that was there.

Note: Changes made to courses and groups in this tool should be seen as suggestions. The changes must be processed and approved, before being implemented in EpN and FS.
Adding a new course group
- To add a new course group, click the plus icon. A new window will appear on the right.
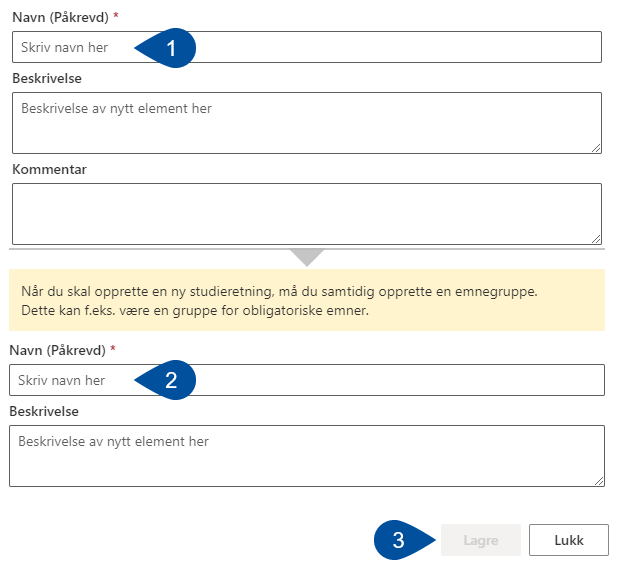
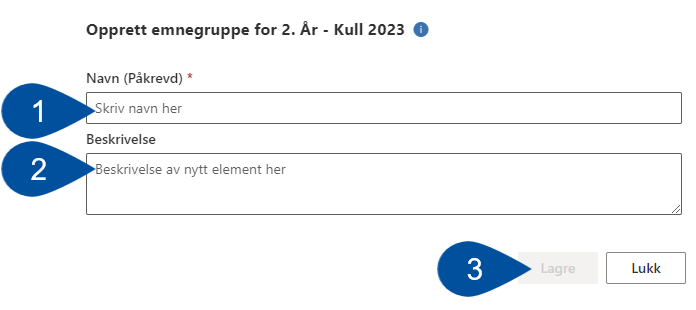
- Enter the "Navn" [Name] (1) for the course group and preferably a "Beskrivelse" [Description] (2). When you have finished, press "Lagre" [Save] (3).

To edit a course group, click the edit icon on the top right. A new window with an overview of courses and information about the relevant course group will appear.
Adding a new path, field or place of study
If the study programme includes different paths, like fields of study, you may add new ones to the plan in almost the same way as you would add a course group. Paths are identified by the "branching path" symbol (1). The icon for adding the new path is the same as for course groups (2).
In the window that appears you enter a "Navn" [Name] for the new path (1), and a "Beskrivelse" [Description] if needed. A new path cannot be created without content, so at the same time you need to create and name a new course group (2). Click "Lagre" [Save] when you finish.
Editing course group contents
To edit the contents of a course group, click the editing icon (see above section). A new window will open, displaying the courses and information about the course group.
Adding a new course
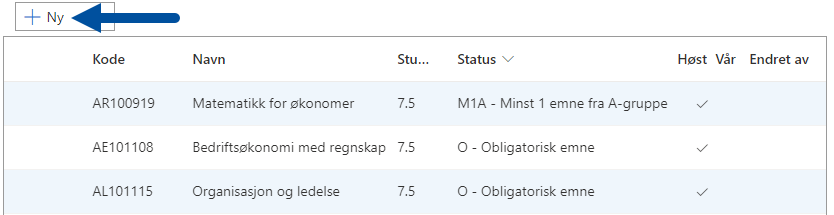
- Press "+Ny" [+New].

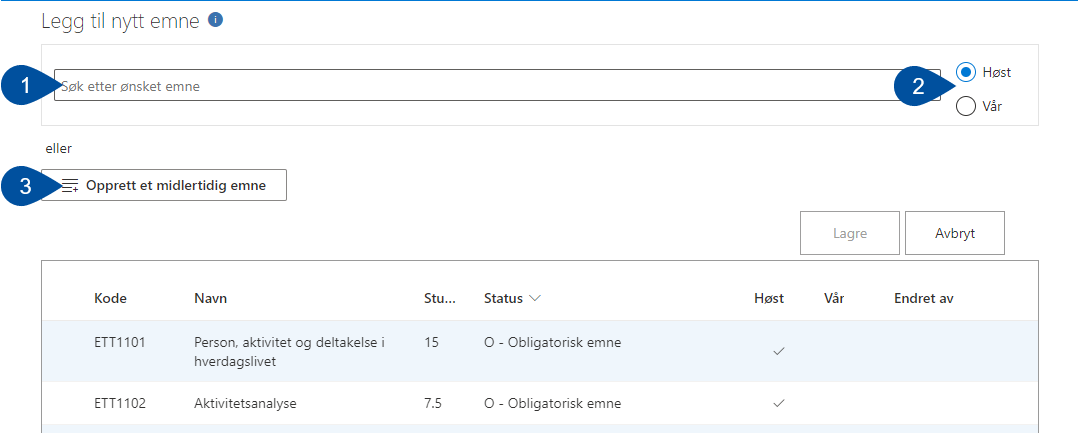
- A window opens where you can use "Søk etter ønsket emne" [Search for course] (1) to add a course that already exists to the group. Before searching make sure to select during which semester the course is held (2). You also have the option to "Opprett et midlertidig emne" [Create a temporary course]. We will return to this option further down.

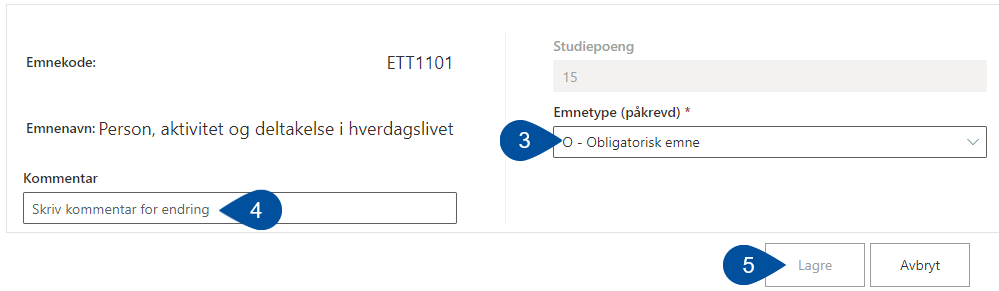
- If you choose to add an existing course you can edit some of its properties. You may change the number of study points it is worth (1), what course type it is (2), and, if needed, add a "Kommentar" [Comment] (3). When you finish, click "Lagre" [Save] (4). The course will appear in the course group with green color coding.

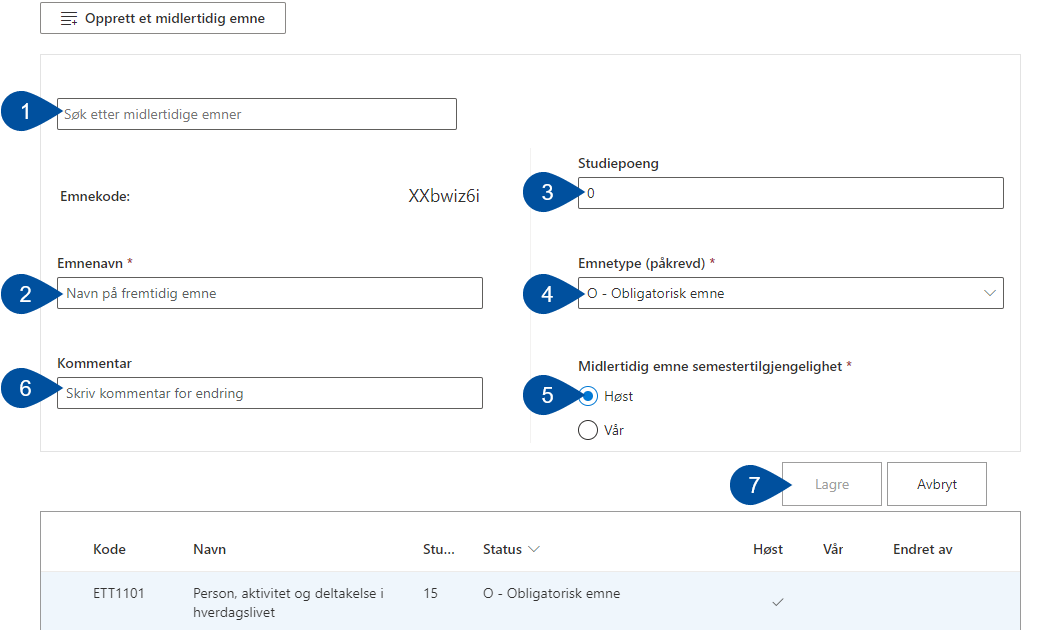
Adding a temporary course
Adding a temporary course is a feature to use if you know there is a new course coming, that you want to use for the study plan, but it has not yet been created in EpN. This adds a "dummy" course to the plan, to use as a placeholder until the actual course is imported to KASPER. If you would like to know more about EpN, you can read the wiki Online Course Planner.
When you click "Opprett et midlertidig emne" [Create a temporary course], some option will appear. You may use the search bar to look for already existing temporary courses (1). If that does not exist, you may enter an "Emnenavn" [Course Name] (2), "Studiepoeng" [Study Credits] (3), "Emnetype" [Course Type] (4), "Semestertilgjengelighet" [Start semester] (5), and a "Kommentar" [Comment], if needed. Only the course name and type is required for creation. When you finish, click "Lagre" [Save] (7).
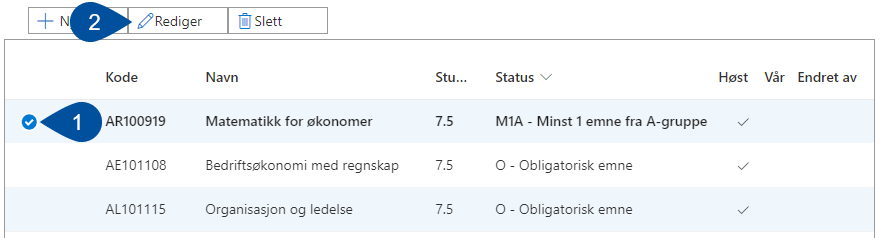
Editing existing courses
- Select the course you wish to edit (1), and click "Rediger" [Edit] (2).
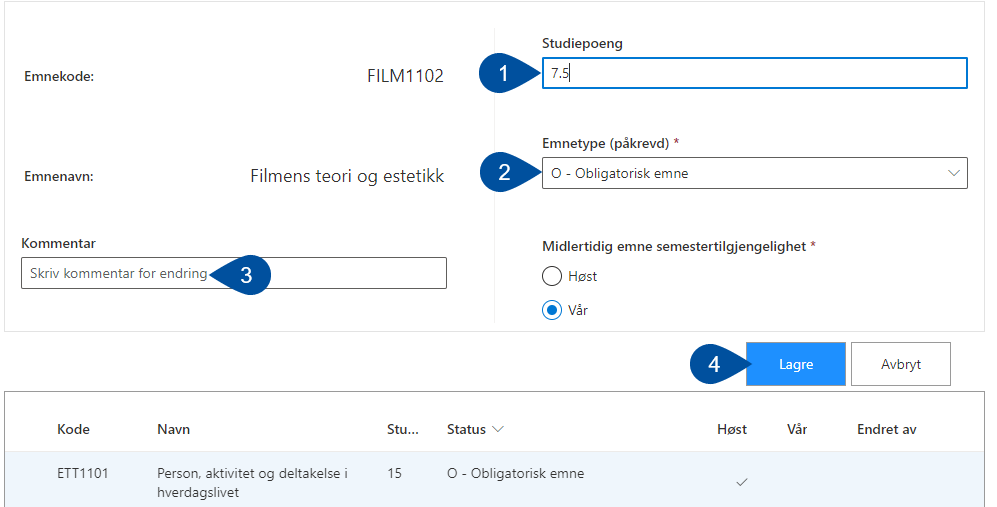
- In the window that opens you may change the course type (3) and add a comment (4). When you finish, click "Lagre" [Save] (5).
.png)
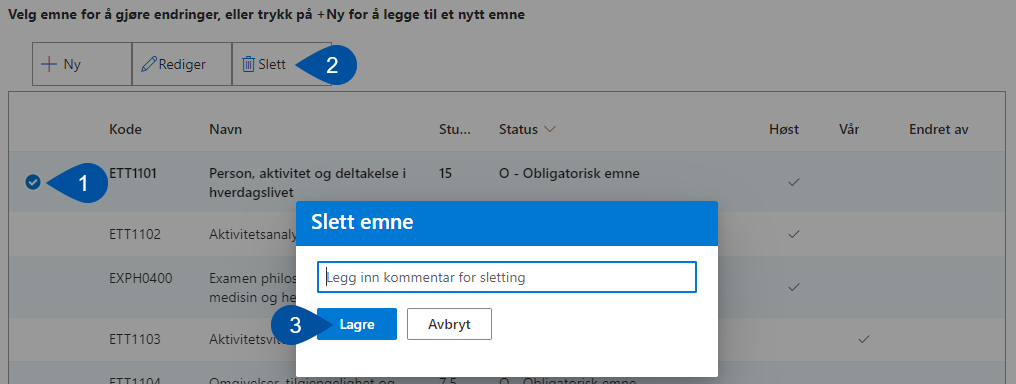
Deleting courses
- Select the course you wish to delete (1), and click "Slett" [Delete] (2).
- A pop-up will ask you to write a comment explaining why you are deleting it (this is optional). When you finish, click "Save" [Lagre].
When deleting an existing course it will be color coded red, and the text will be struck through. For this course the delete button will become an "Angre sletting" [Undo] button instead, and you may change your mind up until the study plan revision has been completed.
NB: If you delete a new or temporary course that has been added during the current revision, it will disappear.
Copying changes between course groups
For paths/fields of study that use the same course groups, you can copy and paste changes from one group to another. This will speed up the process if you are revising a study plan with several similar paths.
- Click the "Kopier endringer" [Copy changes] icon to copy all changes made to the course group during the current revision progress.

- Locate the course group you wish to paste the changes into, and click the "Lim inn endringer" [Paste changes] icon. The changes will then be applied to the chosen course group.
