KASPER - Study Portfolio - Create New Study Programme - Kunnskapsbasen
KASPER - Study Portfolio - Create New Study Programme
This wiki describes how to create new study programmes in KASPER.
Norsk versjon: KASPER - Portefølje - opprette nytt studieprogram
All KASPER Resources | Theme page for study portfolio development
Getting Started
Log in to KASPER by clicking the "Log in"-button below.

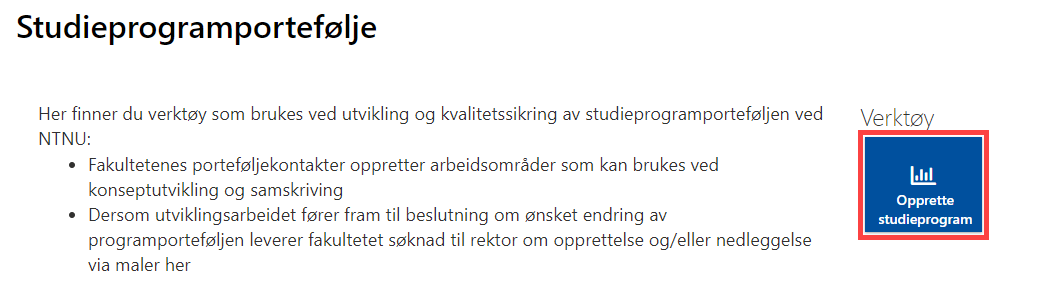
The link sends you to the page for study portfolio development. This is the same as starting on the KASPER home page and clicking "Studieprogramportefølje" -> "Opprette studieprogram".
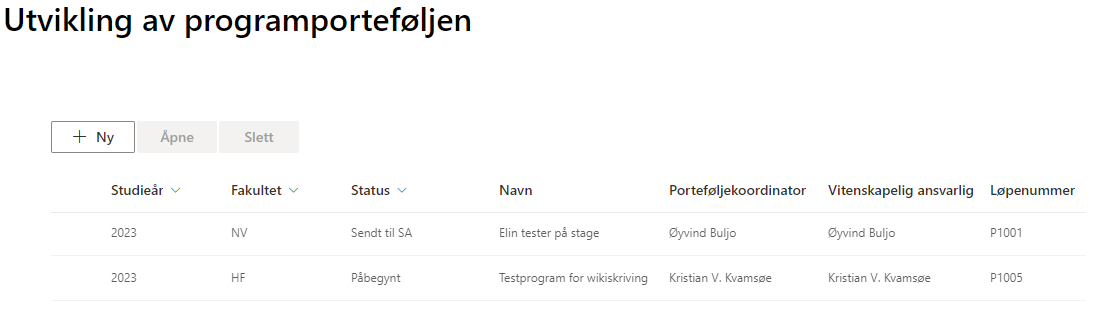
This sends you to a page which lists all study programmes that are being created at the moment. From here you can begin the creation of a new programme, or continue working on one already started.
Starting a new application
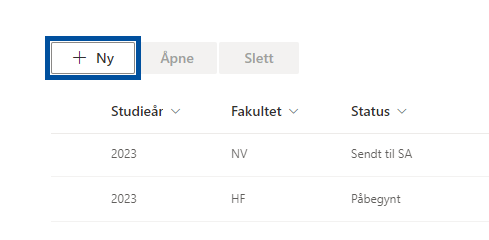
To begin an application for a new study programme, click "+ Ny" (New).
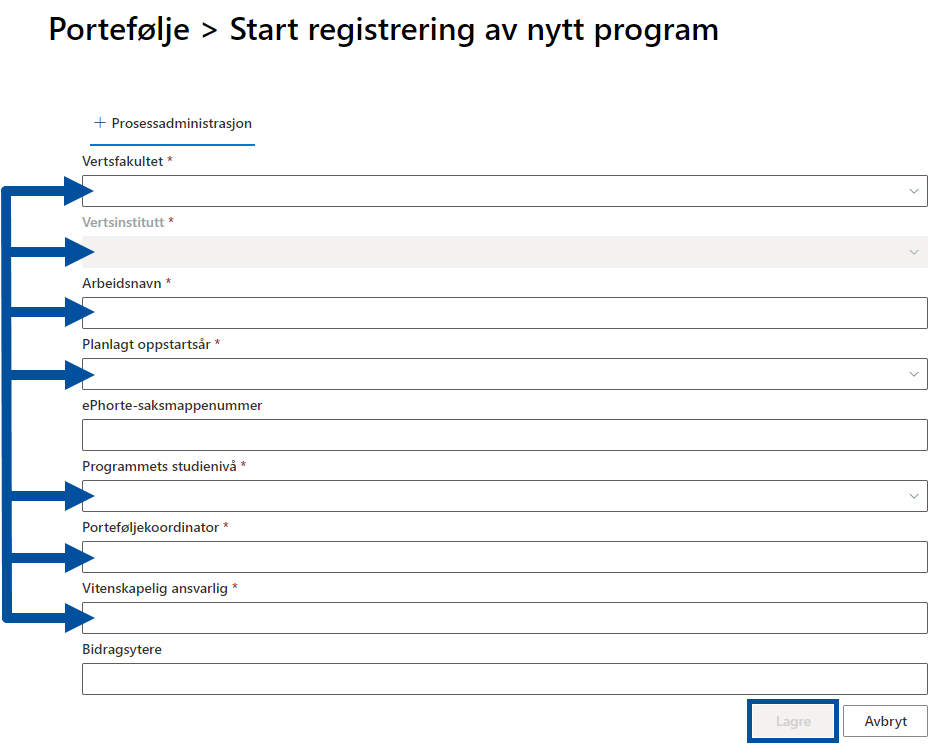
This sends you to a form where some basic information must be added to start the application process. The mandatory fields (marked by a *) include "Vertsfakultet" (host faculty), "Vertsinstitutt" (host institute), "Arbeidsnavn" (temporary name suggestion), "Planlagt oppstartsår" (planed start year), "Programmets studienivå" (programme's study level), "Porteføljekoordinator" (portfolio coordinator) and "Vitenskapleg ansvarleg" (science manager). Filling in "ePhorte-saksmappenummer" (ePhorte case number) and "Bidragsytere" (contributors) can wait for later. When all the required fields are filled in, click "Save". This sends you to the application workspace.
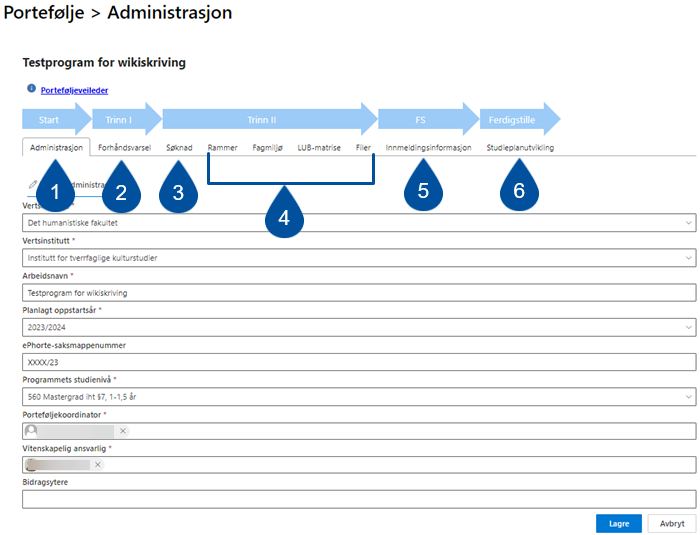
The Application Workspace
The workspace for the application process consists of a number of tabs where different kinds of information is filled in.

Under "Administrasjon" (1) you will find the basic administrative information you filled in when starting the process, as described in the above paragraph. You may edit this information.
The next tab (2) is "Forhåndsvarsel" (advance notice), aka "Trinn I" (Step 1), meant for sending a notification of intent to apply for the creation of a new study programme, which is due February 1st.
The tabs called "Rammer" [Framework] and "Søknad" [Application] make up the most important parts of "Trinn 2" (Step 2), and is due June 1st. Under "Rammer", a number of details regarding the programme must be filled inn before the application can be sent to approval.
For both the advance notice and the final application, a template Word file is generated inside the respective tabs. These can be shared and co-written same as normal word-files.
The rest of the tabs under "Trinn 2", namely "Fagmiljø" (Academic environment), LUB-matrise (LUB-matrix) and "Filer" (files), are used to register the rest of the necessary and supplementary information that must be included in the application. Files uploaded here are attached to the final application.
Rammer
The tab "Rammer" (framework for the study programme) consists of three pages that should be filled out by writing or selecting options.
- "Navn og eierskap" (Name and ownership): general information regarding name and persons.
- "Egenskaper ved programmet" (Characteristics of the programme): additional information on the field of study, teaching, semester, credits, scope etc.
- Finansiering (Funding): answer whether the program is fully funded above the institution's basic budget and choose the funding category.
NB: Remember to save the forms before switching between tabs.
.png)
Sending the notice/application to assesment and approval
When the advanced notice or application+frames have been written, it can be sent for assessment and approval. If the study program is linked to an administrative committee, it must first be sent to the committee for review (see below). If not, you will be able to send it straight to the faculty for approval. After approval from there, a representative of rektor must also assess the advance notice/application, before it can be sent on to the next step/accreditation.

When you click "Send to" review or approval, a menu appears on the right-hand side where you enter the name of the person who will assess the application. As a rule, the faculty has a portfolio coordinator who processes all such applications. If you are unsure who your faculty's coordinator is, see this wiki about contact persons in KASPER.

When the faculty/administrative committee has assessed the application, you will receive a notification by e-mail, and you will find any comments from them in the text field at the bottom of the application page. You then have the opportunity to make changes to the application before sending it on to the next step in the approval loop.
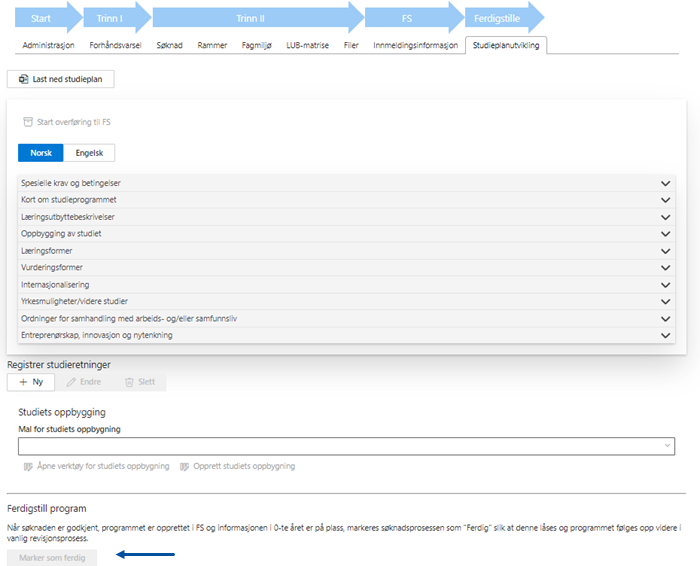
Finishing the study plan
The group of tabs is used to further edit the study plan texts after the application has been approved, in what is called the "zero year" before the study program starts. This is also where the application process for the study program is completed. At the bottom of the page there is a button, "Marker som ferdig" (Mark as complete) (see arrow). The button must be pressed when the study program is completely finished. Pressing it locks all the tabs in the workspace.
.png)