KASPER - Evaluate study programme - Kunnskapsbasen
KASPER - Evaluate study programme
This wiki describes how to use KASPER for the study programme evaluation process. The evaluation is led by the study programme coordinator and/or the programme administrator, working with contributors like study programme councils and other administrative resources. You may also watch our Panopto video on the same topic (Norwegian with English subtitles available).
Norsk versjon - KASPER - Evaluere studieprogram
All KASPER wikis | Theme page on study programme evaluation and development
Getting Started
- Sign in to KASPER by clicking here:
 Sign in
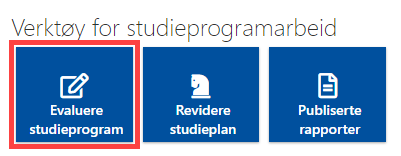
This sends you to the page that lists all programme evaluations in which you take part. You may find this manually from the KASPER front page, by clicking "Studieprogramleder" [Study programme coordinator] -> "Evaluere studieprogram" [Evaluate study programme].![Image shows the tile named "Evaluere studieprogram" [Evalute study programme] highlighted in red.](/c/wiki/get_page_attachment?p_l_id=1307200529&nodeId=1306956300&title=KASPER+-+Evaluate+study+programme&fileName=Verkt%C3%B8y%20for%20studieprogramarbeid.png)
- Select a study programme from the list.
Evaluation Report
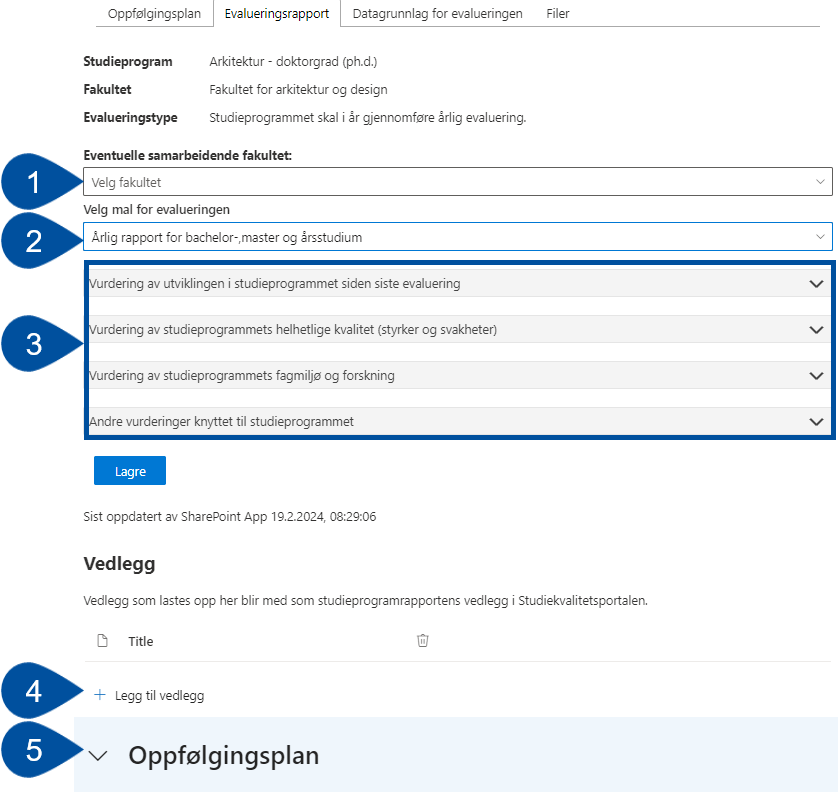
The page you arrive at has four tabs, with the one named "Evalueringsrapport" [Evaluation report] being where most of the work is done. Here you can add cooperating faculties if applicable (1), select a different template for PhD programs (2), use the drop-down boxes to write your assessments (3), add attachments to the report (4) and create the study programme's follow-up plan (5).

Text Boxes
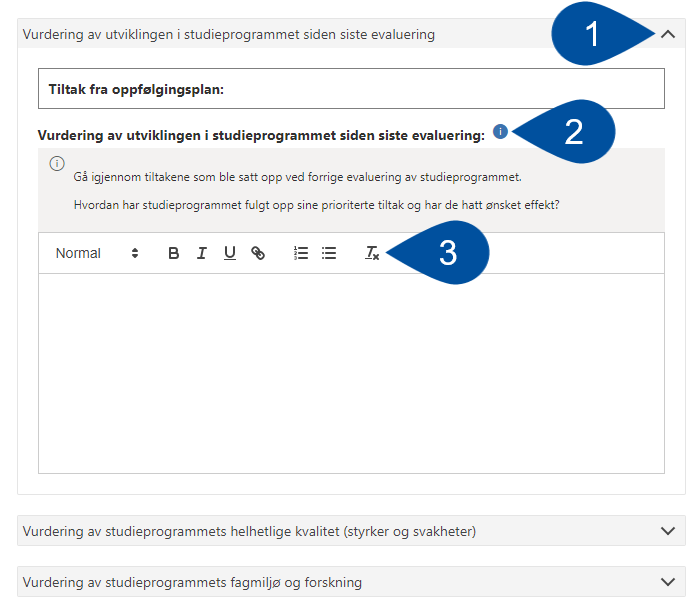
When you open the drop-downs, you will find text boxes where you may write your assessments of the study programme. Open the dropdowns by clicking the header row (1). Each of these includes some help texts you may use for guidance. Open and close them by clicking the blue circles (2).
In the text boxes, you will find some basic formatting options, like text styles, bold, cursive and underlined texts, and bullet point lists. Use the button to the far right to remove formatting from marked text (3).
Periodic evaluation (every 5th year)
For periodic evaluation of the study programme, this page looks a little different. Since this evaluation is larger in scope and often involves people from outside NTNU, we allow for the writing of the report to happen outside KASPER. Thus, this page will have just one text box for the writing of a summary (oppsummering), and the full report may be submitted as an attachment.
Follow-up Plan
Under "Oppfølgingsplan" [Follow-up plan], you create a plan for the development of the study programme. This plan will follow through to the study plan revision that builds on this evaluation.
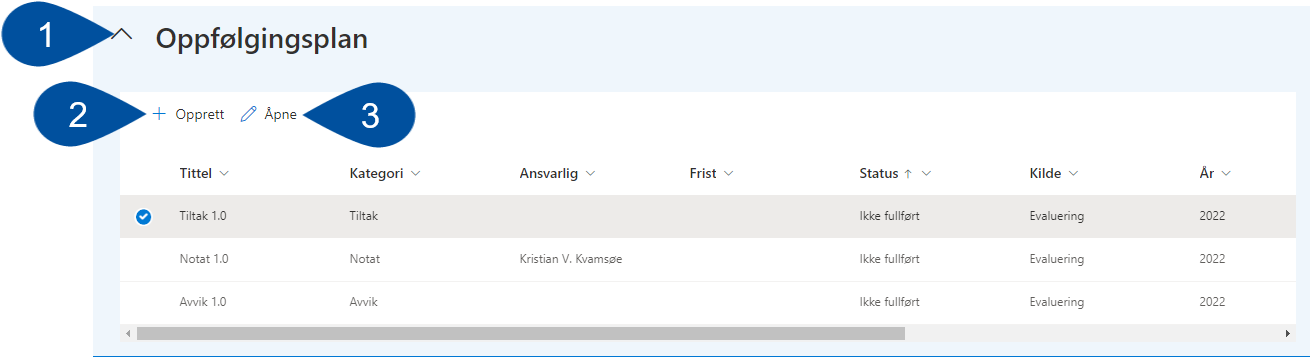
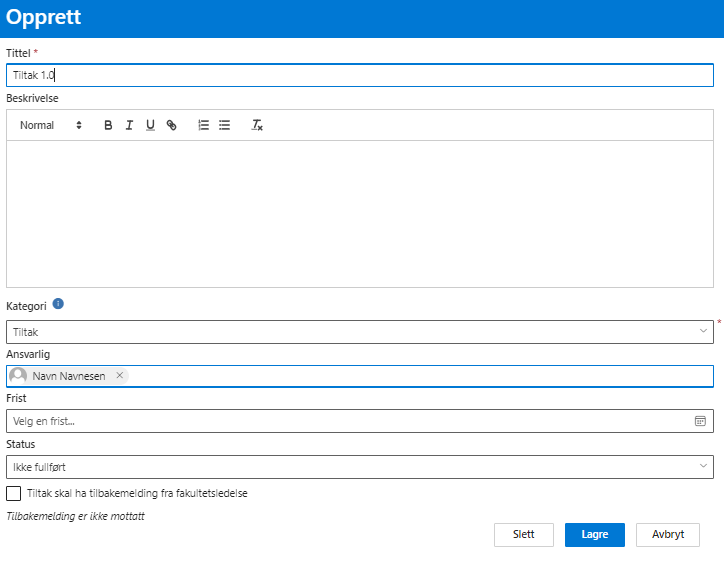
To work on the plan, you click the large drop-down at the bottom of the evaluation tab (1). Add elements to the plan by clicking the "Opprett" [Create] button (2). You can make changes to an existing element by marking it and clicking "Åpne" [Open] (3).
Fill in the relevant details in the window that opens, tick the box at the bottom left if feedback from the faculty is required, and click "Lagre" [Save]. As mentioned above, you can always edit the details later. These elements may only be deleted by the person who created them.

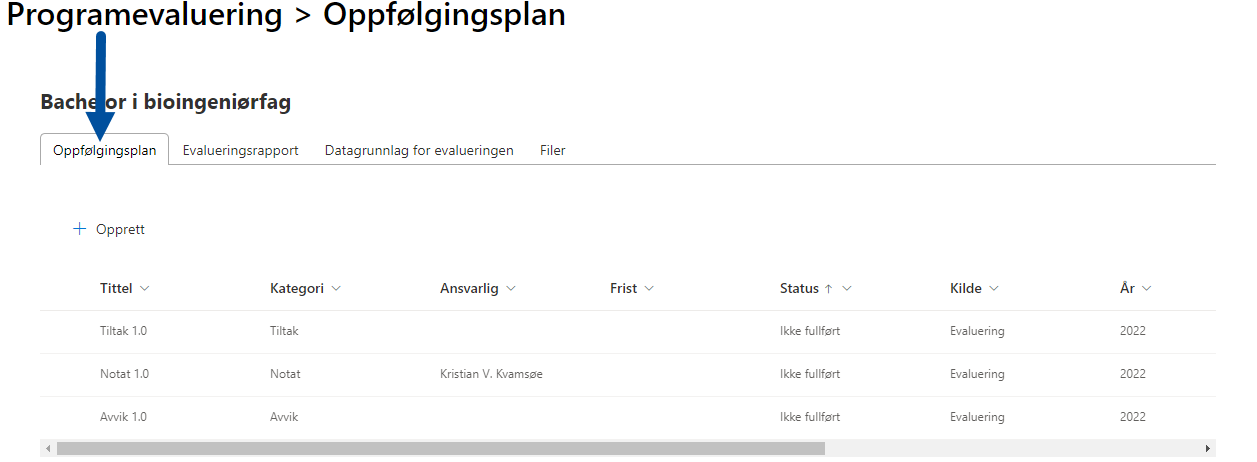
The follow-up plan also has its own tab (see arrow), where you may work on it separately from the rest of the report.
Evaluation Database
Under the tab called "Datagrunnlag for evaluering" [Evaluation database] (1), you will find links to several web resources with information that may be relevant to the evaluation. In addition, you can add your own links by clicking "Legg til lenke til datagrunnlag" (2).
![Image shows the tab where you look at and add web resources that are relevant to the evaluation. Arrows indicate 1) the location of the tab, as number three from the left, and 2) where to click "Legg til lenke til datagrunnlag" [Add web resource to database] to add your own links.](/c/wiki/get_page_attachment?p_l_id=1307200529&nodeId=1306956300&title=KASPER+-+Evaluate+study+programme&fileName=Datagrunnlag_Egen%20fane.png)
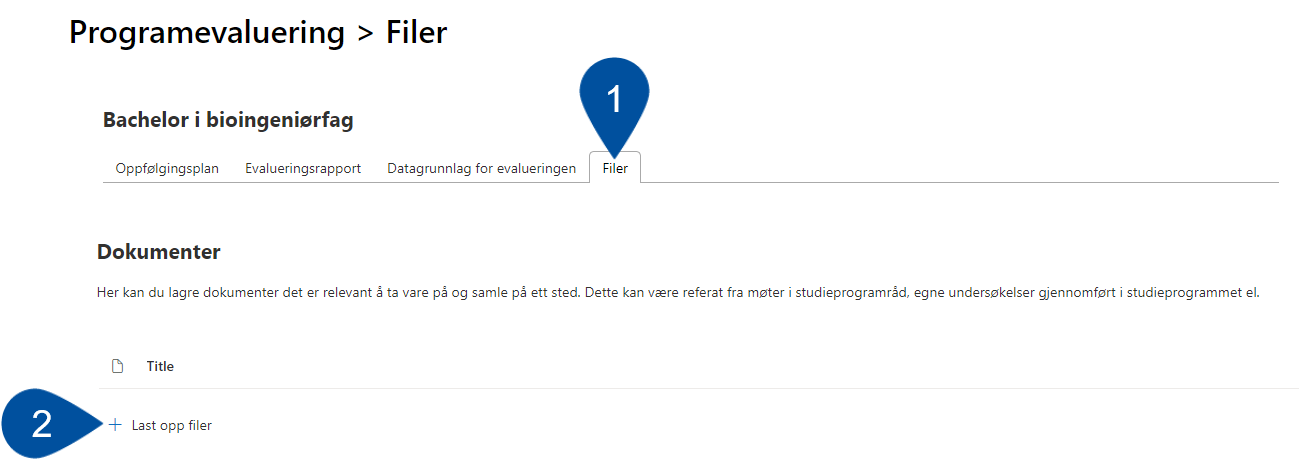
Files
The tab called "Filer" [Files] may be used to gather documents that are used during the evaluation process, but are not going to be attached to the published report. Click "Last opp filer" [Upload files] to add documents from your computer.

Publish Report
The report can be published by the study programme coordinator or programme administrator by clicking "Publiser" [Publish] below the bottom text box (1). Beneath this button, there is a timestamp that tells you when the report was updated last and by whom.
Should it be necessary to make changes to the report or its attachments after publishing, you must first de-publish by clicking "Avpubliser" [Unpublish] (2). After making the necessary changes, remember to publish again.

