Create question set in Inspera Assessment - for academic staff - Kunnskapsbasen
Create question set in Inspera Assessment - for academic staff
This article contains a guide on how to create a question set in Inspera Assessment. Below you will find an overview of the process for making a question set for a digital exam, from creation to sharing it with the department department administration after it is thoroughly checked.
See: also:
Getting started
E-learning course Learn about creating questions and question sets
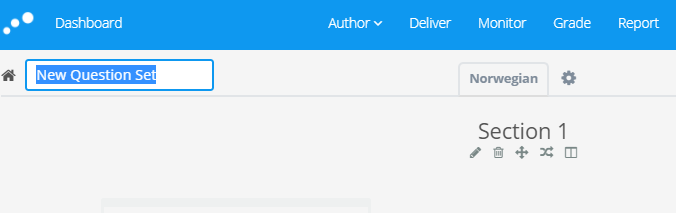
To create a question set in Inspera Assessment, hold the cursor over the “Author” tab, and click "Question sets". You will then see a list of all your question sets, as well as question sets other authors have shared with you. Click “Create New”.

It is important to give the question sets a proper title, especially if they are to be used in a live exam. This makes it easier for the administrative staff to connect the question set to the correct test.

We recommend using the title template COURSE CODE+SEMESTER+YEAR, for example HIST1500 Spring 20. When you have given the question set a suitable title, press “Enter” and the question set is created. The next task is to add questions.
When creating a new question set, Norwegian is the default language. If the question set is only given in one language/language form, it is not necessary to change the selected language. The candidates will see the question set regardless of their chosen language/language form. If you wish to give the question set in multiple languages/language forms, see the user guide further along this page.
Click “Create New” to add a question to the question set.

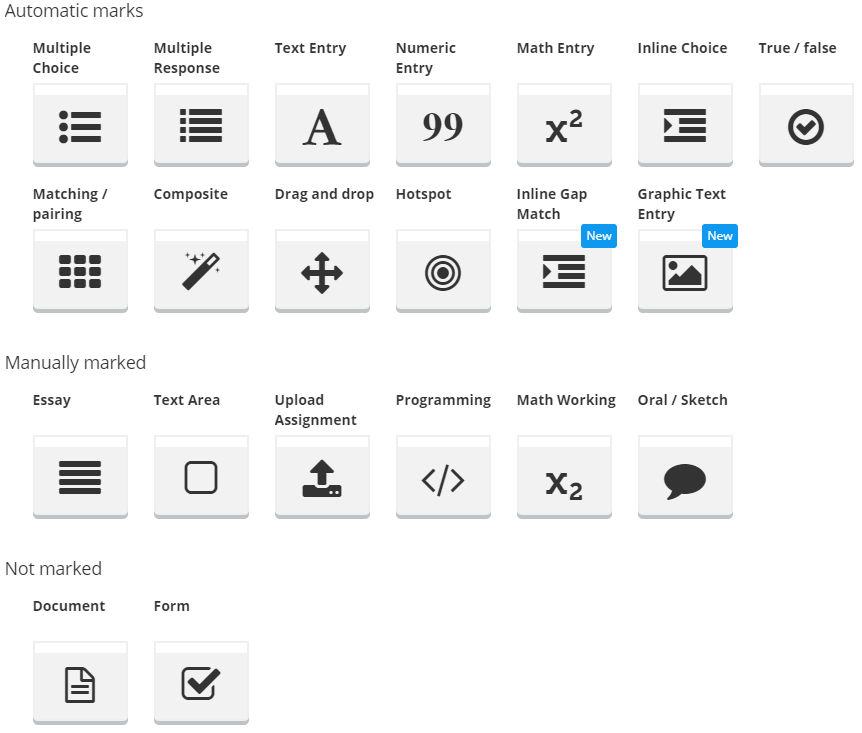
A box will pop up showing all the question types available in Inspera Assessment. Some of the question types are automatically marked, while others are manually marked. There are also some question types that are not to be marked at all. Clicking the icon of the question type you want to use takes you to the question editor. Guides for the different question types are available further down on this site.
Note: Digital exams also require a cover page (see Checking the question set - quality assurance under "Finalizing the question set" on this site for details". We recommend creating the cover page before adding actual questions to the question set. To create a cover page, click “Create New” and choose the question type “Document” which is found in the category “Not Marked”. This question type lets you add the information needed on a cover page. Ready-made templates for cover pages can be found on the wiki page Cover page template for examinations.
Question types, organization and setup
There are 21 different question types available in NTNU's version of Inspera Assessment, 14 automatically marked and 7 manually marked. Automatically marked questions are questions where the author sets the correct answer and mark scheme, and where Inspera assists in marking and scoring the question based on this information. Manually marked questions are questions where the grader manually has to mark and score the question. Below you will find guides for the different question types available.
There are 21 different question types available in Inspera, 14 automatically marked and 7 manually marked. Automatically marked questions are questions where the author sets the correct answer and mark scheme, and where Inspera assists in marking and scoring the question based on this information. Manually marked questions are questions where the grader manually has to mark and score the question. Below you will find guides for the different question types available.

Note: The question type “Upload Assignment” is meant solely for home exams/hand-in assignments or school exams using third-party software. Upload assignment must as a general rule not be used for regular school exams.
Although there are 21 individual question types with different limitations and possibilities, some options and traits are common for all of them. When you create a new question you are asked to name it. As all questions are stored in a personal question bank, so we recommend giving your questions sensible names in case you want to reuse them later.

When you have finished editing a question, click “Save & Close” in the top right-hand corner to return to the question set. By clicking “Save” you will stay in the question editor. If you still wish to return to the question set you can either click “Close” (top right) or the grid icon (top left).
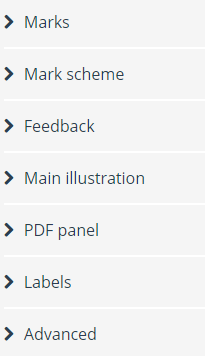
On the right side of the question editor for all question types you will find this menu:

Marks: as an author, you can set maximum marks for a question. The default value for manually marked questions in Inspera is 10 marks. For an automatically marked question, the default value per correct answer is 1 mark. For more information about scoring, see Inspera’s user guides.
Mark scheme: here you can add a mark scheme for a single question, f.x. explain the grading scale or define a given score interval.
Feedback: you can add predefined feedback for all question types, which the planner can make available to the candidates after the test has closed. Write the feedback in the textbox, and click and drag the bottom right corner of the box to expand it.
Main illustration: this option lets you add images or videos from f.x. Youtube. If you add an embed-code, make sure to turn off the function “auto-play next”, which lets the candidate view the next suggested video. Image/video is shown at the top of the question.
PDF panel: lets you add a PDF-document, e.g. formulas or articles, to the question.
Labels: allows you to tag the question. This makes it easier to locate in the question bank. A tag can be used on multiple questions, and by filtering your search by label, you will find all question tagged with that label. Read more about labels in Inspera’s user guides.
In the question editor for all question types you will have this toolbar:

The buttons in this toolbar allows the author to format the question text by using bold text, cursive, underline, and subscript or superscript. You can also add lists, either using numbering or bullet points. The sigma allows for writing mathematical expressions using LaTex. A simple tool for adding tables is also available.
To add an image you use the landscape icon, while the headphones and camera adds sound or video files respectively.
Note: If you are creating a question set for a school exam, do not use the paperclip icon to add an attachment. If you do this, the candidates will exit Safe Exam Browser (SEB) when opening the attachment. If you wish to add an attachment, see the different possibilities further down this page.
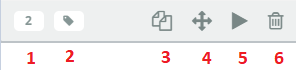
When viewing a question set containing one or more questions, there are a few options for each question.

(1) Shows maximum marks for the question. If you click this button on an automatically marked question you will also see the marks for each wrong answer.
(2) Shows the labels you have used on the question.
(3) Creates an identical copy of the question which can be retrieved from the question bank.
(4) Allows you to move a question within the question set. Left click the crossing arrows, hold and drag the question to the desired location.
(5) Previews the question as seen by the candidate.
(6) Deletes the question from the question set. Note that the question is still available in the question bank.
Guides and explanations for automatically marked questions are available on the wiki site Automatic graded question types in Inspera.
Guides and explanations for manually marked questions are available on the wiki site Manually graded question types in Inspera.
About sections
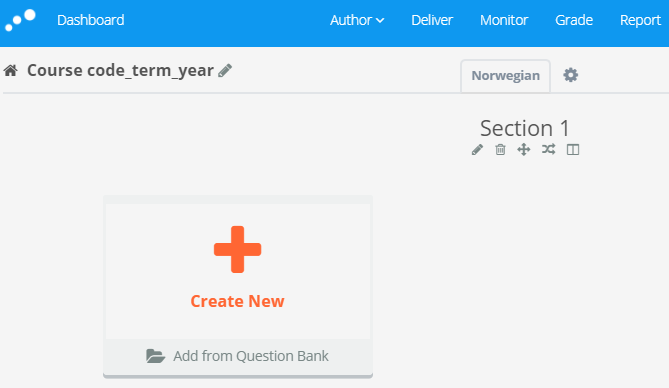
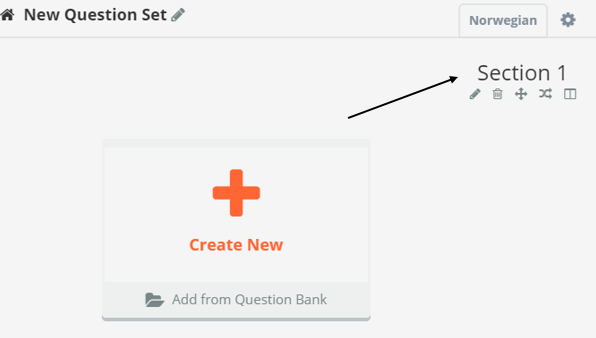
In Inspera you can divide your question set into sections. This makes the question set seem more organized for author, candidate and grader. By using sections, you can add a stimulus which is shown next to all questions in a section.
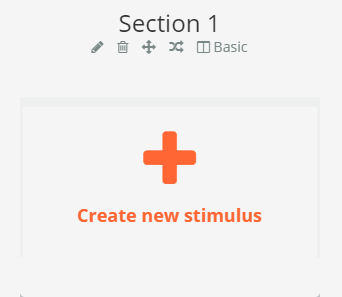
The default name for sections in Inspera is “Section 1”, “Section 2”, etc., but if you click the small pencil under the section name you can rename it. Which name you choose depends on how you wish to organize your question set – e.g. by subject, question type or their relative weight.

Next to the pencil you find the rest of the section tools. The trash can deletes the section and all question within it. Note that all the questions still exists in the question bank and remains available there – they are only removed from the question set.
To move an entire section, use the crossed arrows. Left click, hold, and drag the section where you want it.
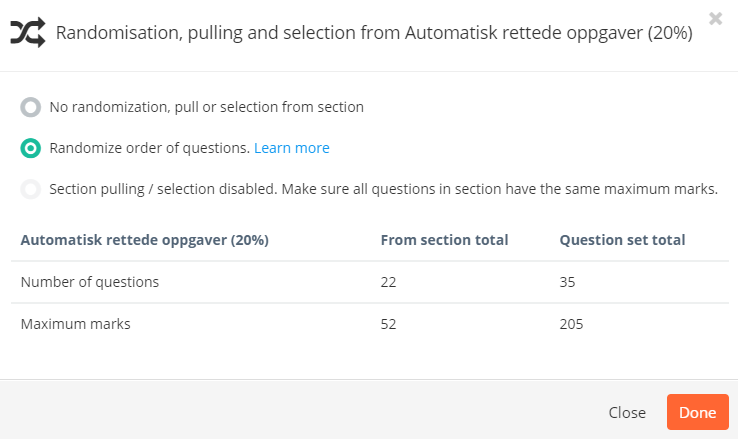
By clicking the intersecting arrows you can select the order of the questions within a section. The default setting is that the questions are shown to the candidate in the order they are shown in the question set, but you can randomize the order. You can also choose to pull a random selection of questions from the section, i.e. that each candidate is given X random questions for their exam.
Note: In order to pull a random selection of questions, all questions in the section must be assigned equal maximum marks.

Options and settings
The standard layout in Inspera Assessment is one page per question, but by clicking the open book in the section tools you can change it to “Vertical layout”. Vertical layout means that all questions are shown on the same page. Be advised that if you have created a large question set where some/all of the questions contain images and/or figures, using vertical layout may cause candidates to experience slowness in navigation.
In the same menu you can add a stimulus to the section. A stimulus is a separate text field that follows all questions in a section. To add a stimulus, click on one of the three options on the right-hand side of the menu. We recommend using “Basic layout – With left stimulus”. After selecting a layout and clicking “Done” a new button will appear in the question set where you can add a stimulus.

To add a stimulus, click “Create new Stimulus” and select “Document”. Then you can add text and/or images, just like an ordinary question.
There are several ways for an author to add attachments to a question set. These are described in more detail on the wiki page Use attachments in Inspera Assessment (In Norwegian only)
Note: When adding an attachment to a question set for a school exam, please make sure that there are no active and clickable links in the attachment(-s). If the candidates click on a link leading to an external website or external software, they will exit Safe Exam Browser (SEB) and be able to use the internet and/or access their own file domain. Be extra careful if using scientific articles, opinion pieces, news stories from newspapers, etc.
Finalising the question set
According to forskrift om målform i eksamensoppgåver (In Norwegian only), the candidates have the right to read the exam questions in the language or language variant of their choosing (i.e. Norwegian bokmål, Norwegian nynorsk or English). We recommend finishing the question set in one language variant before translating it. By doing this, Inspera translates text that is standard for all languages and variants, and also copies all questions to the new language(-s). If you modify a question after translation, you must remember to make the same modifications for all languages – such modifications are not transferred automatically between languages.
Make sure that the questions are identical for all languages/language versions, so all candidates answer the same questions regardless of which language they choose.
To translate a question set, click the cog wheel next to the tab “English” in the question set.
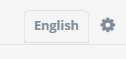
The following box appears:
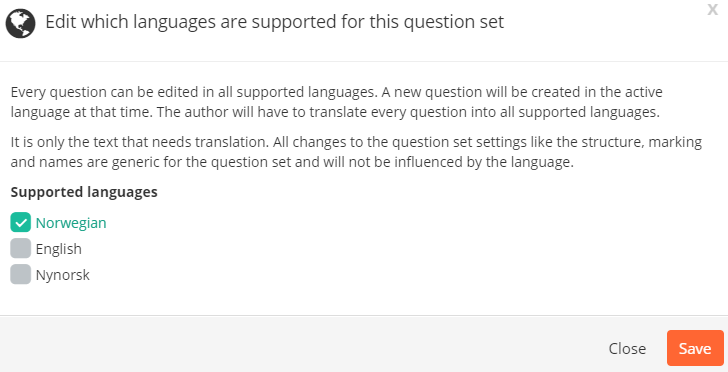
Check the box/boxes for the languages you need and click Save. This creates more tabs next to the tab “Bokmål”. These tabs contain copies of the questions you have made, ready for translation. Remember to both translate question text and alternatives.

NB! PDF attachments are NOT automatically copied when you add new languages/language versions, so these must be added manually after translation.
Note: It is important that the question set in the original language is 100% complete before it is translated into multiple languages. Once a task set has been translated into a second language, it is no longer possible to add or remove interactions to the tasks. This is to ensure that the tasks/task set are formally identical, regardless of the language version.
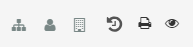
To get a candidate’s view of the question set, click the eye in the top-right corner of the question set.
This opens a new tab in your web browser where you can click your way through the question set as seen from the candidate’s perspective. Please note that the “Check answer” button shown on all automatically marked questions is not visible for the candidates on the actual exam – this is only visible to the author. We recommend that you use this button actively in order to check that you have marked the correct answers as correct, and that the marking turns out the way you planned.
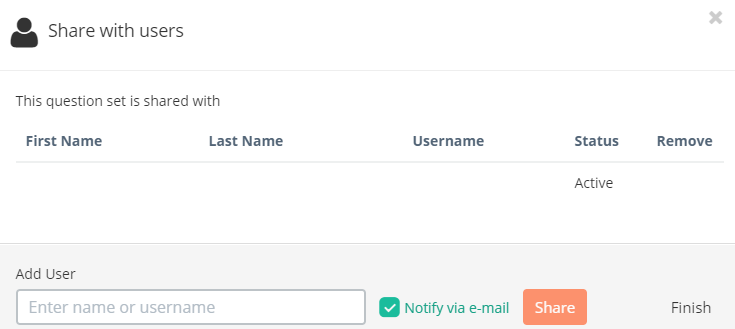
For a question set to be available for a live exam, it must be shared with a planner. If the question set is not shared, it can’t be connected to the test and thus not made available to the candidates. To share your question set, click the silhouette in the toolbar in the top-right corner.
Then you will see a box where you can search for the person/persons you wish to share the question set with. You can search for academic as well as administrative staff.
As author you have the opportunity to impact the exam day experience for your candidates through an array of settings. When viewing the entire question set you have an action bar at the bottom which looks like this:
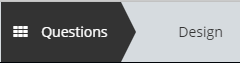
If you click “Design” you get a different view of the question set, along with the following menu:

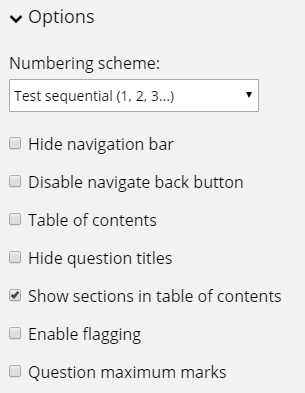
Under “Options” you can:
- Choose numbering scheme. There are three different schemes:
- Test sequential (1, 2, 3,...)
- Section alphanumeric(1a, 1b, 1c,...)
- Section numeric(1.1, 1.2, 1.3,...)
- Hide navigation bar, i.e. candidates can’t see the navigation bar showing the questions and where they are in the question set.
- Disable navigate back button. This setting disables the navigate back button for the candidates, which may be beneficial if, e.g., the answer to question 2 is given in question 3. If this is a setting you wish to use, remember to hide the navigation bar as well. If you don’t, the candidates can navigate back and forth via the navigation bar.
- Table of contents. This adds a table of contents visible to the candidates, which gives them a simple summary of how many questions there are and what question types they are.
- Hide question titles. If the title of the question hints at the correct answer, it may be practical to hide the title from the candidates.
- Show sections in table of contents. This is a default setting and allows the titles of sections to be shown in a table of contents, if you have activated table of contents.
- Enable flagging. Enables the candidates to flag question they wish to revise later in the exam. When a question is flagged, it is easier to navigate to the correct question.
- Question maximum marks. Shows the candidates the relative weight of the question by showing the maximum obtainable marks.
Errors in an exam may, at the worst, result in the exam being redone, with all the delays and extra work that entails. Therefore, every exam should be checked by someone from that discipline. The question set in Inspera is easily shared with the relevant person. A flawless question:
- Has clear and unequivocal question texts
- Is given in the correct languages and language variants
A flawless question set contains:
- Questions suitable to the form of assessment (e.g. not upload assignment for school exams)
- Cover page which contains correct information concerning:
- Course code and course title
- Name and telephone number for academic contact during the exam
- Date, year and term
- Examination time
- Correct support material codes/information about permitted support material
- Languages and language variants
Test settings
As well as the settings concerning the question set, there are some settings concerning the test itself that the author must consider. These settings are for the time being only available to the planner, therefore it is important to maintain close cooperation with the administrative staff in your department.
As a supplement to the digital answer, candidates may hand in handwritten sheets of paper. These are scanned and uploaded to the correct question in the digital answer. This could be a useful tool for questions where you want the candidates to hand in a drawing/sketch, show complex mathematical workings etc., actions that are time consuming to complete digitally.
If you want to activate this setting and allow your candidates to hand in sketches, notify the planner (administrative staff). We recommend that you specify in the question text which question/questions it applies to, as the setting must be activated for the entire question set.
Note: This applies to school exams only – not home exams/assignments.
Home exams with a duration of up to and including 6 hours (spring 2021): If you want your candidates to upload file(s) for a short-term home exam, the question set must contain at least one upload assignment. Scanning is in these instances not an option.
Activation of threshold values enables grading by setting marks. By using threshold values actively in the grading process, the grader(-s) set marks per question rather than grades. When all question have been marked, Inspera suggests a final grade based on the marks and a predefined scoring scale. The grader can easily override the suggested grade.
If your question set contains one or more automatically marked questions, threshold values is automatically activated. It is optional to use the threshold values in the grading process. If your question set contains only manually marked questions, threshold values must be activated by the planner.
Note: The default threshold values in Inspera differ slightly from those recommended in the grading scale using percentage points. If you want to alter the default values before the exam, contact the planner, but the grader is able to alter the threshold values after the exam. In any case we stress the importance of close cooperation between academic and administrative staff.
Rubrics
Rubrics is a tool that can help you as a course teacher to communicate expectations and learning outcomes to candidates. It can also provide different graders with sufficient information to grade a question with the same criteria and standards. Rubrics can be used in the following question types: Essay, Text Area, Upload Assignment, Programming, Math Working, Audio Record. Click on the toggler below to read more about how to use Rubrics in your assessment.
1. Select Rubrics from the Author menu
See the picture below for illustration:

📍 This takes you to an overview of all the rubrics you have created in Inspera.

2. Create a new rubrics template
Click the orange button in the top right corner to create a new rubric template.

You will then see the default rubric editing view, illustrated in the image below.

3. Choose the type of Rubrics that you want to use
You as a course teacher can choose from the following five rubric types:
Points-based:
Points-Range:
Percentage-range:
Qualitative:
Marked Qualitative:
💡Tip: You can find detailed explanations of each type in Inspera’s documentation

4. Customize your rubrics
Once you've chosen the type of rubric you want to use, you can edit it to match your expectations and learning outcomes. The image below shows an example using the No Points rubric type.

You can use the "+" button in the top-right of each section to add more criteria or levels of performance.

To delete a criterion or level of performance, click the three dots in the top-right corner and select remove column.

5. Add the Rubric to a Question
When your rubric template is ready: Go to the Marks section in the right-hand menu while editing your question. Click Rubrics

Select Start from Template
Choose the template you created earlier
📍 This links the rubric directly to the question being assessed.

6. (Optional) Let Students View the Rubric During the Exam
If you want students to see the rubric during the exam:
- Go to the Design tab at the bottom of the question set overview

In the right-hand menu, enable Show rubric as a resource for applicable question(s)

💡 This can help students understand what is expected in their answers.
Contact
E-mail: digitaleksamen@sa.ntnu.no
Phone (open during the exam period): 73 59 66 00