Software Farm with Windows - Kunnskapsbasen
Software Farm with Windows
Software Farm for Windows is a remote software platform which gives you access to a diverse selection of software. You run the applications without having to install them on your own machine.
Norsk versjon - Programfarm med Windows
Looking for something else? Topic page on Software for students or for employees | pages labelled with Software Farm.
Connecting to the Software Farm using Windows
From Windows, there are three ways to access NTNU's Software Farm:
1. Using a web browser such as Firefox.
2. Create shortcuts in the start menu on your local PC.
3. Open the Software Farm as a remote desktop (remote desktop connection)
Which alternative is simplest and best is a matter of personal taste.
Alternative 1. Software Farm via your Web Browser
- We will use Firefox in our examples
- If you use Internet Explorer on an NTNU-computer ("administered client"), the procedure will be almost identical. The differences will be noted at the appropriate points.
- There is a user guide for using the Software Farm with Internet Explorer on privately owned computers ("non-administered clients").
Using the Software Farm via web browser
Open the Software Farm
- Open https://farm.ntnu.no in your web browser, and sign in with your NTNU username and password. Feel free to save the page as a favorite or bookmark in your browser.
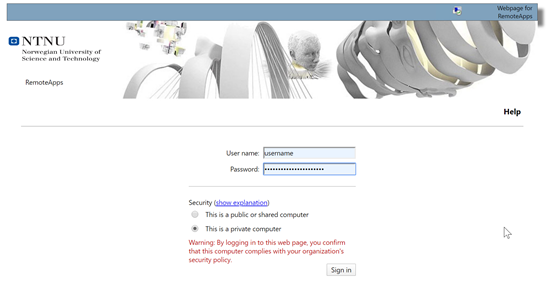
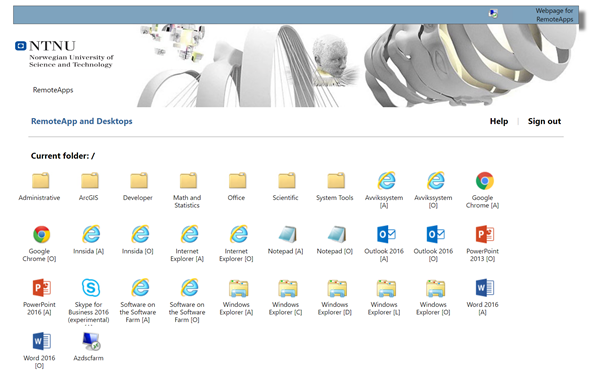
- The Software Farm's website will then display icons of all the programs available through the Software Farm.
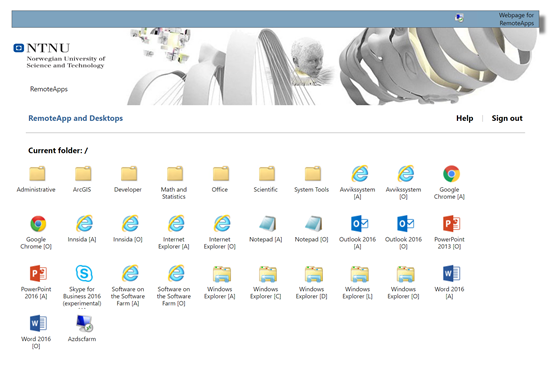
When you run a program from this site, it will behave as if you ran it from your own, local computer. See "Using the Software Farm", below.
The printers available on your own computer will be forwarded to the running program. The folder "Documents" is a link to the "Documents"-folder on your home area on the NTNU net (normally disk M:\). For employees, any other network disks you use in your work (e.g. disk K:\) will be forwarded to the remote application. The disk on your own computer is also accessible. Further, the copy-and-paste function works across the remote computer and your own.
Run a program
- Click the icon of an application launch it
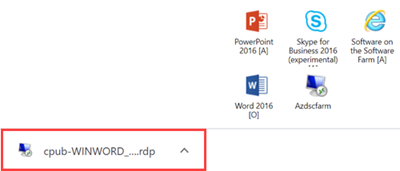
- A file in .rdp-format will be downloaded. Click the downloaded file to launch the program on your computer.
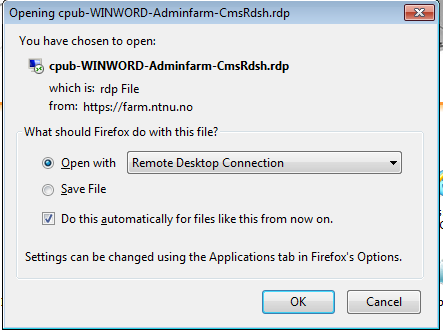
- The first time you launch a program from this website, the browser will ask what you want it to do with files in .rdp format.
- Choose to Open with Remote Desktop Connection. Tick Do this automatically for files like this from now on, and hit OK.
- If "Remote Desktop Connection" is not shown in the dialog-box's scroll-menu, see "If Remote Desktop Connection is not shown..." at the end of this document

- The first time you launch a program from the website, you will be asked to accept a certificate.
- Tick Don’t ask me again for remote connections from this publisher, and press Connect.
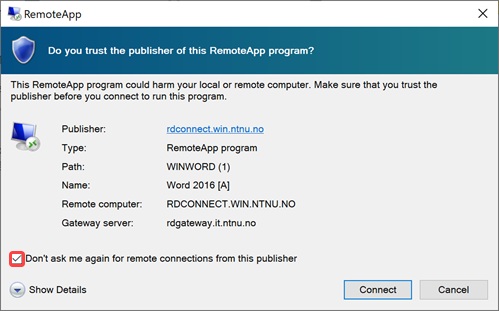
- By pressing Show Details in the bottom left corner of this dialogue box, you will see that the remote session gives you access to the local disk and the printers registered on your computer, and that the cut-and-paste function will be common to the remote session and your own computer.
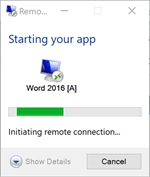
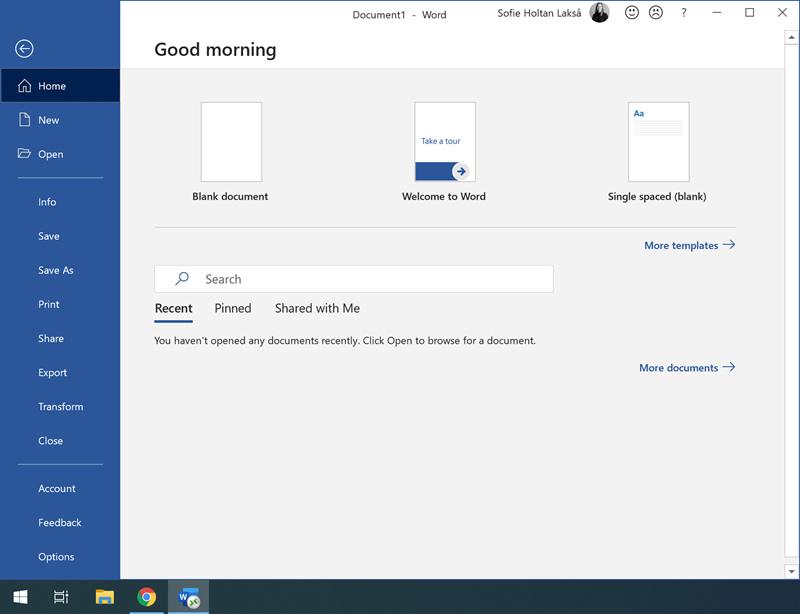
- The process has started. In this example we have chosen to launch and run Word 2016. The message informs us that the process is running.
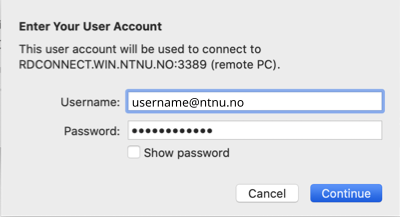
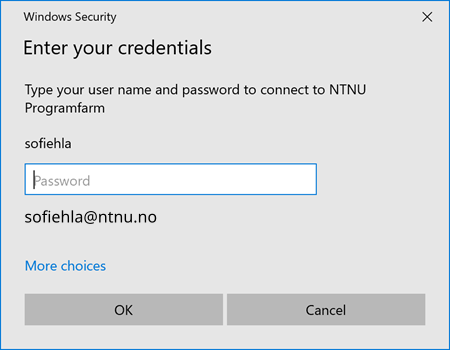
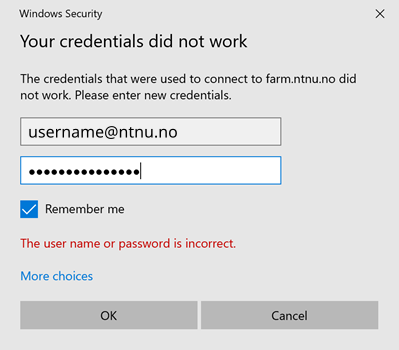
- For the first application you launch after logging into the Software Farm, you will be asked for your NTNU username and password. Fill in your username on the form username@ntnu.no. If you are not asked for username/password, proceed to step 7.
.png)
- The program is running. The program chosen, here Word 2016, is open and ready for use.

By pressing "Computers" in the Open or Save menus of the program, you get access to the documents on your home area (network disk M:). See Drives and storage below.
We also see that the remote program shows its icon on the taskbar of your local computer, just as if it was an ordinary, local program.
Alternative 2: Shortcuts in the start menu on your local computer
This is an alternative to using the web browser:
You can install shortcuts to the applications on the Farm in the start menu on your local computer. This way they are accessible in nearly the same way as if they were installed locally.
The method is simple, but the somewhat cramped space in the list of programs in the start-menu would make the perspicuity of what is available somewhat better on the website.
Setting up shortcuts in the start menu
- Go to the start menu
- Find Control Panel under Windows System
- Use the search field in the upper right corner to search for remote
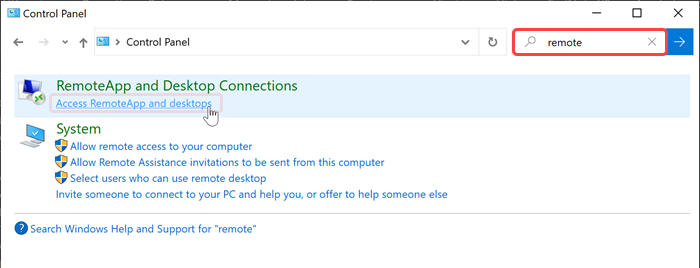
- Here, open Remote App and Desktop Connections
- Choose Set up a new connection with RemoteApp and Desktop Connection
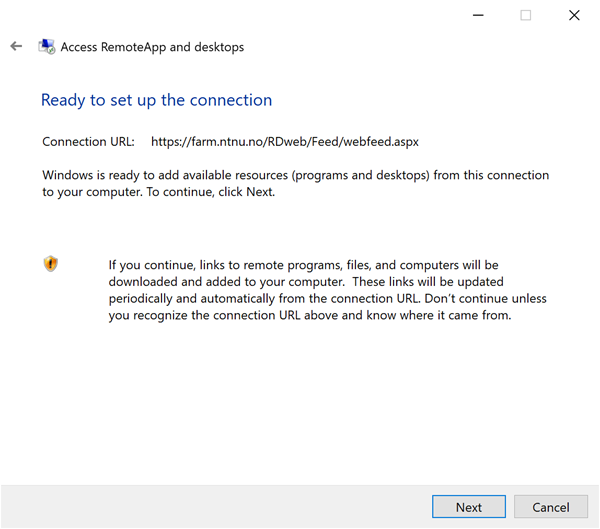
- In the dialogue box that appears, enter the following address and hit Next: https://farm.ntnu.no/RDweb/Feed/webfeed.aspx\\
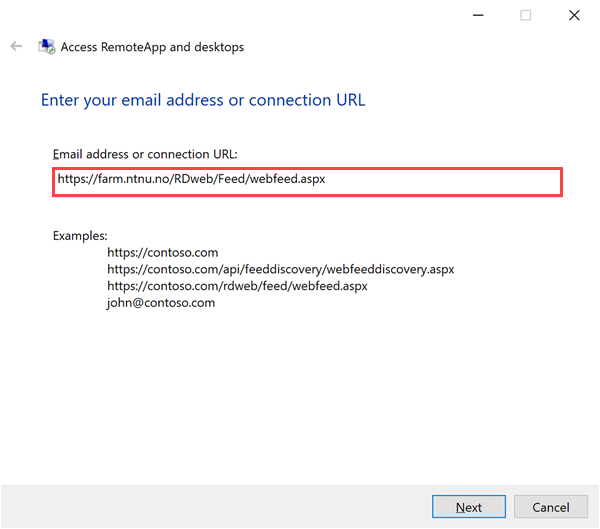
- Press Next in the following dialogue box

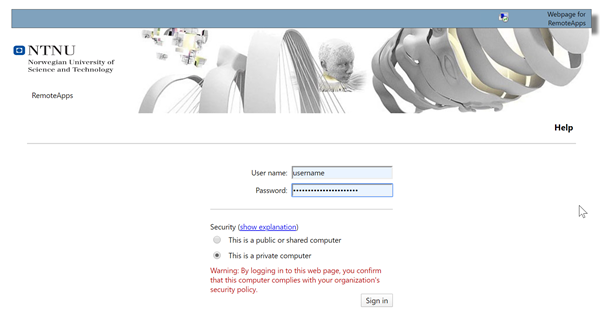
- Fill in your NTNU username and password. Note that the username has to be written as username@ntnu.no
.png)
- Success!

- Click Finish
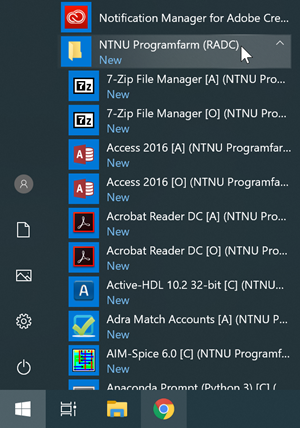
You can now go to the start menu to access and see what software is available through the Software Farm under the folder NTNU Programfarm. The list of available software is very long, so if you know what you are looking for, the fastest way is to use the search function.
Manually update the list of remote desktops
By default, this list is updated once a day and at every login. There should be no need for a manual update, but if you feel the need to do so, this is how to:
- Open the start menu
- Open Control Panel under Windows System Tools
- Search for Remote
- Click Connections to RemoteApp and desktops
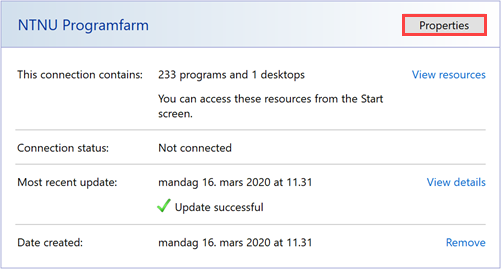
- This window will then be opened:

- Press Properties
- In the next window, click Update now
- Click Finish, and the Software Farm is updated
Alternative 3: Software Farm via Remote Desktop Connection
The third alternative is to connect to one of the Software Farm’s own desktops.
The Software Farm has eight available desktops:
| Remote Desktop | Who are to use it |
|---|---|
| adminfarm.ntnu.no | Employees of NTNU. Not businesses on the NTNU perimeter (SINTEF etc.) |
| officefarm.ntnu.no | Students at NTNU. Also accessible for employees of NTNU with a student account. |
| edgefarm.it.ntnu.no | Employees of the NTNU perimeter businesses |
| calcfarm.ntnu.no | Students and employees who need scientific software and software for mathematics and statistics |
| devfarm.ntnu.no | Students and employees who need access to developer software such as Visual Studio |
| legacyfarm.ntnu.no | Employees at the NTNU administration who need the outdated interfaces required to access NTNU's accounting software: legacy versions of Internet Explorer and Java |
| kavlifarm.it.ntnu.no | Persons affiliated with the Kavli institutions. |
| ielfarm.it.ntnu.no | Department of Electric Power Engineering |
In adminfarm, officefarm and edgefarm, you will find all the Microsoft Office applications and a rich diversity of other office tools.
On calcfarm you find various mathematical and statistical programs. It can be used by employees and students alike.
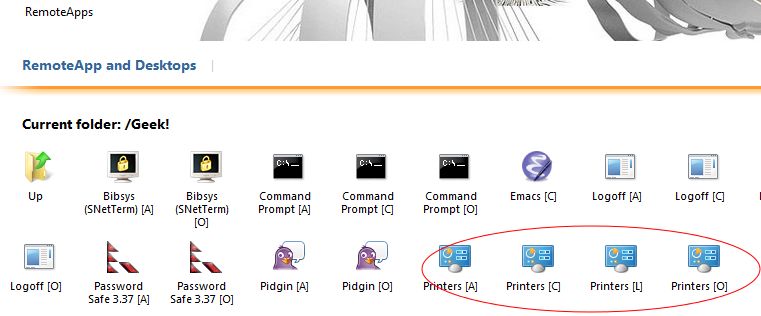
(Identifiers of these different farms are indicated under the program icon in the Farm's web-interface (Alternative 1, above), as [A], [O], [E], [C], [D], [L], [K] og [IEL]. Anyway, this is irrelevant for the user of the web interface.)
Connecting to a remote desktop
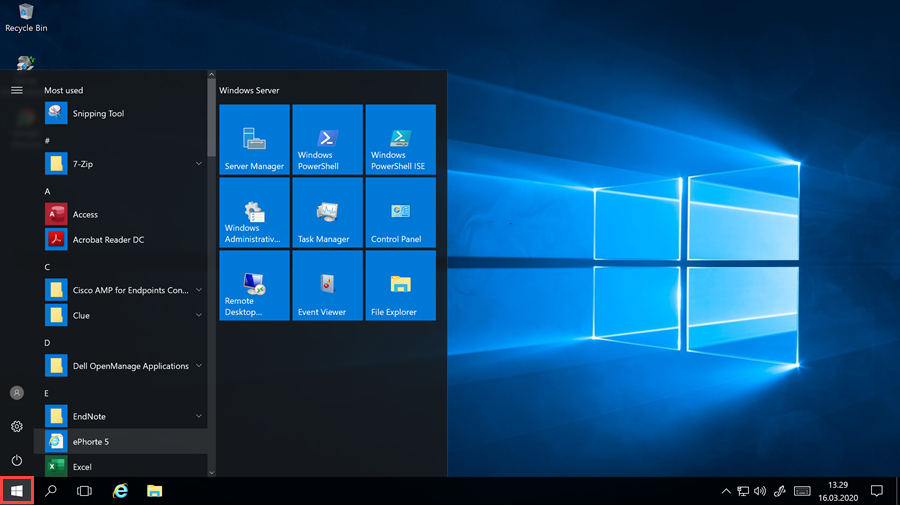
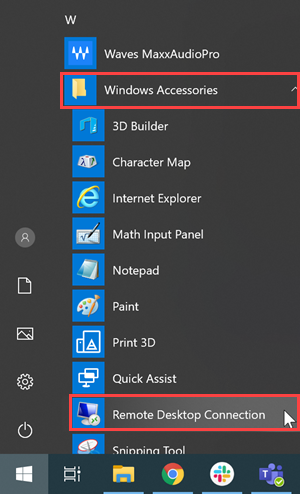
- Open the start menu
- Find Remote Desktop Connection under Windows Accessories

- Click the program to launch it
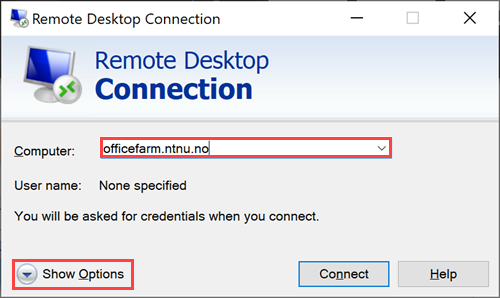
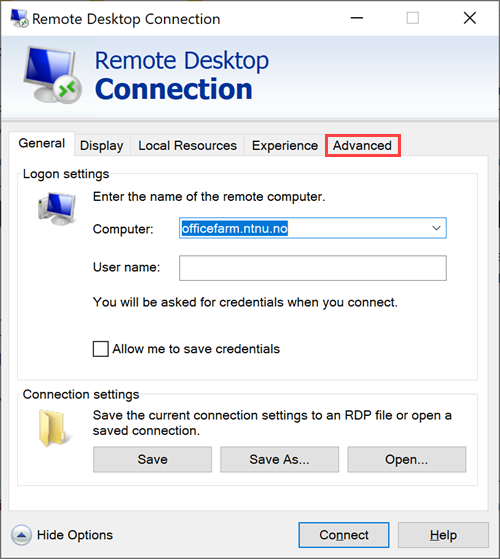
- In the following dialogue box, fill in the address of the farm you want to open, and click Show Options
- Note that in order to connect to the Software Farm through a remote desktop, you should connect using rdgateway. If you do not wish to do so, go straight to step 11 and make sure you are connected to VPN.
- Note that in order to connect to the Software Farm through a remote desktop, you should connect using rdgateway. If you do not wish to do so, go straight to step 11 and make sure you are connected to VPN.
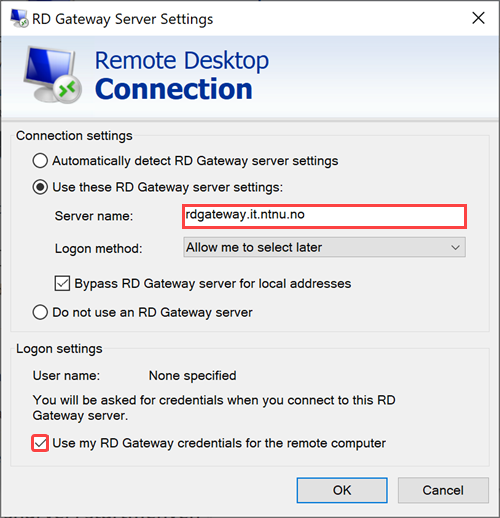
- Choose the Advanced tab

- Press Settings
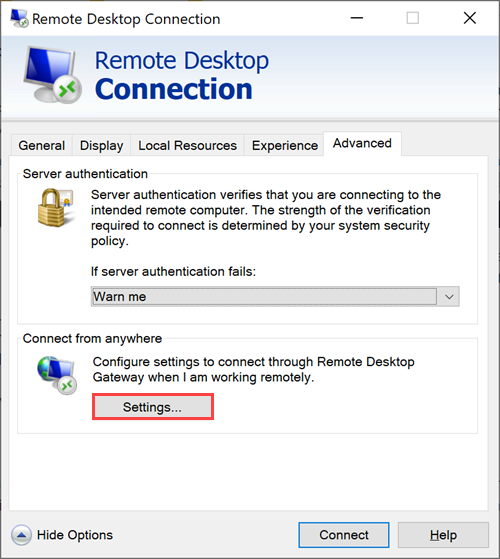
- Fill in the settings as shown below: rdgateway.it.ntnu.no

- Press OK
- Press Connect
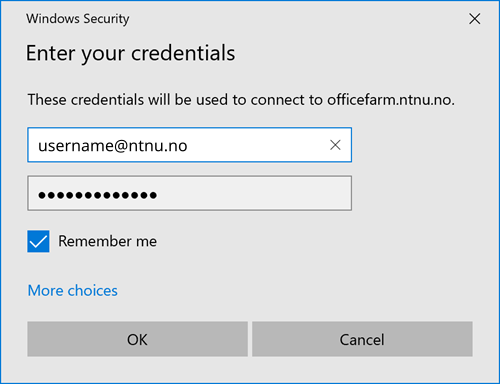
- First time connecting to farm this way, you will be asked whether you trust the connection. Tick Don't ask me again for connections to this computer and press Connect.
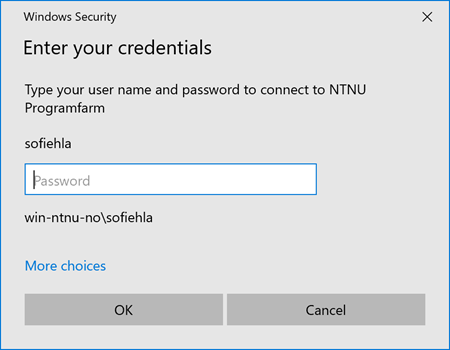
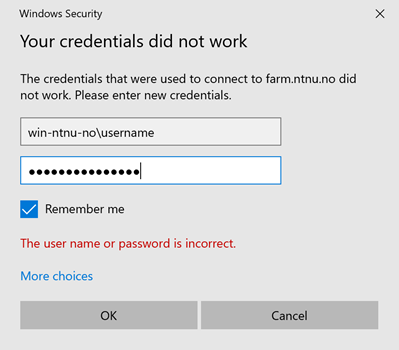
- You will then be asked for username and password: If you are logged in on a private computer with a local username, you may have to press "Use another account", to be able to log on with your NTNU account. In that case you will also have to enter your username with the NTNU domain: username@ntnu.no
.png)
- Press OK, and you will soon be connected to the Farm.
The desktop of the Farm will now be opened as if you were logged in on the Software Farm, and not on your own PC.
By clicking the Windows symbol in the bottom left corner, the start menu will open. The programs you launch will run on the remote desktop. They are therefore not shown on the taskbar of your local computer, but on the taskbar of the remote desktop.
The NTNU user profile, which is loaded to your computer every time you log on with NTNU username and password, is also loaded to the remote computer. It contains information which allows the computer to connect automatically to your home directory (normally M:\) and other network resources. The profile does not connect printers, but there are default printers on the Farm, and printers registered on your local computer are forwarded to the remote and accessible there. For more about this, see User interface of the remote desktop.
Configuration details for remote desktop
When you use connection alternative 1 (browser) and alternative 2 (shortcuts in your start menu), these configurations are set automatically.
- Start by opening the program Remote Desktop Connection
- Open the start menu
- Find Remote Desktop Connection under Windows Accessories
- Click the program to launch it
- In the configuration panel, press Show Options
Keyboard, printers, clipboard, and network disk
- Choose the tab Local Resources
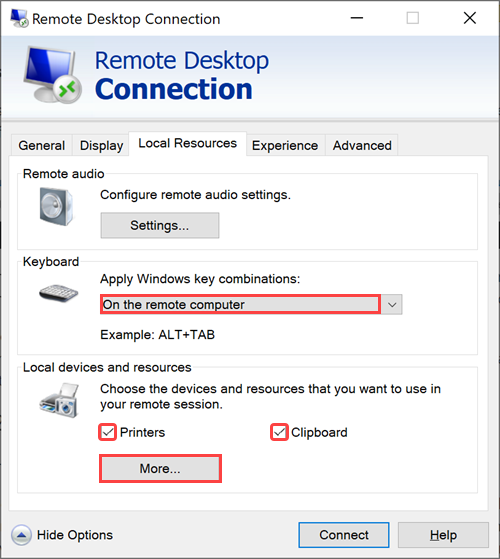
- Choose On the remote computer for Keyboard
- It is also a good idea to tick Printers and clipboard under "Local devices and resources". These will then be available from the remote desktop.
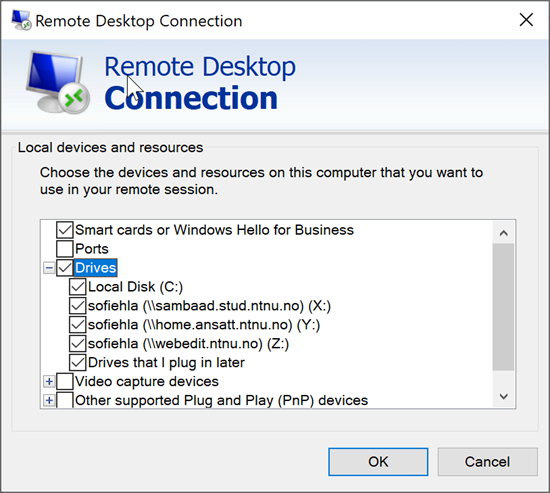
- By clicking on More under Local devices and resources , you can select other local resources to be redirected to the remote desktop. The remote desktop loads your NTNU user profile, so that network drive ("M:") and other drives which are in your profile will be available anyway. But it is handy to also have your local disk ("C:") forwarded to the remote computer.
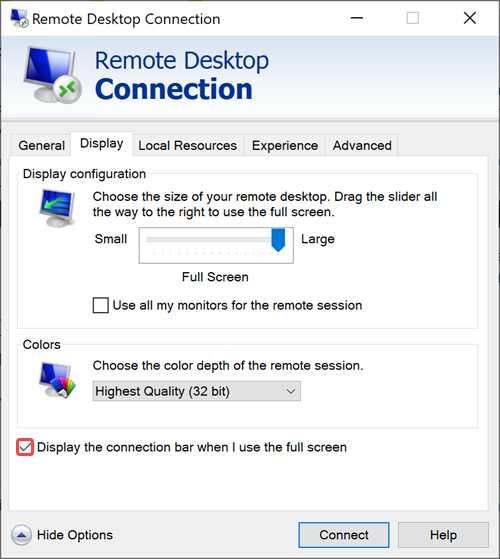
Display
- Go to the tab Display
- Here you can select the screen size for the remote desktop. If you set the slider to max, the remote desktop covers the entire screen of your local computer.
- Tick the box for Display the connection bar when I use the full screen. A small toolbar will then be shown at the top of the remote desktop. This toolbar allows you to adjust the size of the window once you are connected.
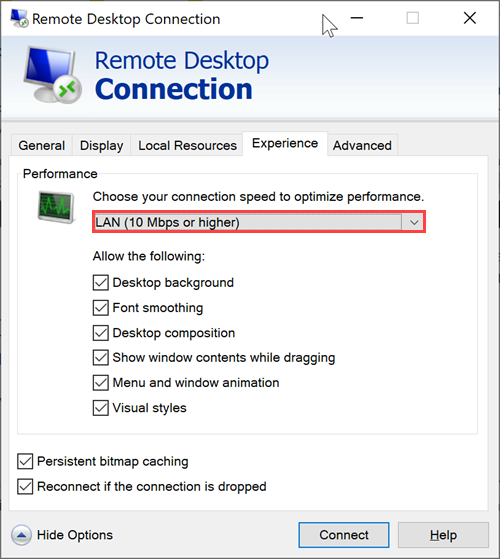
Connection speed
- Go to the tab Experience
- Set the connection speed to max: LAN. With the present-day speed of broadbands, there is really no reason to set this to any other value than max, i.e. "LAN". Choosing a lower speed means that less of the bandwidth is used for graphics quality. This might be a good idea if you are connected by way of mobile broadband.

Using Software Farm
The user interface of the remote desktop
The user interface on the Farm is that of Windows 8. If you want to know more about it, see User interface on the Software Farm.
Clipboard
You can cut and paste between applications running in the remote session and those running locally on your own computer.
Drives and Storage
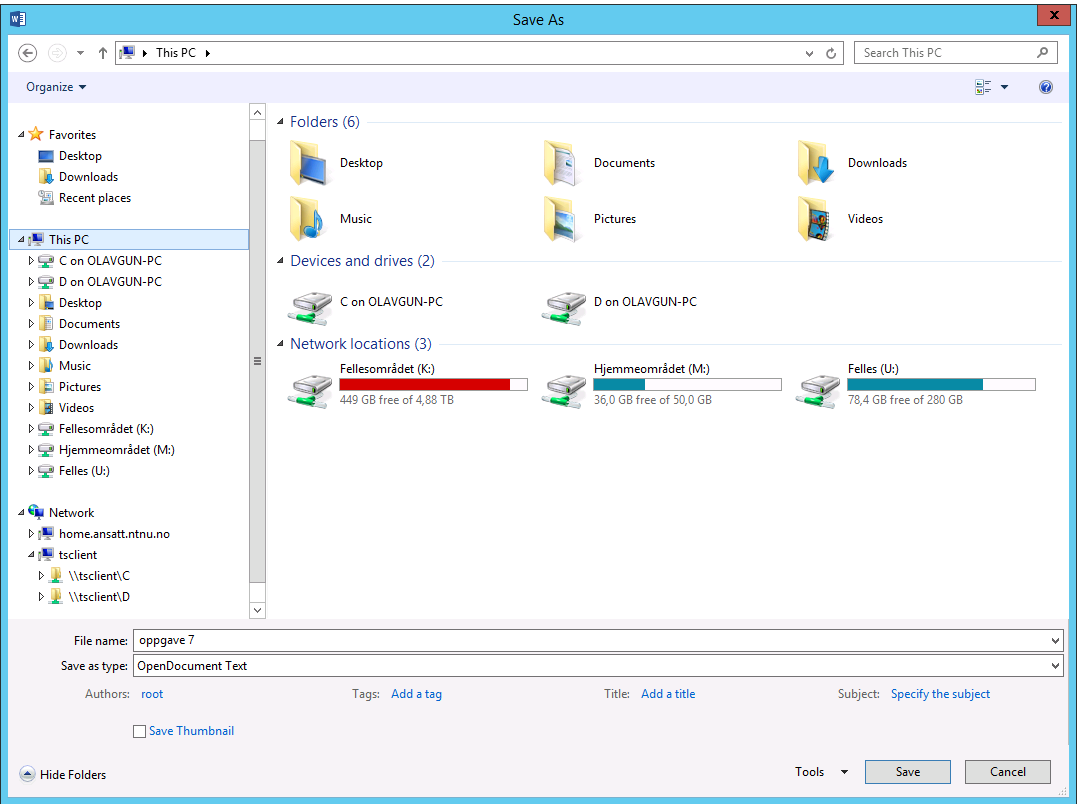
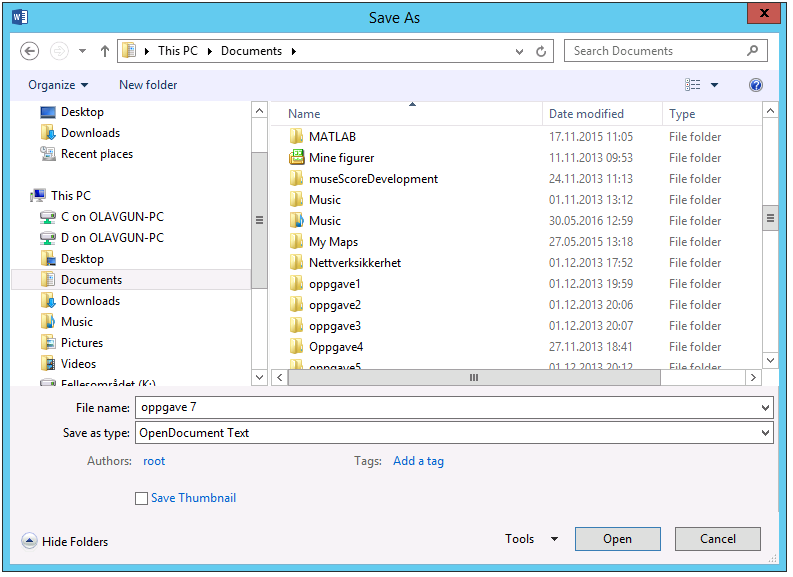
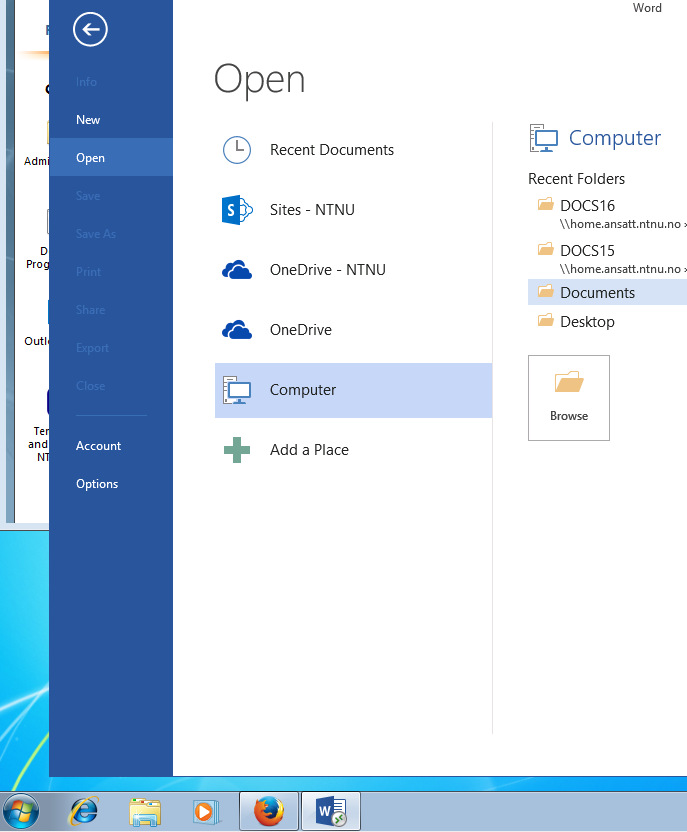
Pressing "Save" or "Open File" from within a program running on the Farm brings up "Documents" (Mine dokumenter) from your home directory, normally known as "M:\Documents". That is: what is shown as "Documents" in the remote apps, is your own M:\Documents.
The examples shows "Open File"/"Save as" in Word 2013.

- By choosing Save As (Lagre Som) and then Computer (Datamaskin) and finally This PC, you can see all the disks and drives that are available in the remote session.
- In the figure below Network Locations (Nettverksplasseringer) is the server's connection of my network drives based on my user profile.
- Devices and drives are local drives on my own computer, which are not included in my NTNU user profile, but are forwarded from the local to the remote computer.
- The inquisitive person will see that the forwarded local disks also can be found under "tsclient", at the bottom of the left sidebar.
Printing and adding printers
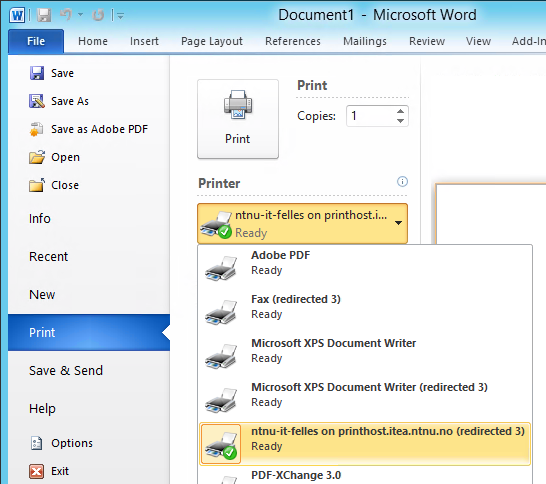
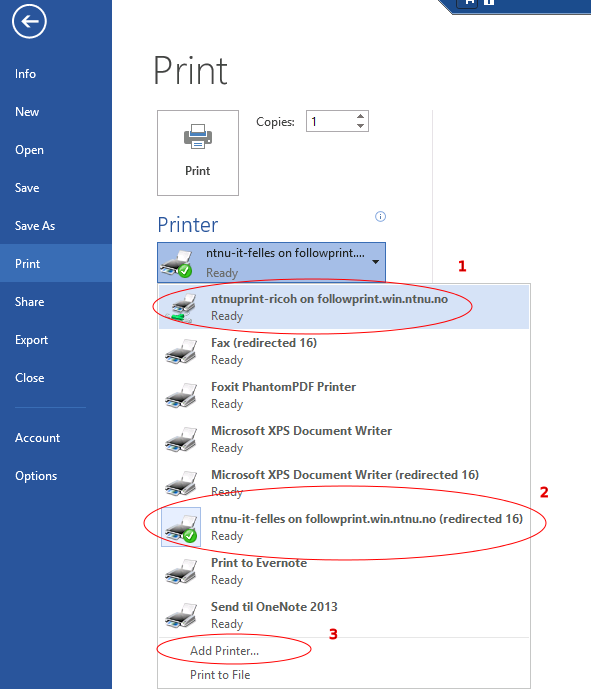
The example below shows the print menu in Word 2013 on the Farm.
- Printers registered on your local computer are available. They are marked "redirected" (2 in the figure).
- Standard printers on the Farm, or printers which you have added on the Farm (see below), are not marked "redirected" (1 in the figure: This is the default printer on adminfarm).
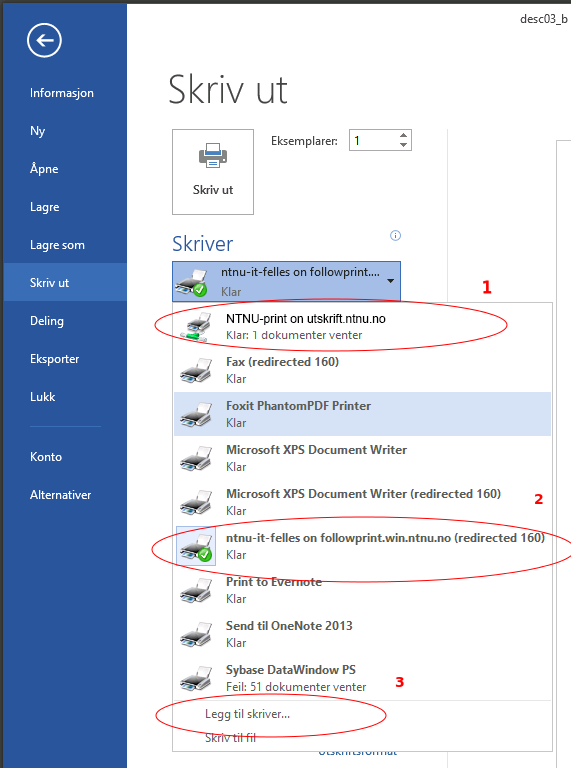
It is not possible to use the "Add printer"-menu entries within each program to add printers. Point 3 in the figure does not work. This is the standard for the NTNU network. The reason for this is that NTNU's printers are on a separate network behind a firewall to protect them from being hacked, which has been a problem in the past.
To add a printer, you have to open Control Panel -> Devices and Printers on the Software Farm, and then press "Add a printer".
Accessing "Devices and Printers" on the Farm requires a different method according to the connection alternative you have chosen.
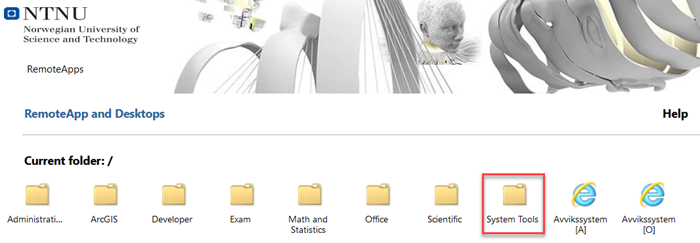
Connection alternative 1: via the browser
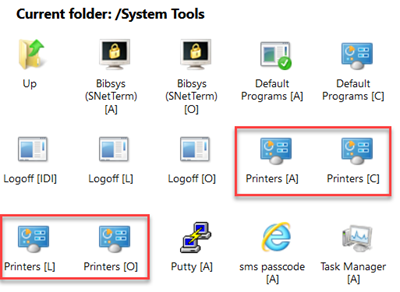
You will find "Devices and Printers" in the folder System Tools.
Connection alternative 2: Full desktop.
If you are connected to one of the Farm's desktops, you press on the tile "Control Panel" in the start screen, and then choose "Devices and printers".
Adding a printer
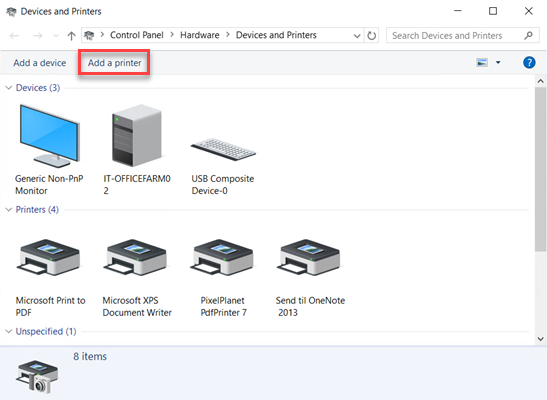
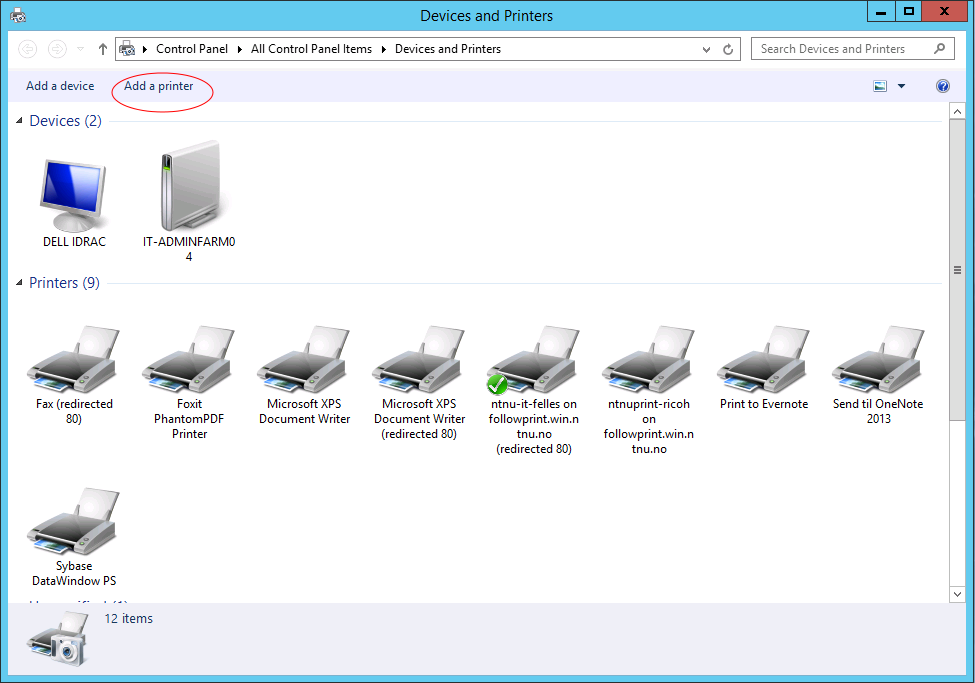
In Control Panel -> Devices and printers, we see the printers accessible to us, and which of them are redirected local printers and which are not.
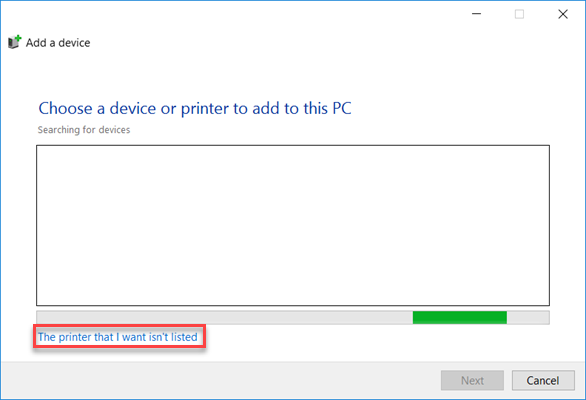
To add a printer, press "Add a printer" in the top taskbar.
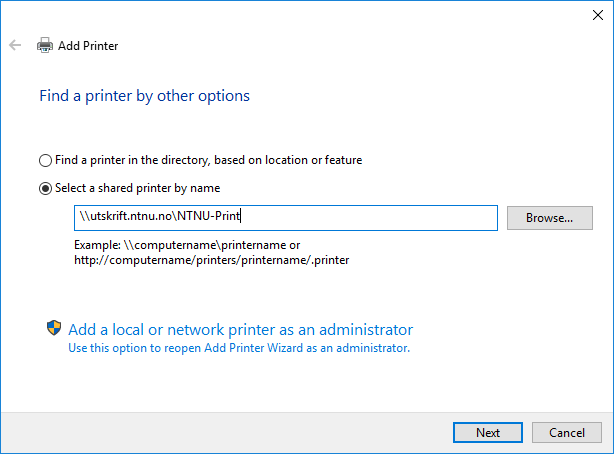
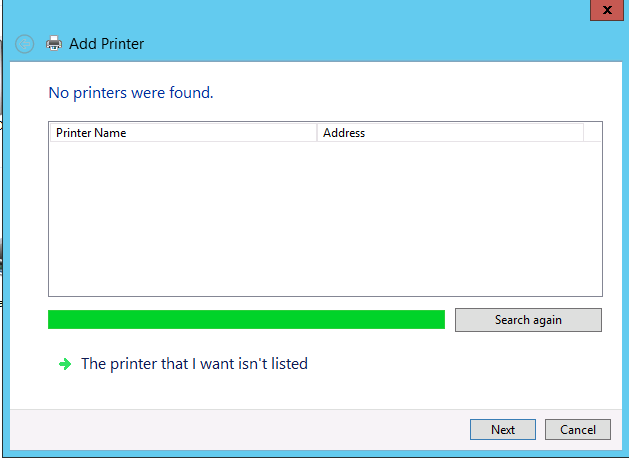
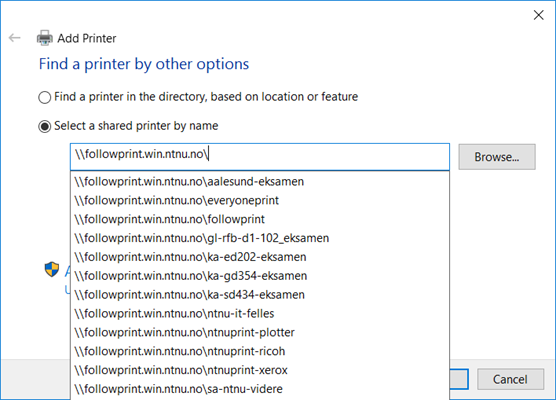
You will then get a dialog box saying "No printers were found". Press The printer that I want isn't listed.

The dialog "Find a printer by other options" will open. Fill in the text-box "Select a shared printer by name" with \\utskrift.ntnu.no\NTNU-Print
Chose your printer, and press "Next". A couple of unimportant dialog boxes will follow, and then your printer is installed.

The printer is saved to your local profile on the Software Farm, and will be accessible also for your future use of the Farm.
If you are connected by alternative 2: Remote Desktop, it seems that the printer will only be saved to the local profile on the particular farm you are logged on to. Printers chosen in adminfarm are not saved to officefarm.
Contact
Orakel Support Services can help if you encounter difficulties.
Child Pages (1)
-
Software Farm for Internet Explorer - private PC
Software Farm: Internet Explorer on privately owned PCs Innholdsfortegnelse [-] Software Farm: Internet Explorer on privately owned PCs Step 1: Start Internet Explorer Step 2: Set some permissions...