Software Farm for Mac users - Kunnskapsbasen
Software Farm for Mac users
The Software Farm makes it possible for you to run several computer programs without having to install them on your own computer. This user guide tells you how to use the Software Farm with a MacIntosh computer.
For a more general explanation of the Software Farm, see Software Farm.
Norwegian version: Programfarm med Mac
Innholdsfortegnelse [-]
- Who is it for?
- Software necessary for access: Windows App
- Three ways to use the Software Farm with Windows App
- Method 1: Access the remote resources from the menu of Windows App
- Method 2: Log on to the Software Farm's Windows desktop
- Method 3: The web interface for the Software Farm
- Using the Software Farm in your browser
- Contact
Who is it for?
The Software Farm is available to all NTNU employees and students.
Software necessary for access: Windows App
You need a program on your Mac called a remote desktop client to use the Software Farm. We recommend the use of Windows App.
How to install //Windows App//
- Open the App Store
- Log in to the App Store and search for Windows App
- When you find the program, click on it to get and then install the app
When the installation is finished, you can start Windows App from the Applications folder on your Mac.
Three ways to use the Software Farm with Windows App
There are three ways to use the Software Farm with Windows App:
- Direct access to remote resources in Windows App. This is by far the easiest and thus recommended method.
- Log on to a remote Windows desktop. This is convenient when you have to work in a Windows environment with several of the Software Farm's programs open at the same time.
- Using the Software Farm's web interface. This will involve the use of Windows App as a service program for a web browser. This method requires a bit more work than the other methods, but is also possible.
We recommend the first method. The other two do work, but require more work to set up.
Method 1: Access the remote resources from the menu of Windows App
This is the easiest method, and thus also the recommended one. The next time you open Windows App, all of your remote resources will be available immediately. There is no extra log on or start up required.
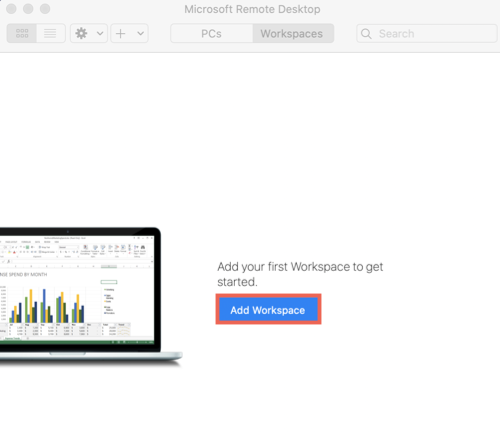
- Start MS Remote Desktop
- Click on the Workspaces tab and then click Add Workspace
- Then this form will appear. In the URL field, write farm.ntnu.no
In the User Account Field, click Ask when required, and choose Add User Account..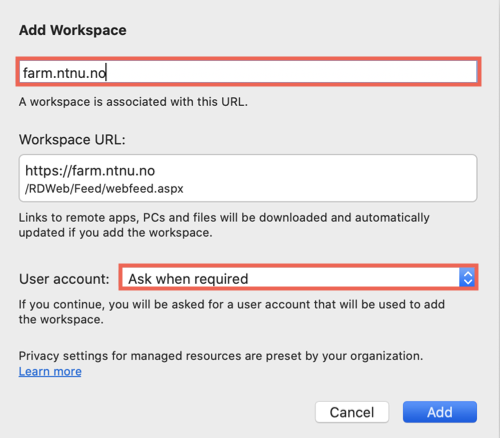
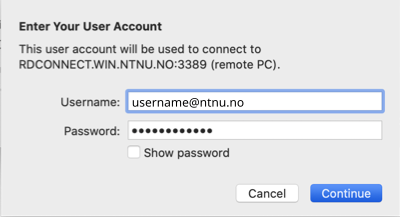
- A new window will pop up. Select Add User Account... in the dropdown menu and input your own username and password:
Username: "username@ntnu.no" as shown below.
Password: The password that is associated with your NTNU username..png)
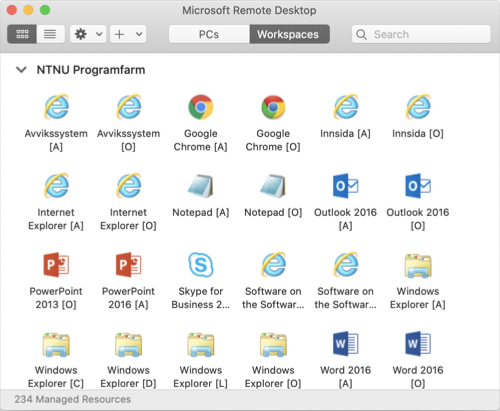
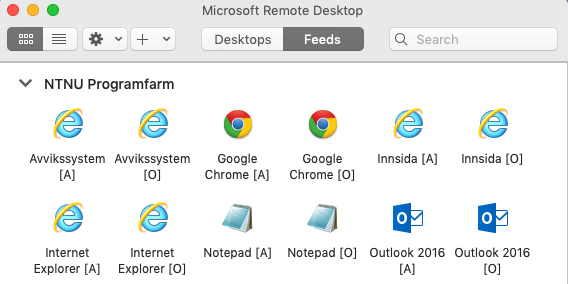
- Press Add and then Add again to close the form. All the software at the Software Farm is now accessible through the list inside Windows App:
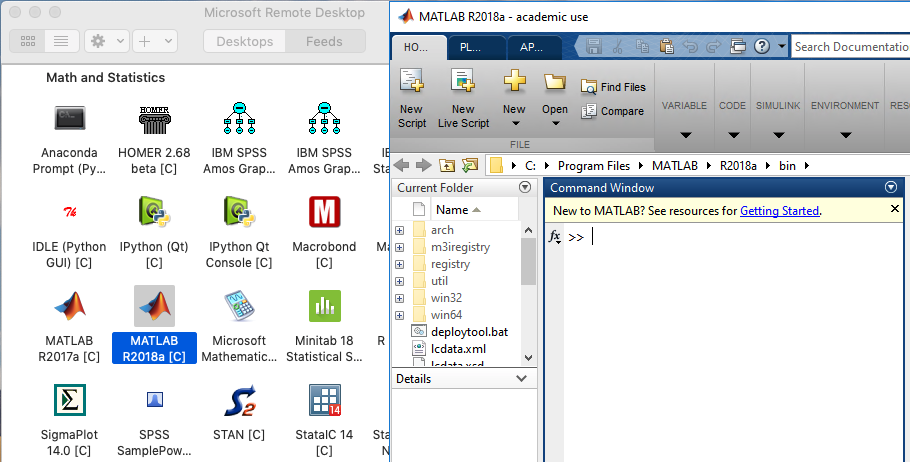
- If you click on an icon/program name, the program will run as if it was running locally on your own Mac desktop. In this example, we are running MATLAB:
Local disks and network disks
To redirect the disk on your local Mac to the remote program you have to do the following:
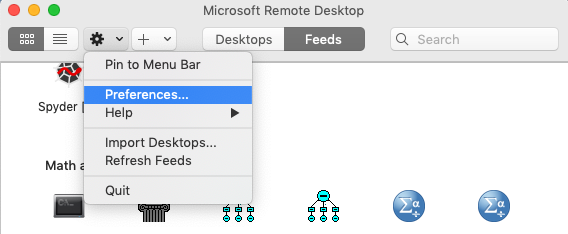
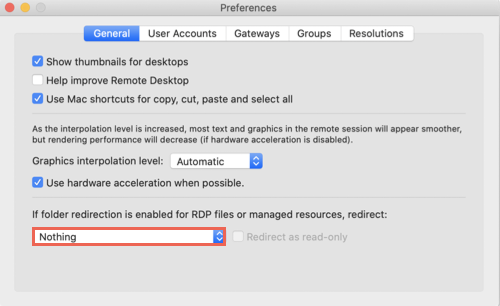
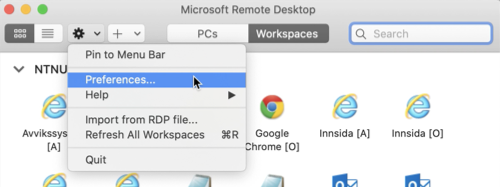
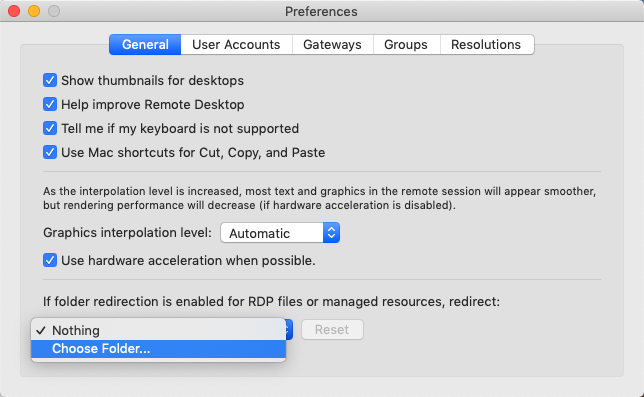
- Press the cogwheel icon on the top menu bar and select Preferences as shown under:
- Under the General tab press the bottom dropdown menu and select Choose Folder...

- A Finder window vil now appear and here you can select the folder you wish to redirect, for example Documents.
The folder you redirected will now be under This PC --> Devices and drives. This is an example of how your local disk looks like from inside a remotely running MS Word for Windows:
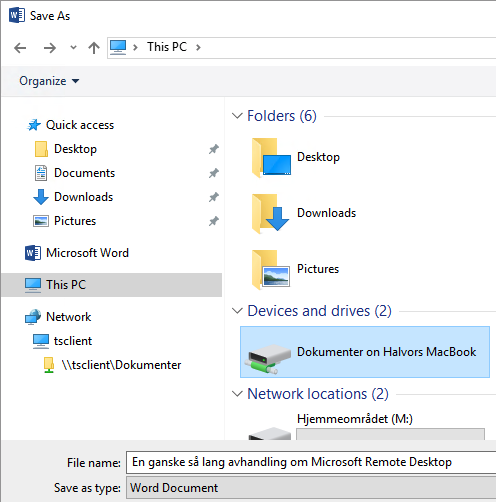
Here you can also see that the network disks that belong to your user account at NTNU are accessible in the the programs running remotely via the Software Farm. The screenshot shows this as "Hjemmeområdet (M:)".
Shared clipboard
The remote session and your local computer share a common clipboard. Your will be able to cut and paste between the remote session and local resources
Local printer
The default printer on your Mac will be forwarded to the remote session. In some programs it is also possible to set up a printer in the remote session (see below: add a printer).
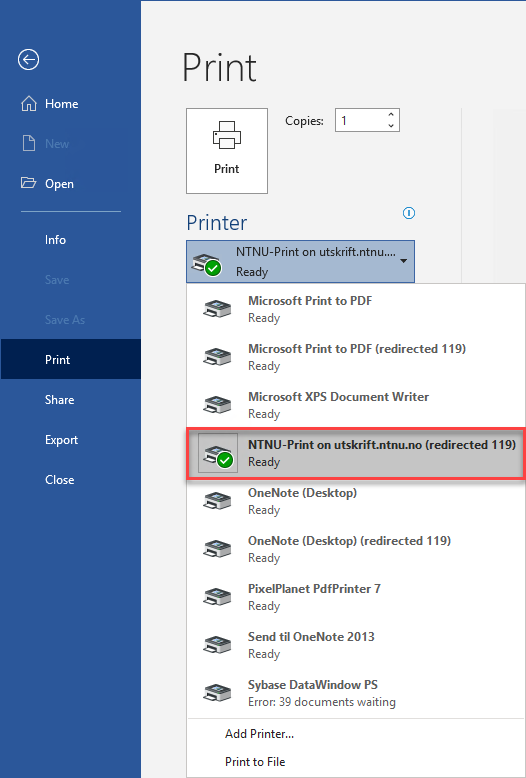
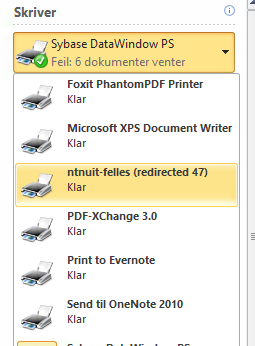
The forwarded printer has parentheses with the word "redirected" inside, after the printername, here shown in MS Word for Windows:
.png)
Method 2: Log on to the Software Farm's Windows desktop
This method is convenient if you need to work in a Windows environment with several of the Software Farm's programs open at the same time.
The Software Farm has eight Windows desktops that you can log on to:
| Remote Desktop | Who are to use it |
|---|---|
| adminfarm.ntnu.no | Employees of NTNU. Not businesses on the NTNU perimeter (SINTEF etc.) |
| officefarm.ntnu.no | Students at NTNU. Also accessible for employees of NTNU with a student account. |
| edgefarm.it.ntnu.no | Employees of the NTNU perimeter businesses |
| calcfarm.ntnu.no | Students and employees who need scientific software and software for mathematics and statistics |
| devfarm.ntnu.no | Students and employees who need access to developer software such as Visual Studio |
| legacyfarm.ntnu.no | Employees at the NTNU administration who need the outdated interfaces required to access NTNU's accounting software: legacy versions of Internet Explorer and Java |
| kavlifarm.it.ntnu.no | Persons affiliated with the Kavli institutions. |
| ielfarm.it.ntnu.no | Department of Electric Power Engineering |
In adminfarm, officefarm and edgefarm, you will find all the Microsoft Office applications and a rich diversity of other office tools.
On calcfarm you find various mathematical and statistical programs. It can be used by employees and students alike.
(Identifiers of these different farms are indicated under the program icon in the Farm's web-interface (Alternative 1, above), as [A], [O], [E], [C], [D], [L], [K] og [IEL]. Anyway, this is irrelevant for the user of the web interface.)
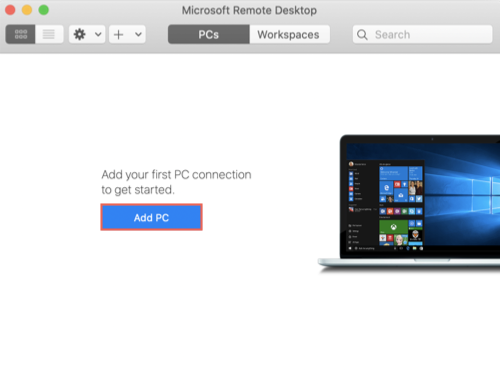
- Start Windows App, click the PCs tab, and select Add PC

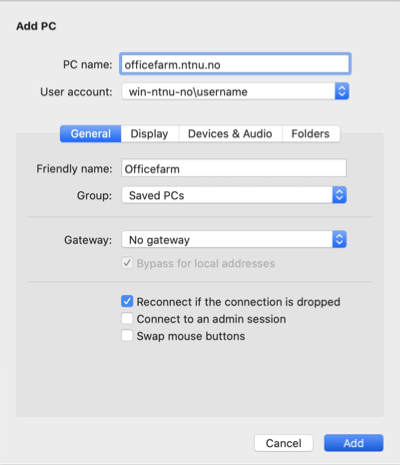
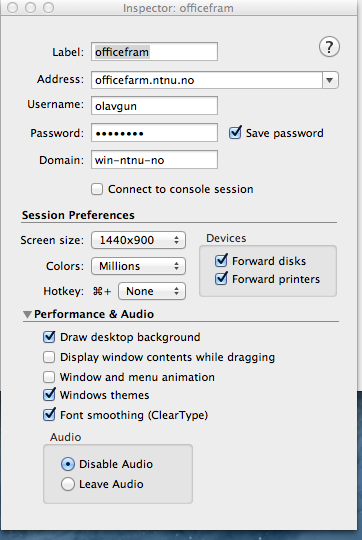
- Under the General tab fill in the fields as follows:
- PC name: write one of the desktops mentioned above, dependent on which remote desktop you are setting up a connection for. E.g.:
- officefarm.ntnu.no (office- and common programs for students and external personnel)
- adminfarm.ntnu.no (office- and common programs for employees)
- calcfarm.ntnu.no (Mathematically oriented programs, for example Mathlab)
- devfarm.ntnu.no (Programming oriented programs, for example Visual Studio)
- User account: Select the username that we added earlier (username@ntnu.no)
- Gateway: Choose Add Gateway...
- Gateway name: Fill in rdgateway.it.ntnu.no
- Friendly name: Leave blank, or choose a name of your choice to label the gateway
- User account: Choose Use PC User Account
- Friendly name: choose a name of your own choice to label the connection, in this example we use "Officefarm"
- If your mouse behaves strangely in the Windows desktop, mark the checkbox "Swap mouse buttons"
.png)
- Under the Display tab:
- Colors: "Highest".
- In this form, you can also choose whether you want to start the Windows session in full screen or inside a Mac window. It might be more practical to run the remote session in a local window, because you will then have the local resources on your Mac accessible outside of this window.
- PC name: write one of the desktops mentioned above, dependent on which remote desktop you are setting up a connection for. E.g.:
Manual forwarding of local disk and printer
When you use method 1 above, the local disk and default printer are automatically forwarded to the remote session. But here, when you connect to the remote Windows desktop, you have to manually set up disk and printer forwarding.
- Click on the Devices & Audio tab
- Tick the redirect boxes Clipboard and Printers
- For Play sound, choose On this computer so that sound from the remote session will be played on your local computer.
.png)
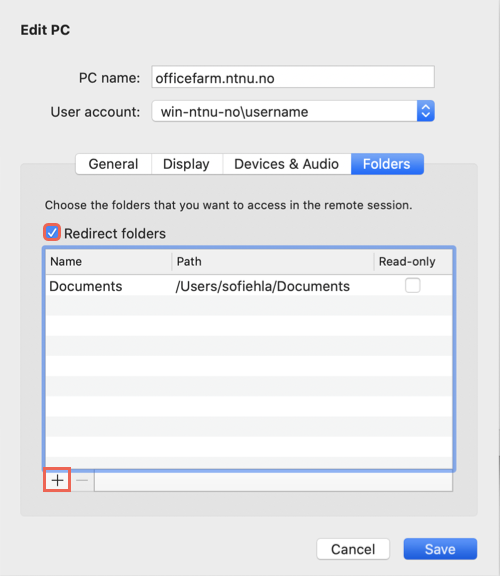
To forward your local disk to the remote session,
- Click the Folders tab
- Check the box Redirect folders
- Click the plus sign near the bottom left of the window
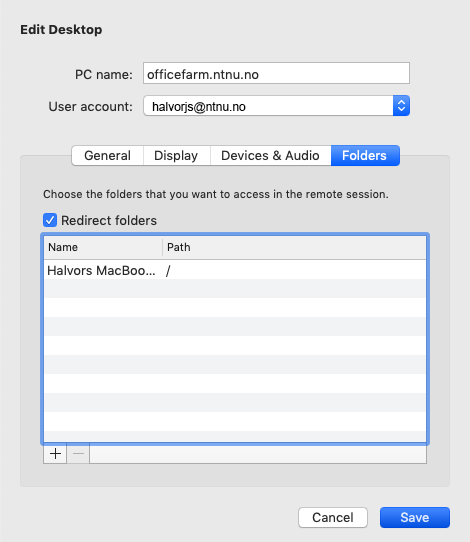
- This will open a Finder window where you have to choose which folder to forward, e.g. "\Users\Username\Documents" for the "Documents" folder only. In the example the entire Mac disk is made accessible (Path: /) in the remote Windows session:
.png)
- When done, press Add to close the window, and finally press Save!
Using the Windows desktop
How to connect
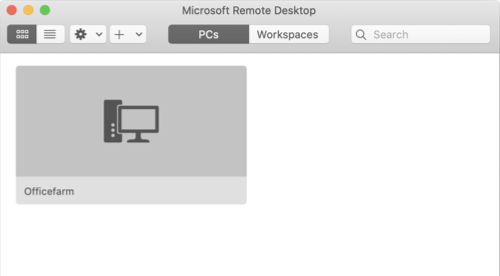
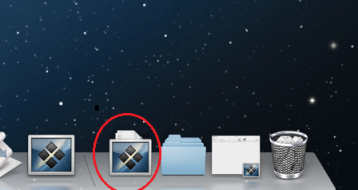
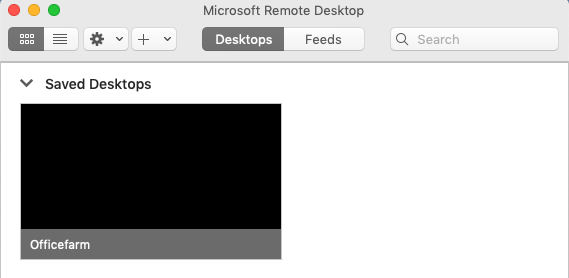
After closing the Add PC window, you will be returned to MS Remote Desktop's main window. You will then see that "Officefarm" now is available for connection. Activate the connection by double clicking on "Officefarm" in the list.

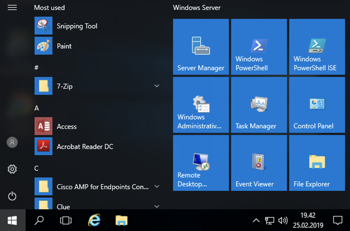
The Windows desktop officefarm will now be opened in a window on your Mac desktop. The Windows-desktop has the well known taskbar at the bottom, on the very left on this taskbar you will see a white Windows icon. When you press this icon you will open the Start menu. Here you can scroll between and open the available programs.
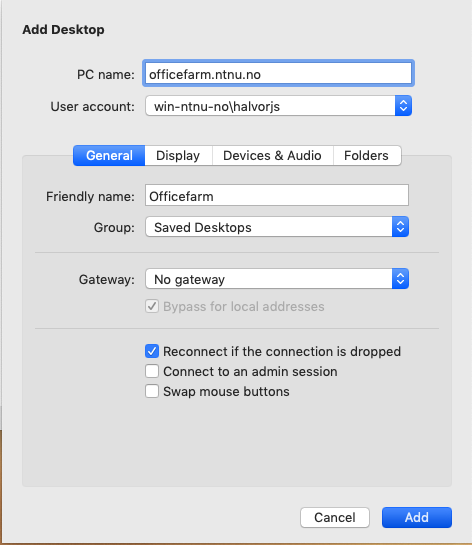
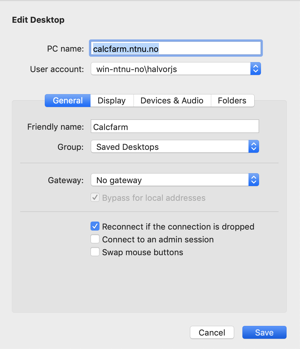
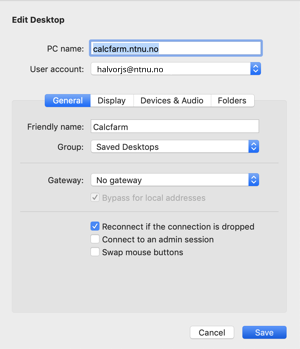
Adding an additional Desktop: Calcfarm
If you want to add another desktop you can do the following:
- Press the pluss symbol on the line at the top of the Windows Remote Desktop window
- Select Desktop to add a new desktop.
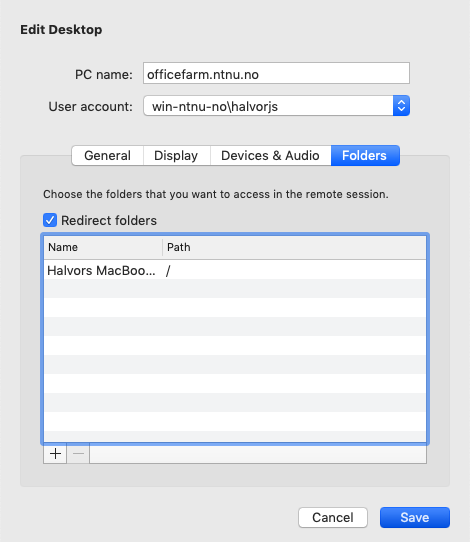
- Fill in the form, following the image below
- Change display, Device and Redirection settings to your liking by clicking the different tabs like we did before
- Save
.png)
How to log off
Close the connection:
- Click the Windows icon
- Click the powerbutton that appears above
- Hit Disconnect
Clipboard
The clipboard will be shared between the Windows desktop and your Mac, so that you can cut and paste between the Windows and the Mac programs.
Disks
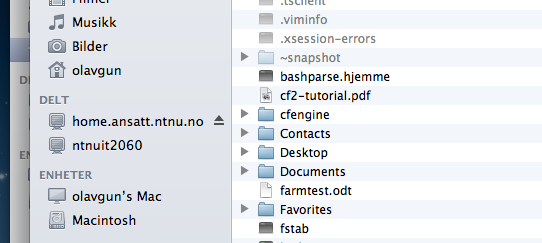
On the Windows desktop, the folders Libraries->Documents and My documents are shortcuts to the folder Documents on the network disk belonging to your account at NTNU.
When you click on Computer in the file manager in the Windows session, you will see that your NTNU network disk also is connected as "home directory (M:)" (Norwegian: Hjemmeområdet (M:)).

This is the disk that you usually connect to on your Mac with the address:
smb:// home.ansatt.ntnu.no/<yourNTNUusername>
The manually forwarded local disk
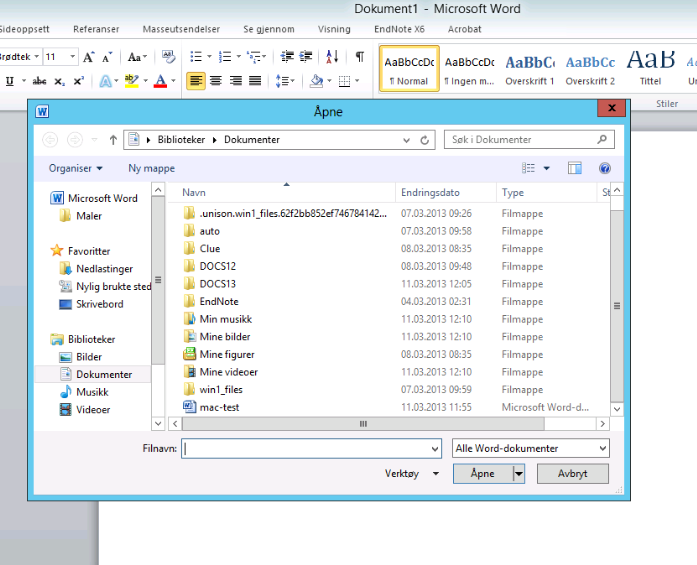
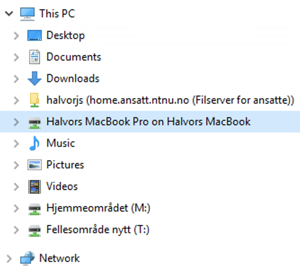
The folder or disk that you chose to forward in the setup form for the connection will now be accessible from the Windows desktop's file manager, or from the File menu inside the Windows programs as shown in the image below. Shown as "Halvors MacBook Pro on Halvors MacBook" in this example:
Location of the forwarded local printer
The forwarded local printer does not show up, as you might expect, in Control panel -> Hardware -> Devices and printers. But it will be readily available from inside the remote session programs.
.png)
Windows: How to use the start menu, desktop and add a printer.
A short introduction to the Windows 10 user interface can be found here.
If you don't have a local printer connected to your Mac, or if it is not forwarded to the remote Windows session, it is possible to add a printer from the Windows desktop. Here's how you do it:
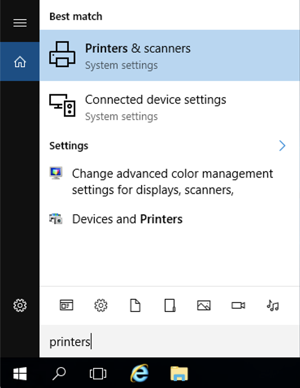
- Press the magnifying glass on the taskbar, right next to the Windows-icon
- Search for "Printers" and select Printers & scanners

- In the window that appears click "Add a printer or scanner" after a little while some blue text will appear just below saying "The printer that I want isn't listed", Click on this text.
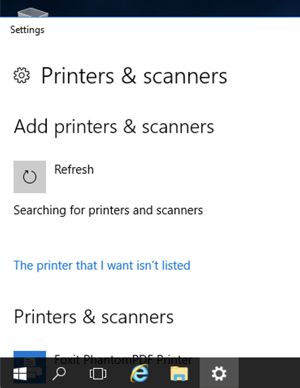
- This will open the following window:
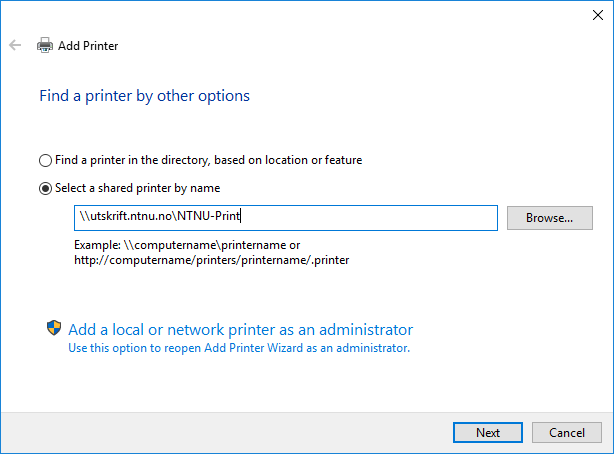
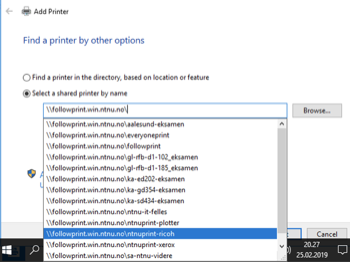
- Mark the option Select a shared printer by name
- Type in: \\utskrift.ntnu.no\
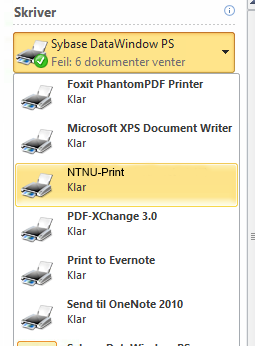
- This will open a long list of NTNU-printers. Select NTNU-Print, and press Next.
Finally, agree to set the selected printer as the default printer and we are done!
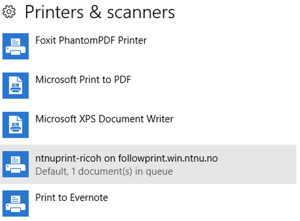
If you after all this then again search your way back to Printers & scanners, you will find that the printer we just added is marked with Default.
How to use the desktop and add a printer
If you don't have a local printer connected to your Mac, or if it is not forwarded to the remote Windows session, it is possible to add a printer from the Windows desktop.
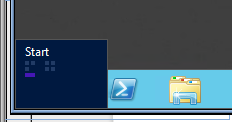
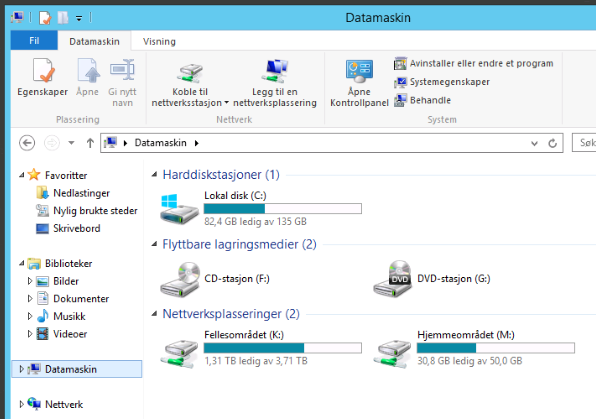
- On the Windows desktop, open the file manager, and in the file manager choose Computer.
- The icon for the Control Panel will now appear in the toolbar in the file manger
- Click on the Control Panel icon to open
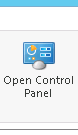
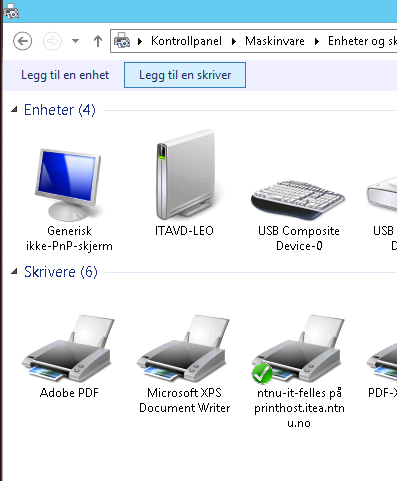
- Choose Hardware, and then View devices and printers from the Control Panel
- The panel will then look like this. Click Add a printer (Here shown in Norwegian as the blue field: "Legg til en skriver").

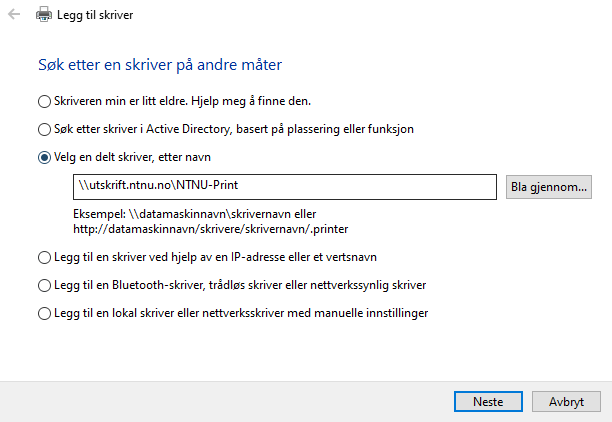
- A panel will be opened with a list of printers, and the text "->The printer that I want isn't listed" below it. Click on that text, and the panel will change to this:
.png)
- Click Select a shared printer by name, and fill in the field with: \\utskrift.ntnu.no\
- The final backslash is important, because that brings up a long list of printers available at NTNU. Select NTNU-Print.
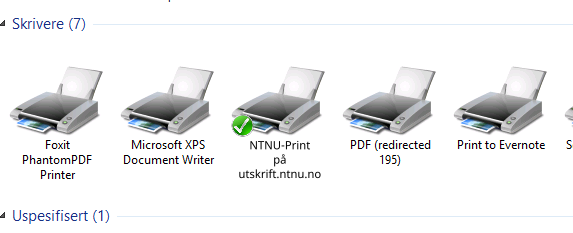
- When that is done, you will return to Control panel->Hardware->Devices and printers, where you will see the printer you have selected with a green tick next to it:
.png)
Method 3: The web interface for the Software Farm
Using the web interface, all the Software Farm's applications can be opened, as long as you have the Windows App installed.
Opening the Software Farm's web interface
- Open the address https://farm.ntnu.no in your web browser
- Log on with your ordinary NTNU username and password.
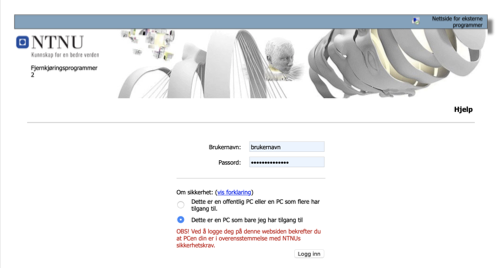
- When logged in, you can see the icons of all the programs installed and available on the Software Farm
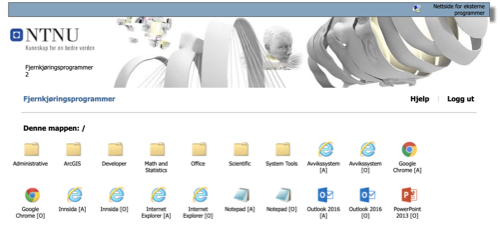
Using the web interface
- Click on the program you want to launch. In this example, we are opening Word 2016.
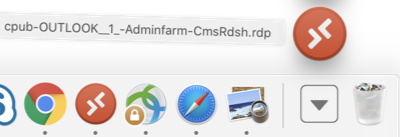
- The application file will be downloaded to you local folder for downloads
- The name of the file contains the name of the remote Windows program your want to run. For example the file is called cpub-WINWORD-Officeapps.CmsRdsh.rdp if you wanted to run Word for Windows.
- The name of the file contains the name of the remote Windows program your want to run. For example the file is called cpub-WINWORD-Officeapps.CmsRdsh.rdp if you wanted to run Word for Windows.
- Double click on the rdp-file in the "Downloads" folder to open the application.
- Windows App will start, and establish a new connection to the Software Farm based on the data in the rdp-file.
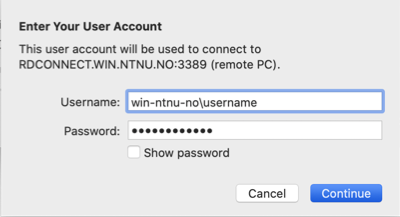
- Fill in your NTNU username and password. Note that your username has to be written as username@ntnu.no
.png)
- Click Continue
- Windows App will now run your selected program on your Mac desktop, as if it were running locally from your own disk
Local disk, local printer and clipboard when using the web interface
Your shared disk/folder will be redirected in the same way as described earlier, as long as you selected this in the cogwheel --> Preferences... --> General menu.
Local printers will be forwarded to the remote session and appear as: Printer name (Redirected xxx), for example NTNU - Ricoh (redirected 186)
The clipboard is shared and common for remote and local programs.
Using the Software Farm in your browser
You can use the software farm in the browser without installing any new software on your machine. This requires an HTML5-compatible browser, but that should not be an issue. Simply follow the link above and log in with your normal NTNU username and password and choose the program you wish to use. While this could introduce a bit more lag than connecting to a remote desktop, this is a way to use the software farm without installing anything or doing anything in particular, a quick and easy solution!
Contact
Orakel Support Services can help you if you find this description confusing or if you simply can't seem to connect to the Software Farm.
We would really like feedback on this page, or suggestions for ways to improve it. Send an email to orakel@ntnu.no.