Home exam with hand drawings - Kunnskapsbasen
Home exam with hand drawings
Information for students regarding home exams which utilize hand drawings.
Norsk versjon - Hjemmeeksamen med håndtegninger
Topic page for exams | Digital home exam for students | Pages labeled with exam
Handing in hand drawn answer sheets in a home exam
Digitized paper responses may be used as a supplement to a home exam.
The candidate is responsible for paper sheets and writing tools.
Hand drawn paper responses can be digitized by using a document scanner or alternatively by capturing an image with a camera/phone, and consequently uploading the files as a part of the answer in Inspera Assessment. Please note that this will not be possible for all subjects, as the course administrator is responsible for information and for making the option available. Therefore, make sure that you read through the entire exam and inform yourself whether drawings may be used or not.
Black/blue pen is not a requirement, unless the exam informs you otherwise, you may also hand in drawings with coloured pens.
Make sure that your answer sheets are readable, as with ordinary school exams, unreadable parts of the answer may be dismissed.
You are expected as a student to be familiar with the tools and the use of these before the exam.
We recommend that you read through your answer sheets before and after sending them in.
File uploads: All files must be uploaded before the exam time expires. For home exams with a duration of up to and including 6 hours with hand drawings, +30 minutes will be added to the base exam time for digitizing the hand drawings and uploading. The remaining time of your exam will always be visible in the upper left corner of the Inspera Assessment.
Tips for getting good results:
- Make sure that the lighting is good.
- Frame the image such as it only includes the answer sheet, either by cropping it or being observant of what is on and around the sheet.
- Hold the camera as straight as possible with a clean lense and minimal movement.
- Double check your images and take more pictures rather than relying on a single image, keep control over which image will be a part of the answer.
Hand drawings must be sent in as PDF-files as long as no other information has been disclosed.
Ever answer sheet must be noted with:
- Subject code
- Date of exam
- Candidate number
- Task number
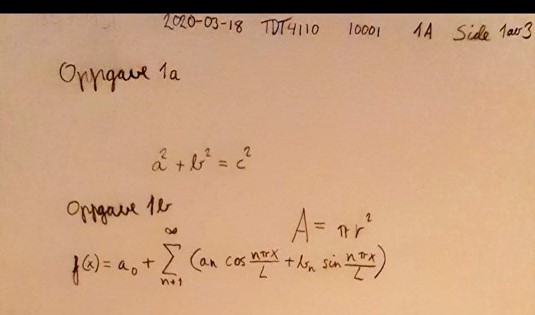
Example:

Recommended software for digitizing images
We recommend the mobile app "Microsoft Office Lens - PDF Scanner" if you wish to use your phone to digitize the answer sheets. The software is available for both Android and iPhone in their app-stores and are free to use. The app has the functionality of cropping and exporting multiple images to PDF without the use of other tools.
You should still take advantage of the method you are the most comfortable with. The end product is the most important. Options include Genius scan, or USB.
Get to know Office Lens
Following is a short user manual for Office Lens
-
When you first start up the app you will be prompted to accept various accessibilities like access to your files and camera. Please press ok to allow Office Lens access to your device.
Press OK to allow Office Lens to work on your device.
.


-
Press "Start Scanning" and you are ready to scan your hand drawn answer sheets. View "How to use Office Lens" for more instructions.
How to use Office Lens
Remember to write down which exercise the answer sheet is referring to!
-
Step 1 – Take an image of the answer sheet using Office Lens
Leave Office Lens on the "Document" function, as it will automatically search for and adapt to your drawings. Press the camera button as soon as you see the orange frame around the sheet.

-
Step 2 – Chose "Add New" if you have several answer sheets

Press the "Add New" button in the bottom left corner to add more sheets to the same PDF. Press "Done" when you are happy with the results.
Note! We recommend using plenty of lighting when taking the image, and double checking that all formulas and answers are readable.
Creating PDFs in Office Lens and exporting to OneDrive
After you have captured your images in Office Lens press "Done" to use the native function in the app which allows you to put all the images in one PDF-file and export it to, for example, your OneDrive account, or locally to your device. The easiest method is however to export to OneDrive.
Firstly check if you are logged in to your OneDrive account.
- If you are not logged in, press the +-button and choose "add account"
- Press "logg in" and write your username@ntnu.no

Continue by filling in your regular NTNU username and password in the window.

- After logging in, press PDF and choose "Save"

Press "Onedrive" if you wish to transfer the images to a text editor such as MS Word.

- Find your PDF in Onedrive and upload it to the assignment in Inspera.

Alternatives to Onedrive
-
Exporting images to your computer
There are a lot of good alternatives for exporting images from a mobile device to a computer, but we recommend using MS Office Lens with the "Document" function for the best possible result. Use the method you are the most comfortable with however. You can find different options below:- Using a USB-cord or NFC to transfer the images to your computer.
- Sending the images through other web-based services. Like for example sending yourself an email.
-
gathering all your images into one PDF
There are several options for doing this, but we recommend using MS Word from the O365-package -> Save as PDF:
- You may add your images as a Word-file and then save as a PDF using "Save as" in the "File" menu in Word.
Follow this user guide if you are unsure how to do it - If you haven't installed Word you can go to https://farm.ntnu.no and use the Office-package from there. More information is found in the link below:
https://i.ntnu.no/wiki/-/wiki/English/Software+Farm
- You may add your images as a Word-file and then save as a PDF using "Save as" in the "File" menu in Word.