Blackboard - Qwickly tool - Kunnskapsbasen
Blackboard - Qwickly tool
Qwickly is a tool that allows you to make updates in several Blackboard courses at the same time.
Norsk versjon - Qwickly-verktøyet
Topic page for Blackboard | Pages labelled with Blackboard
Qwickly
Qwickly allows you to update several Blackboard courses at the same time. You can make an announcement, upload files and send e-mails etc. You can choose what courses you would like to update.
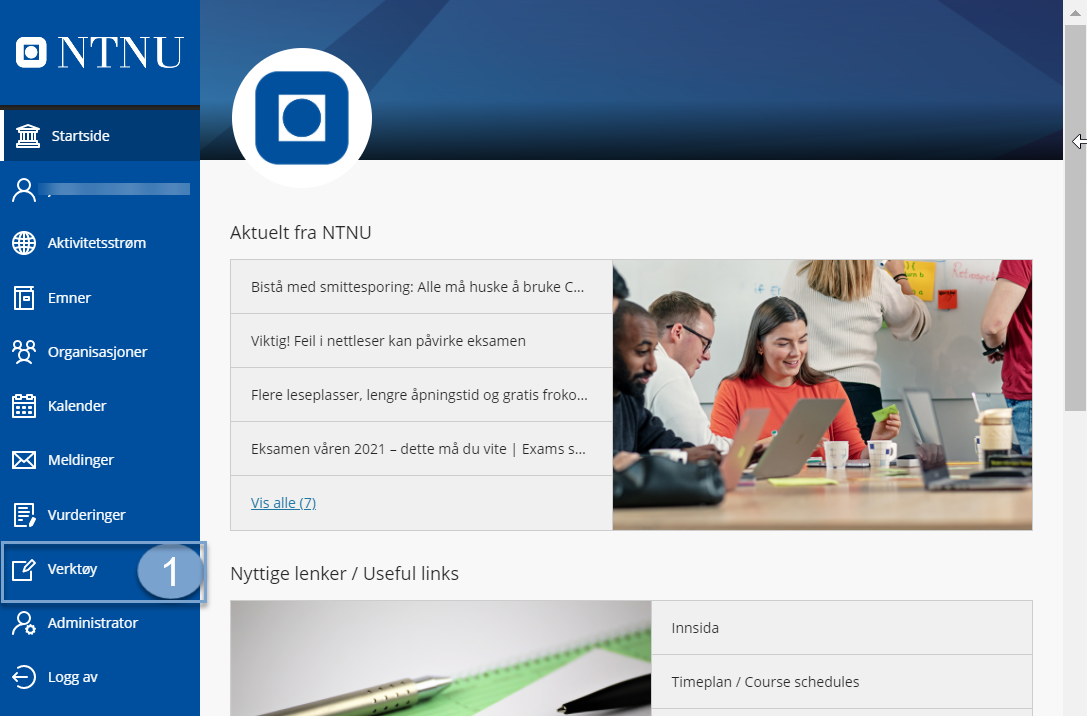
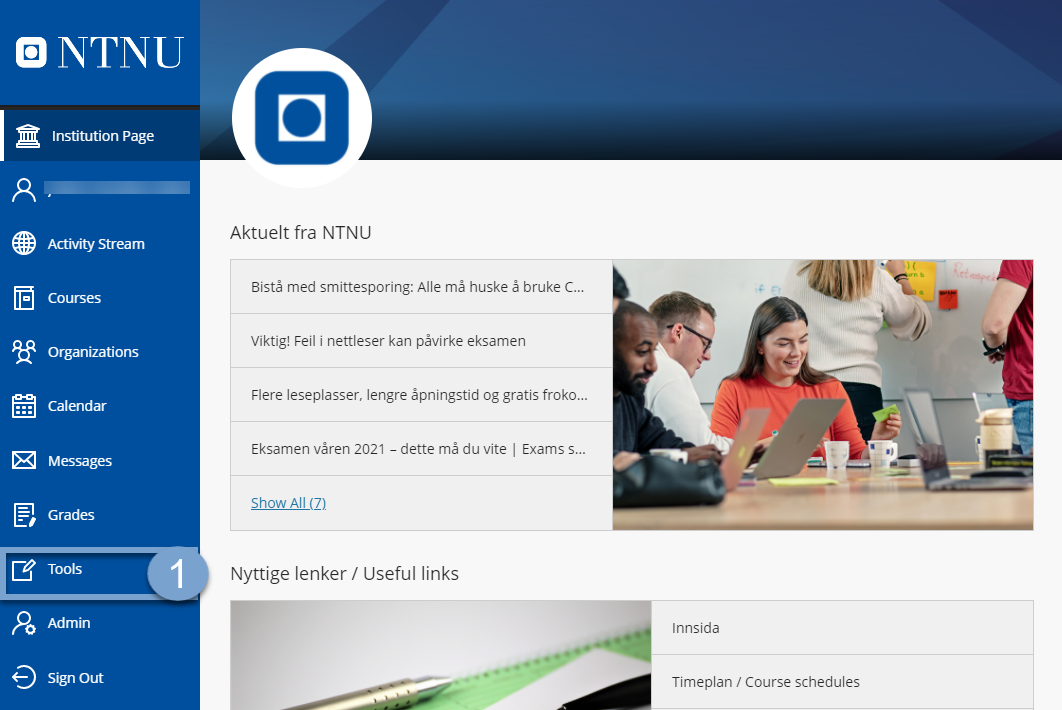
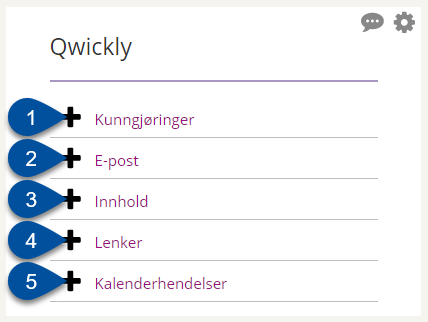
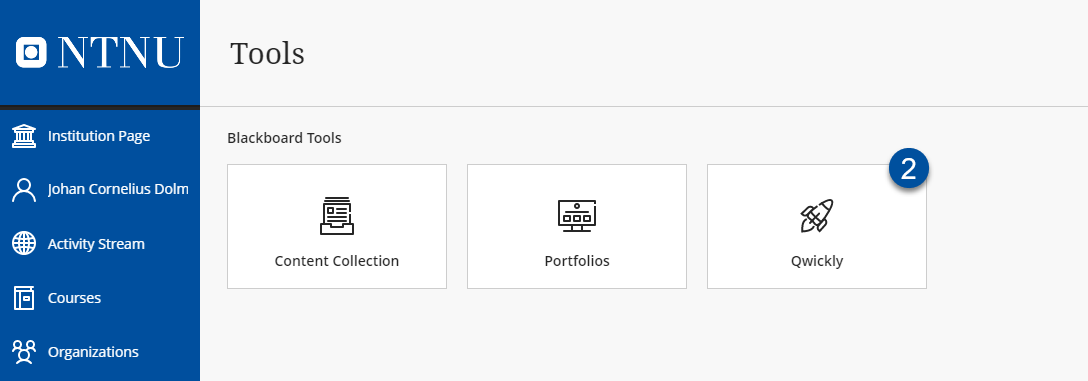
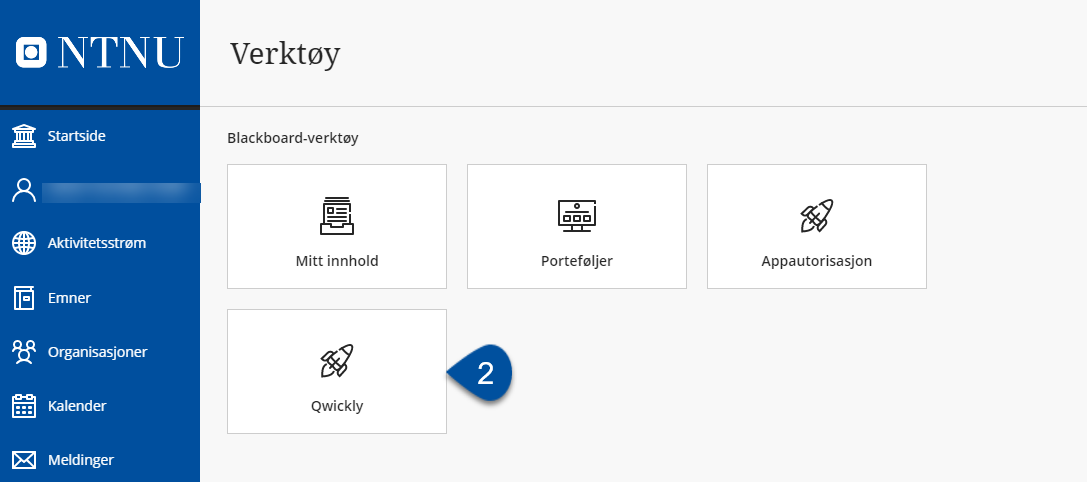
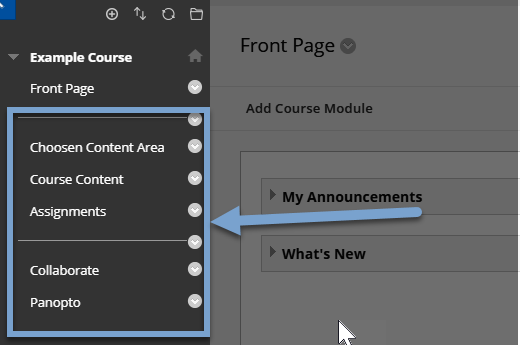
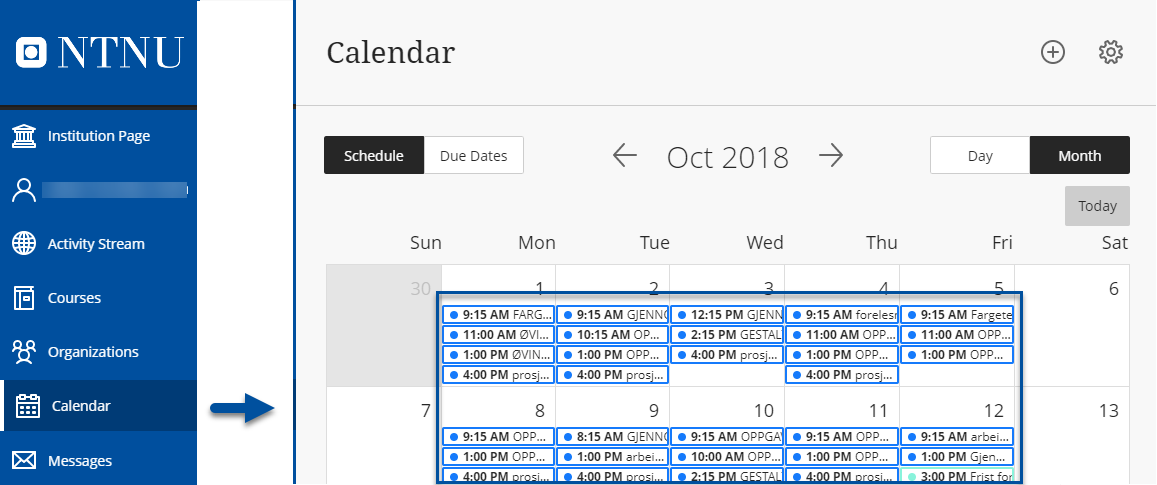
Find the Qwickly tool
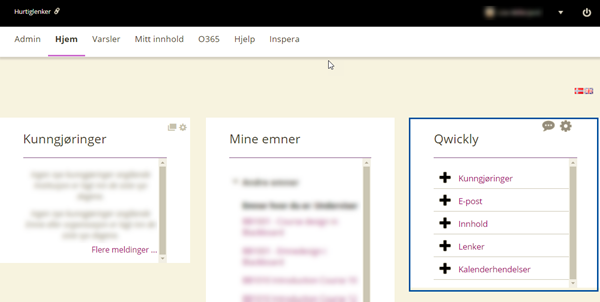
You can find the Qwickly tool on your Blackboard Learn home page, in the right column.
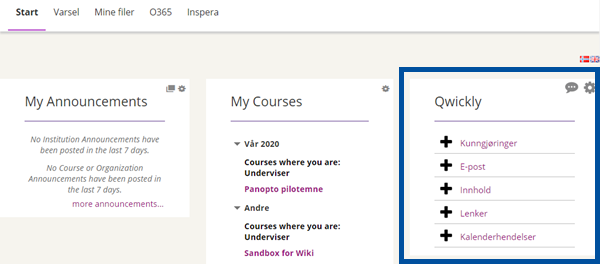

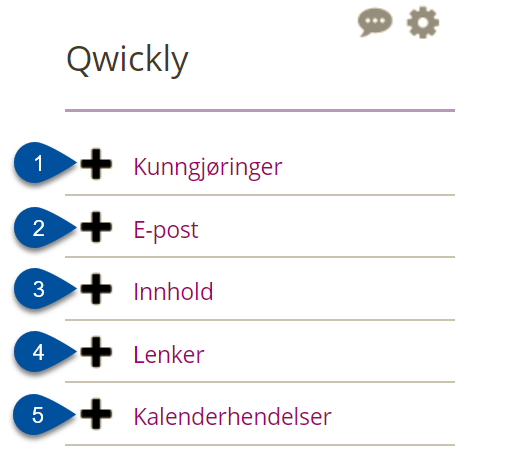
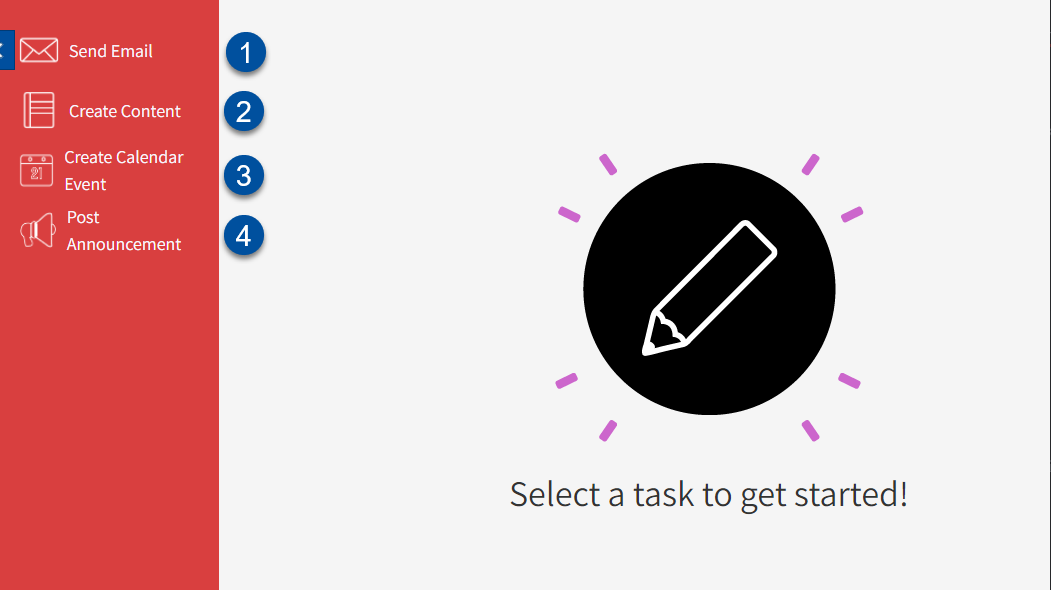
You can use the Qwickly tool in Blackboard to:
- Create announcements (1)
- Send email (2)
- Create content (3)
- Add links (4)
- Add calendar events (5)
in multiple Blackboard courses at the same time. This keeps you from having to do the same thing more than once if you want to make identical updates to more than one course.
Creating announcements
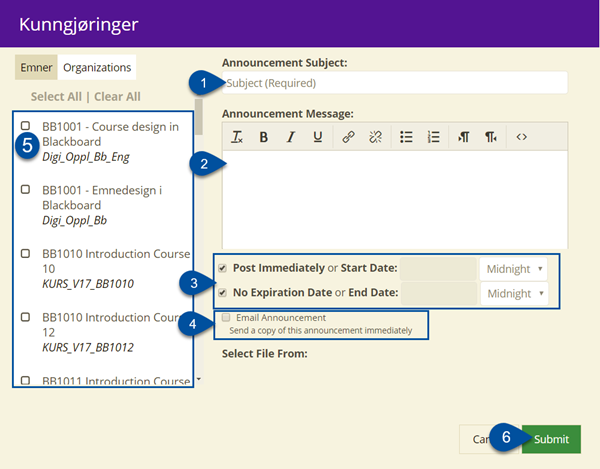
Start by clicking on Kunngjøringer (1) (Announcements) in the Qwickly box.
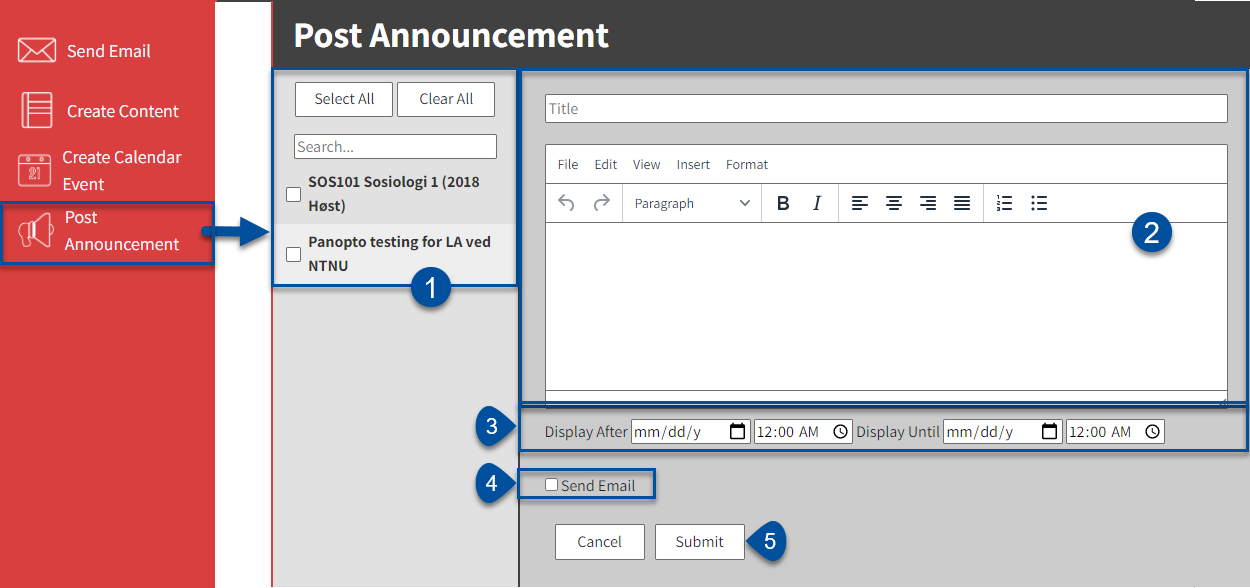
A box will appear where you can include all the details of your announcements:
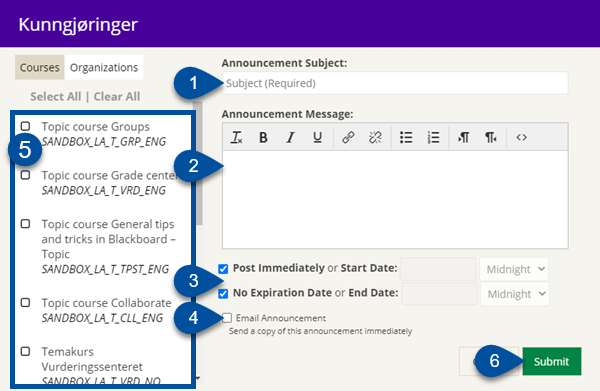
- Enter the subject of the announcement. (1)
- Enter the message of the announcement. (2)
- Choose any date restrictions to your announcement (3): Choose a start date to show the announcement after this date and choose and end date to show the announcement until this date.
- Check off Email announcement (4) if you want to send an email announcement to the participants of all the Blackboard courses you are submitting the announcement to. Students will still be notified about this announcement if you do not check this box.
- Choose what Blackboard courses to publish the announcement to (5). You can also choose organizations.You choose courses by clicking on them and if you change your mind you can click on it one more time to remove it.
- Click Submit (6) to post the announcement.
The announcement will now be posted to all the Blackboard courses you selected.
Sending emails
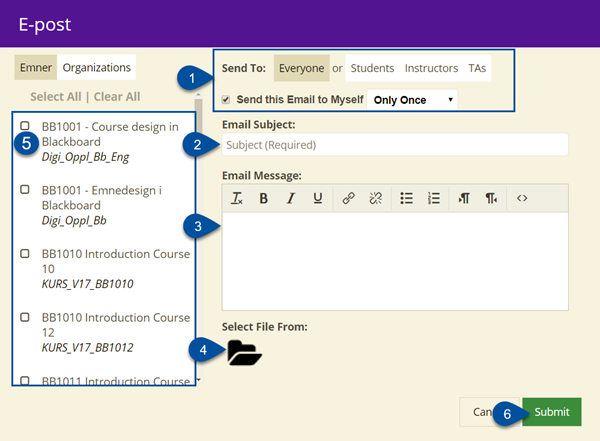
Start by clicking on E-post (2) (Email) in the Qwickly box.
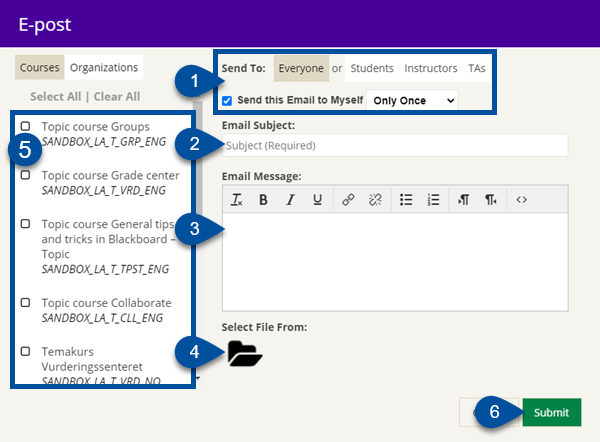
A box will appear where you can include all the details of your email:

- Choose who to send the email to (1): You can choose everyone in the course or you can send to only the users in the course that are students, instructors or TAs (student assistants). By checking the box you will send the email to yourself as well, and you can choose to send it to yourself only once or once per course you are sending it to.
- Enter the subject of the email (2). This will appear in the subject line as usual.
- Enter the message of your email. (3)
- If you want to attach a file to the email, you can choose the file from your computer by clicking on the computer symbol. (4)
- Choose the courses whose members you would like the email to be sent to. (5)
- Click on Submit (6) to send the email.
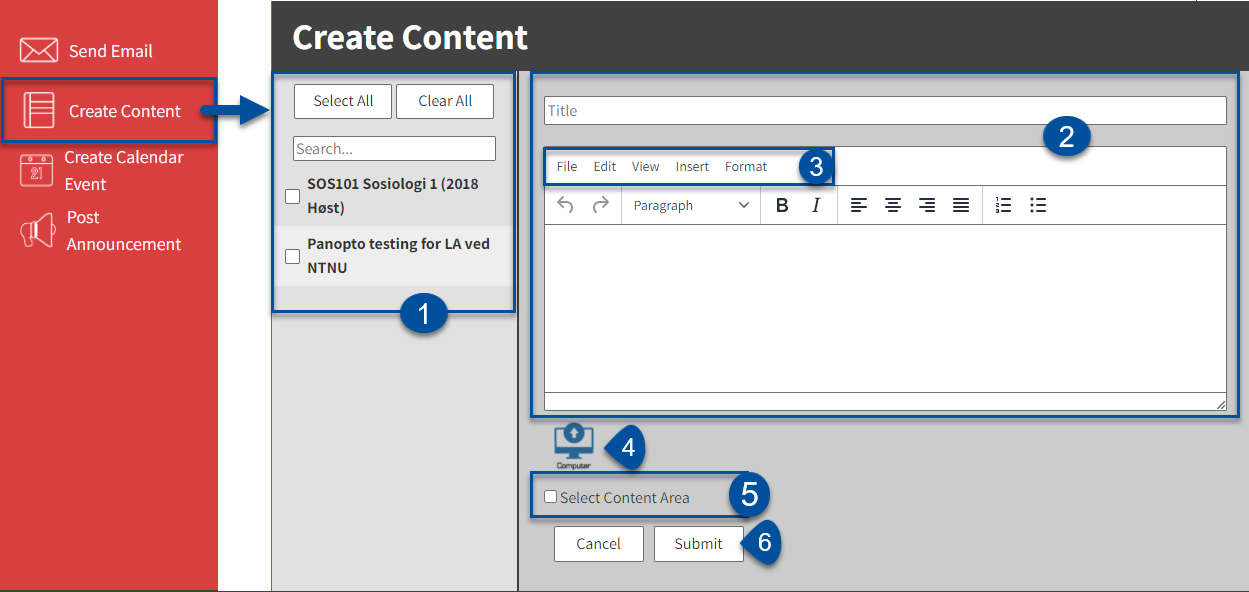
Adding content
Start by clicking on Innhold (3) (Content) in the Qwickly box.
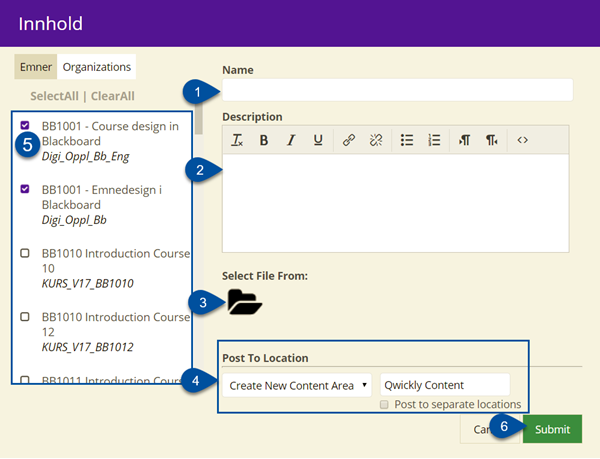
A box will appear where you can include all the details of your content:
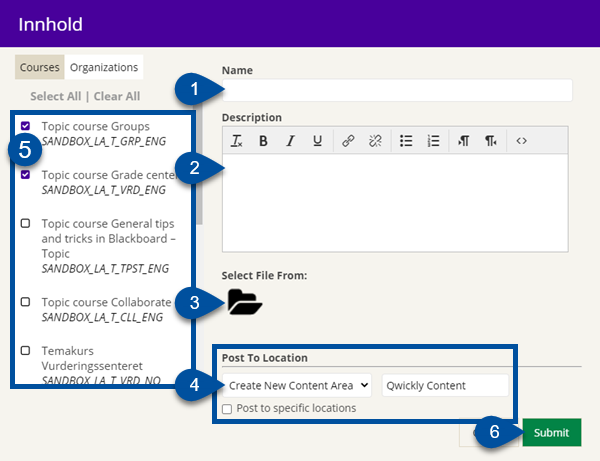
- Enter the title of your content. (1)
- Enter the content you would like to post. (2)
- If you would like to add a file to your content, click on the computer symbol (3). Then click on Choose file to browse your computer.
- Choose where the content should be posted within the courses. (4) More information on this is below.
- Choose what courses you want to post the content to. (5)
- Click on Submit (6) to post the content to the chosen courses.
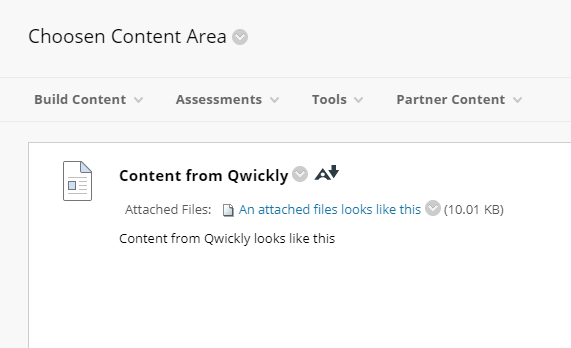
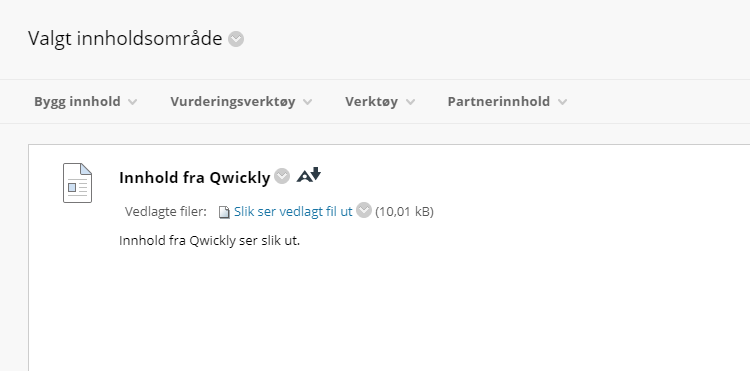
Choose where to post content
You can publish content to a single course, or multiple courses simultaneously. You can either publish the content to the same content area for all courses (e.g. sources and syllabus), or select the content area for each course individually.
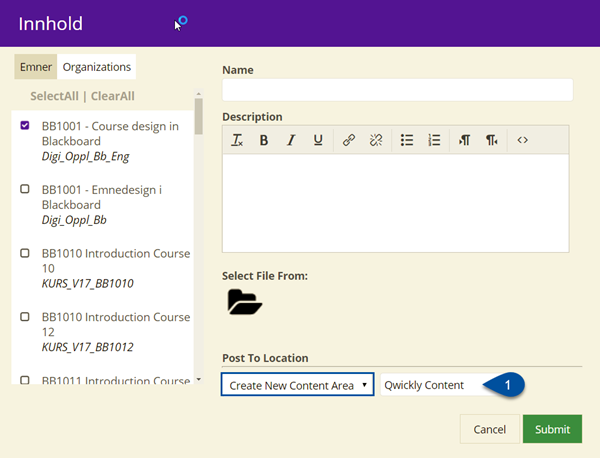
If you just want to publish to a single course, or you want to publish to the same content area in multiple courses; simply use the dropdown menu under Post To Location:
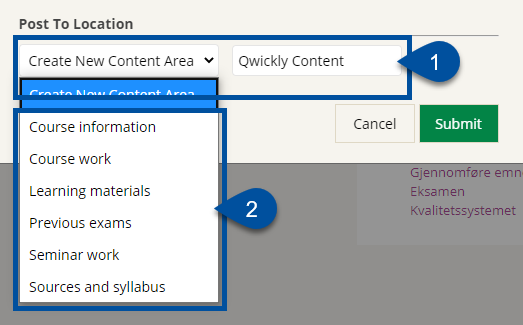
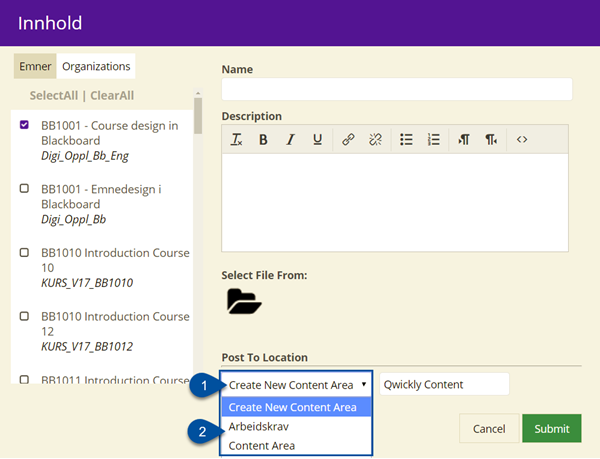
Here you have two options:
- Create a new content area by selecting Create new content area (1) and give it a name.
- Select an existing content area from the dropdown menu (2).
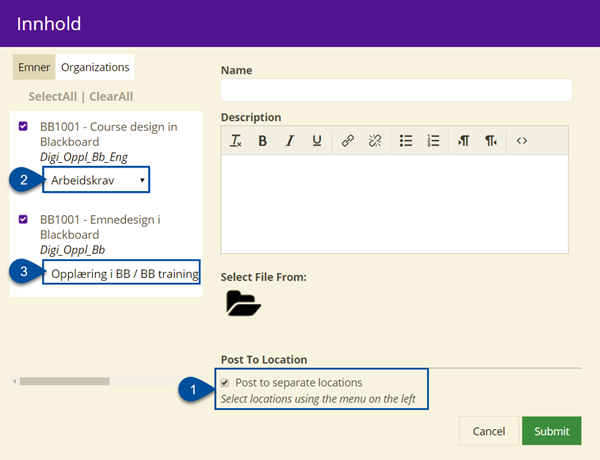
If you want to publish content to different content areas for each course; check Post to specific locations (1):

Then you can select a content area for each course you selected in the list on the left (2).
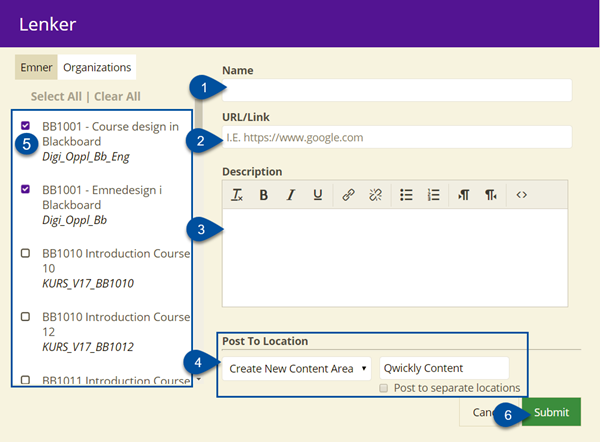
Adding links
Start by clicking on Lenker (4) (Links) in the Qwickly box.
A box will appear where you can fill in the details of your link:
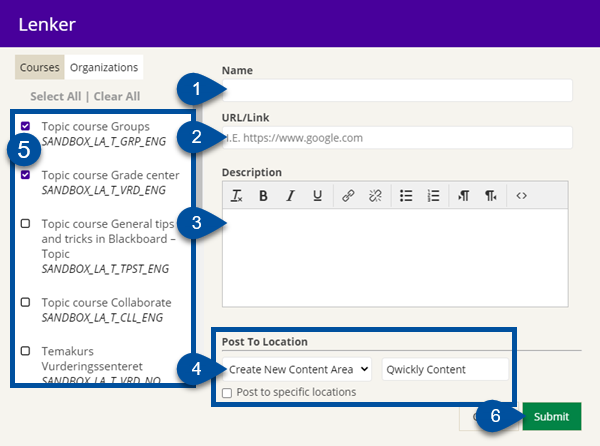
- Enter a name for your link. (1)
- Enter the URL (the actual link). (2)
- Enter a description of the link. (3)
- Choose where to post the link (4). For a description on how to choose where to post the link in different courses, see Choose where to post content above.
- Choose what courses to add the link to. (5)
- Click on Submit (6) to post the link to the courses you chose.
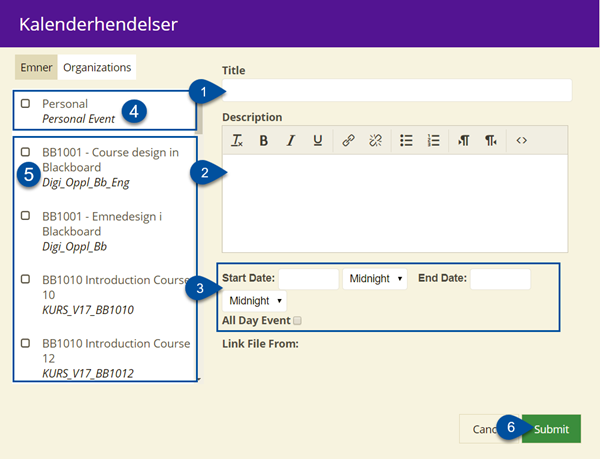
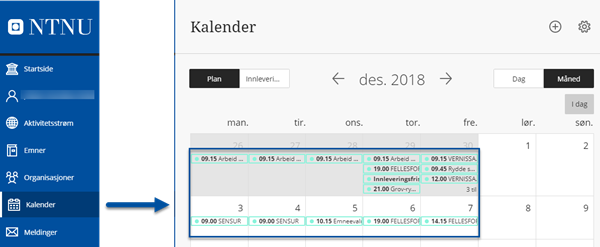
Adding calendar events
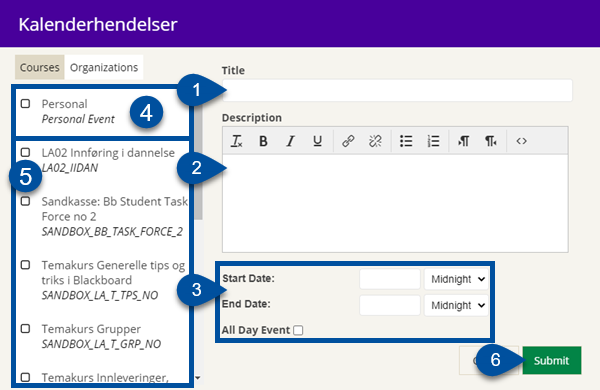
Start by clicking on Kalenderhendelser (5) (Calendar events) in the Qwickly box.
A box will appear where you can include all the details of your calendar event:

- Enter a name for your calendar event. (1)
- Enter a description of the event. (2)
- Enter a start and end date and time. (3)
- If you check Personal (4), the event will be private to you and not posted to the calendar of any courses. It will only appear to you.
- Choose what courses, if any, you would like the event to be added to. (5)
- Click on Submit (6) to post the calendar event to the chosen courses.
See also
Contact
Orakel Support Services can help if you have any questions or difficulties.