Blackboard - Tools in Collaborate - Kunnskapsbasen
Blackboard - Tools in Collaborate
This page shows you how some of the different tools in Blackboard Collaborate Ultra function.
Norwegian version - Verktøy i Collaborate| Blackboard for employees
Blackboard Collaborate Ultra contains many different tools that can be used to facilitate student active learning and collaboration.
Tools in Collabrate
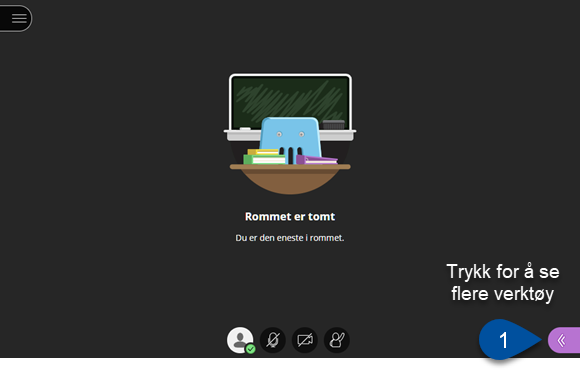
Most of the tools in Collaborate can be found in the Collaborate panel. To open this, click on the purple arrow (1) in the bottom right corner.
Your screen will look similar to this (it depends slightly on which rights you have in the session). The Collaborate panel will be on the right hand side (1):
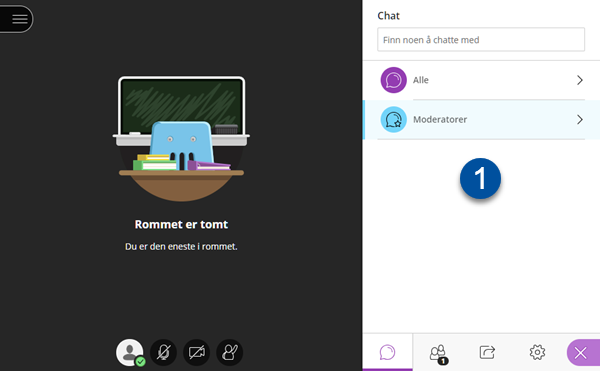
At the bottom of the panel you can navigate through different tabs. Each tab contains different functions which can be used to facilitate student-active learning.
Chat
The first tab has a picture of a speech bubble on it – this is chat tab. Here you can write messages to others in the room. By default, students have access to this tool.
NB! It is important to inform students / participants that private chats – if they are allowed - can be monitored by moderators in a session. This is to help avoid inappropriate comments and/or displays of sensitive information the participant may not wish others to see.
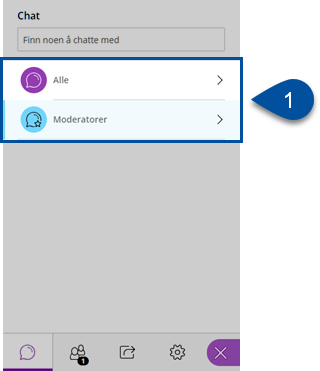
The available chat channels will be listed in panel (1). These depend on the rights you have in the session. The shared chat channel “Everyone” allows you to communicate with everyone in the room. You can only see chat messages that have been posted after you enter the room, you can’t see the whole chat history.
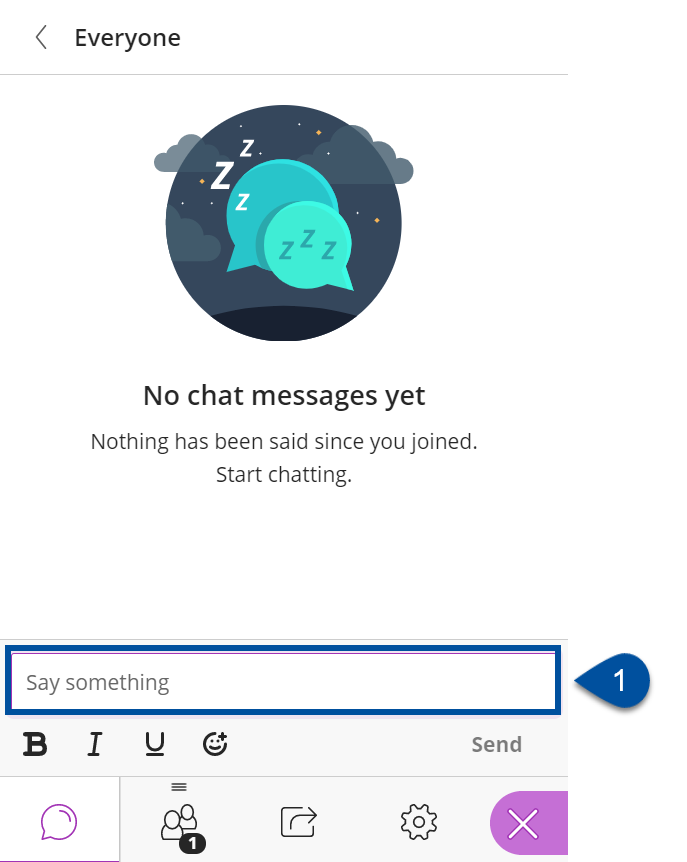
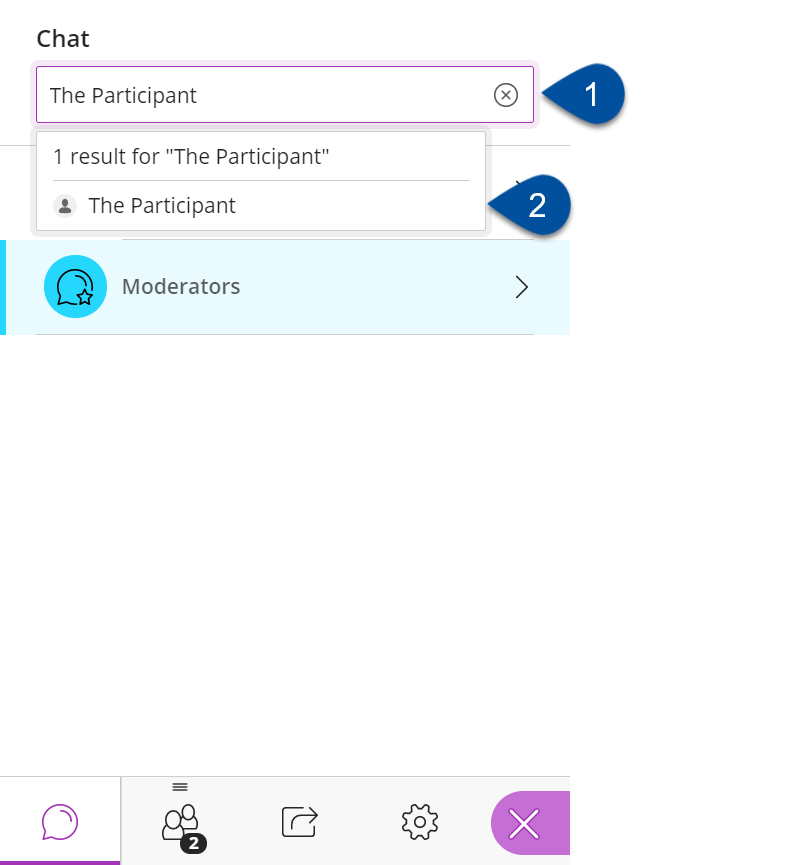
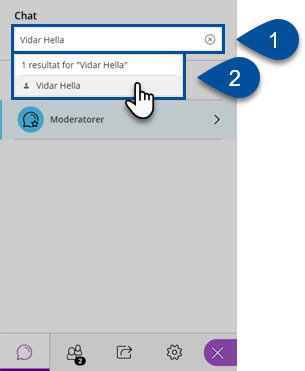
- To send a chat message, click on the channel you want to use (1)
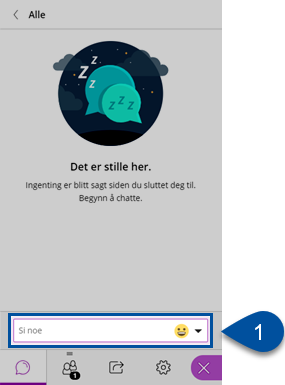
- After this you write in the chat box (1) and click enter to send the message.
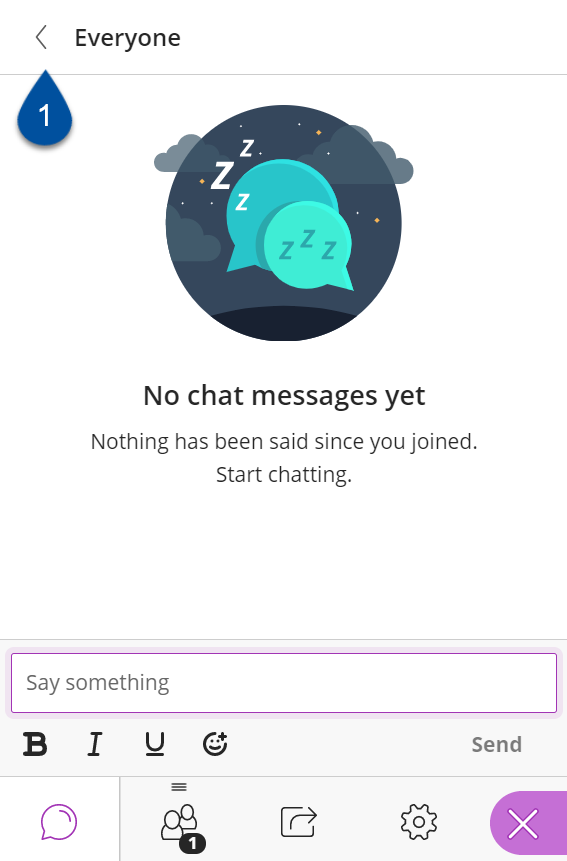
- To go out of the channel and back to the previous panel you click on the return arrow in the top left hand corner.
Participants and raising your hand
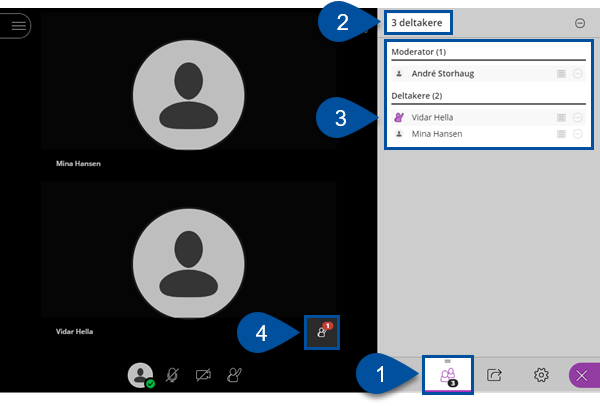
To see who is in the session, click the two-person icon(1). Then you will be able to see the number of participants (2) and a list of names of everyone in the room (3). You can see who raises their hands when the icon to the left of the name turns purple. There is also an icon that shows how many people raise their hands (4). The participants with their hands’ raised will be listed in chronological order.

The Whiteboard
If you want to brainstorm with others, you can use the whiteboard-function in Collaborate. On the whiteboard you can draw, write and more on your own or with the other participants.
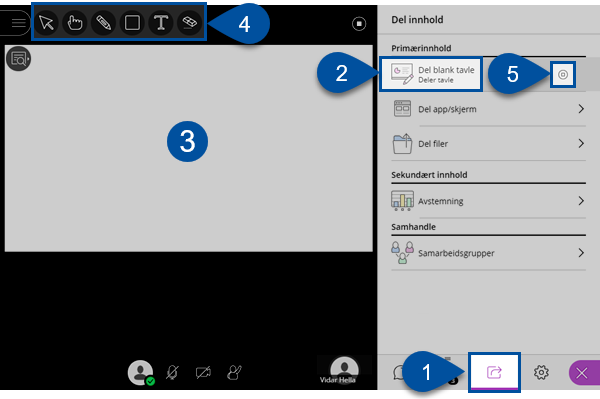
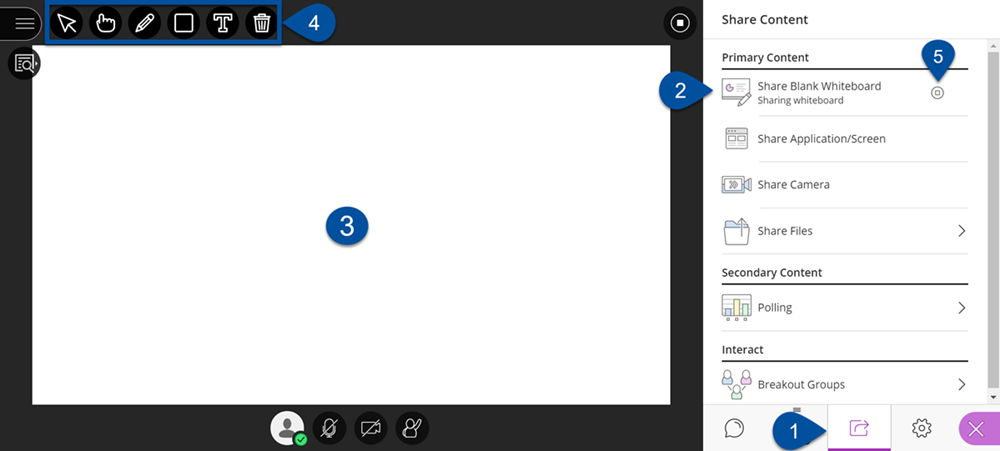
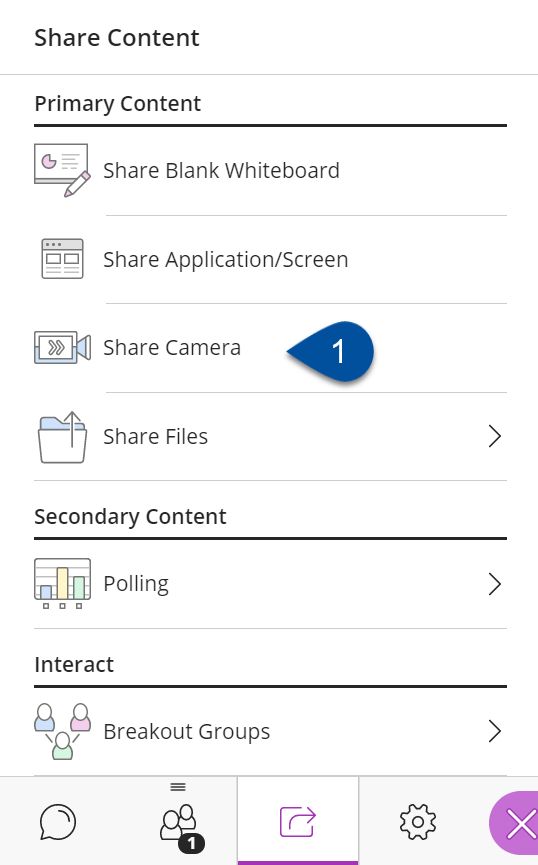
To start a whiteboard, first click on the Share Content icon (1), then click Share whiteboard (2). You will now be able to see the board in the display window (3). At the top of the page you will find tools for drawing and writing (4). When you are finished with the board, exit the grid view by clicking on the circle with a square inside (5).

Sharing an application or screen
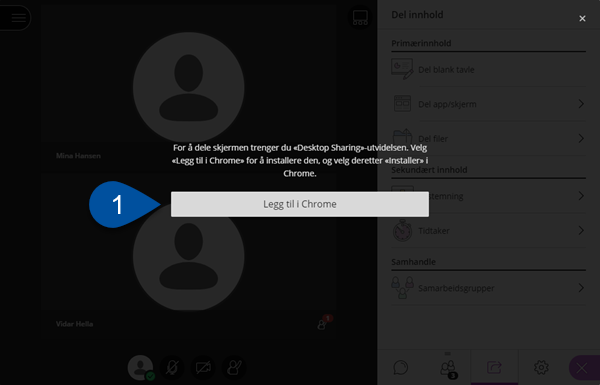
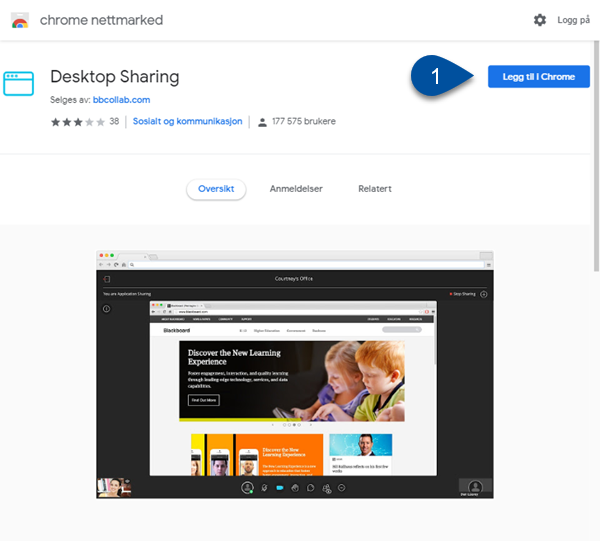
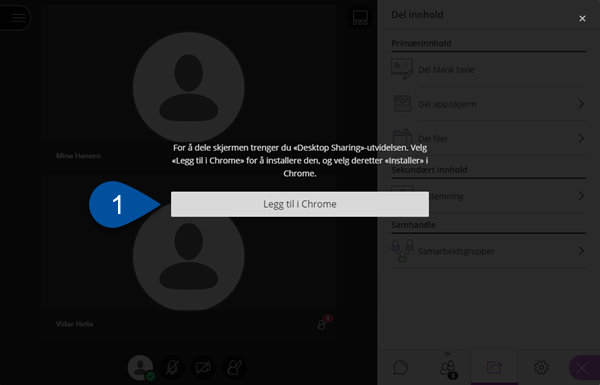
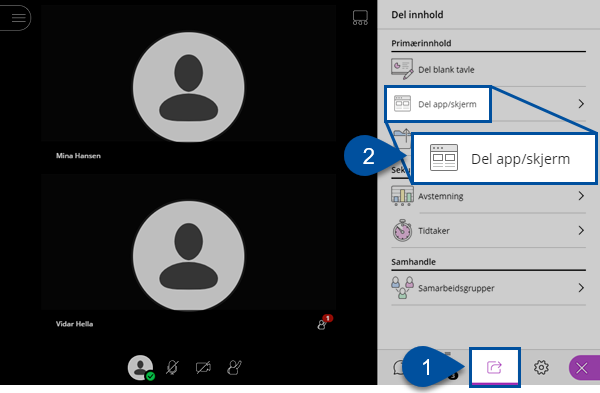
If you want to show your audience something you have on your own computer, you can share your screen. You can either share your entire screen or just the application window for the programme you want to share.
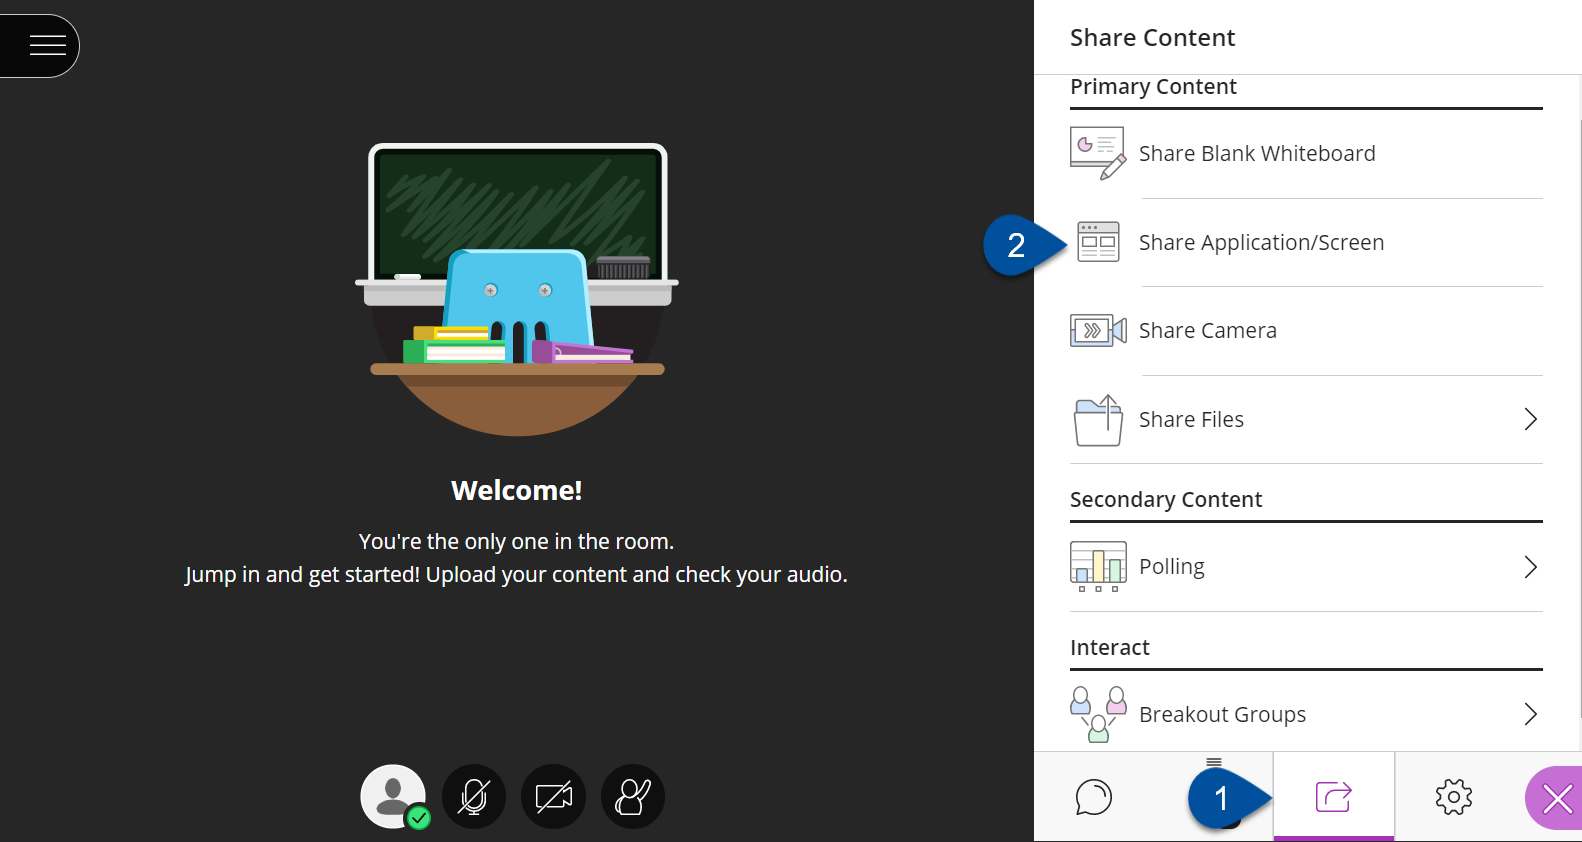
- Click first on the Share Content icon (1) and then on the Share app/screen button (2).

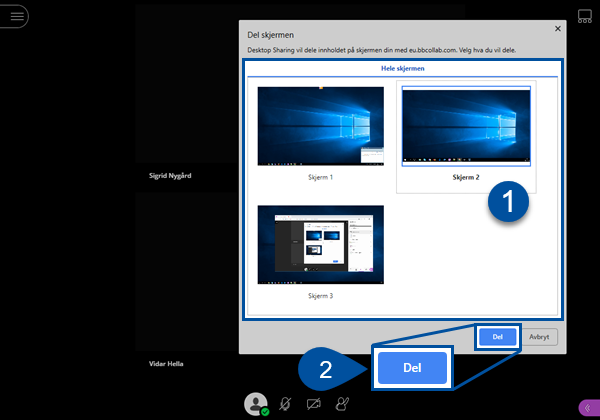
- You will now be given the option to share either your whole screen (1) or an application (2)

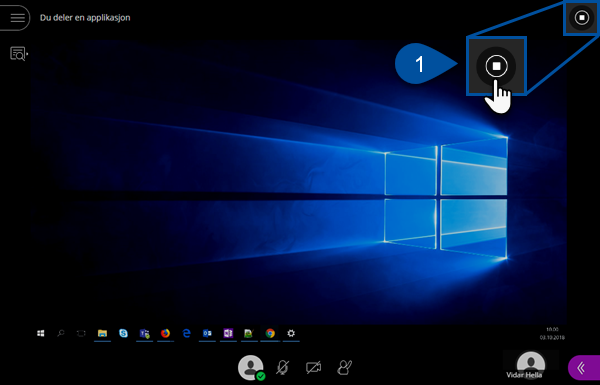
- To stop sharing your screen, you click on the stop symbol in the top right hand corner. (1)

Remember that when you share your screen everything on your screen is shared with the viewers.
Share files
You can share photos and PDFs with participants in the Collaborate room. Together you can draw and write on the shared files. It is also possible to upload PowerPoint files, these are automatically converted to PDF and sometimes it can cause deviations in how the slides will look. Therefore, we recommend converting to PDF manually and always checking that the slides look as you intend before presenting them.
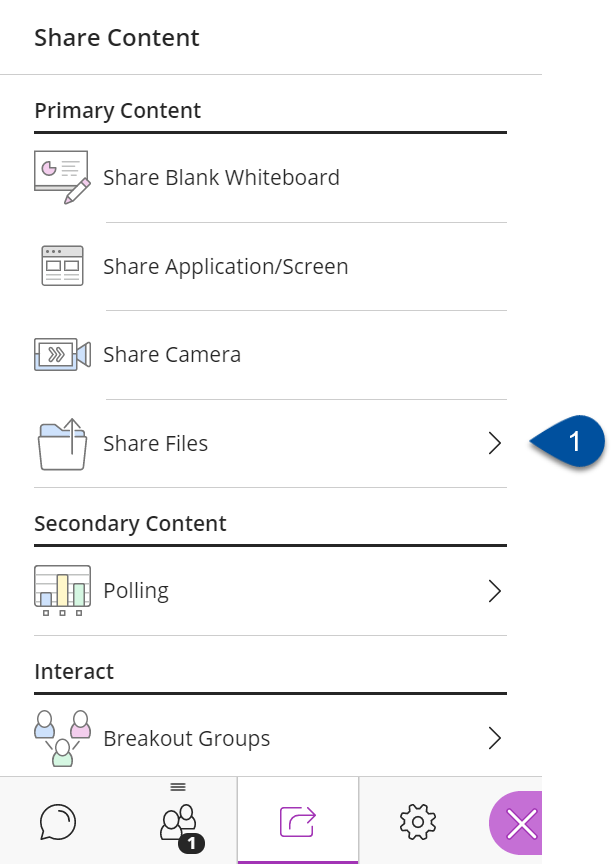
- Click on the Share Content icon(1) and then the Share Files button (2)
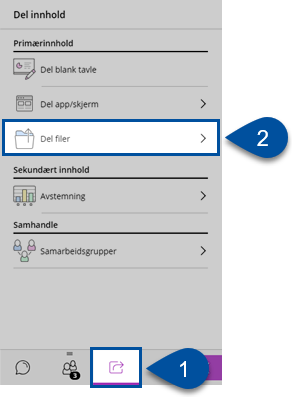
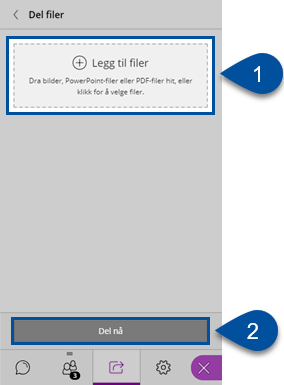
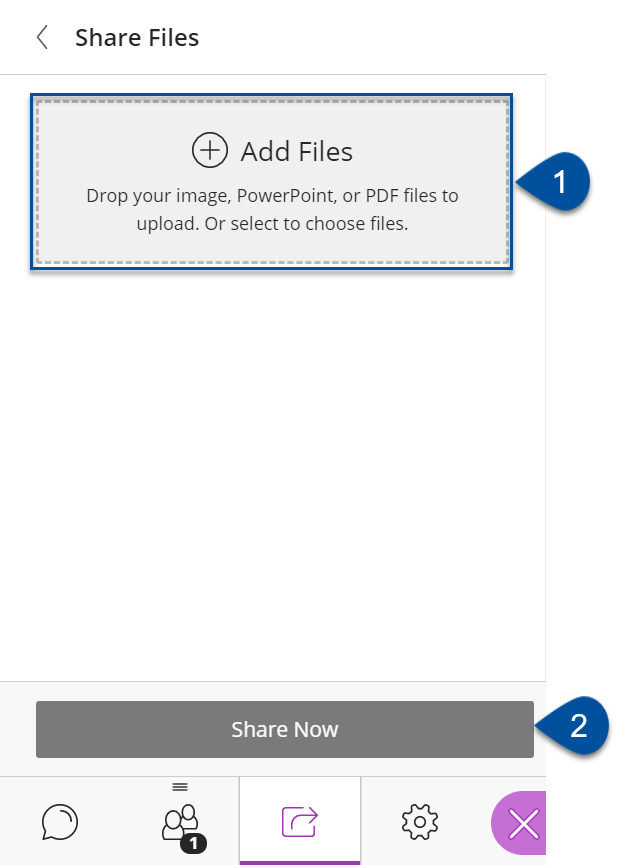
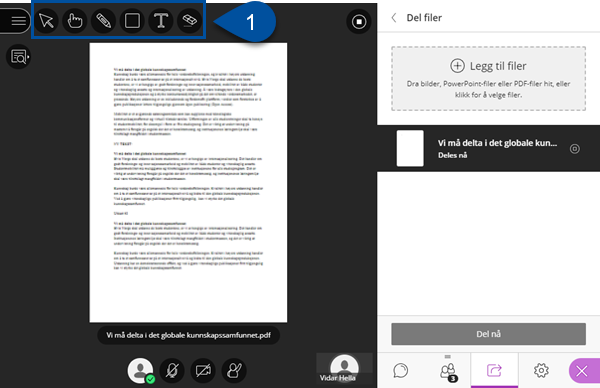
- Click on Add to Files (1) to choose files from your computer. You can also click and rag files into the box. It will take a few seconds for the files to be ready to be shown. When they are finished up loading you can click Share Now (2)
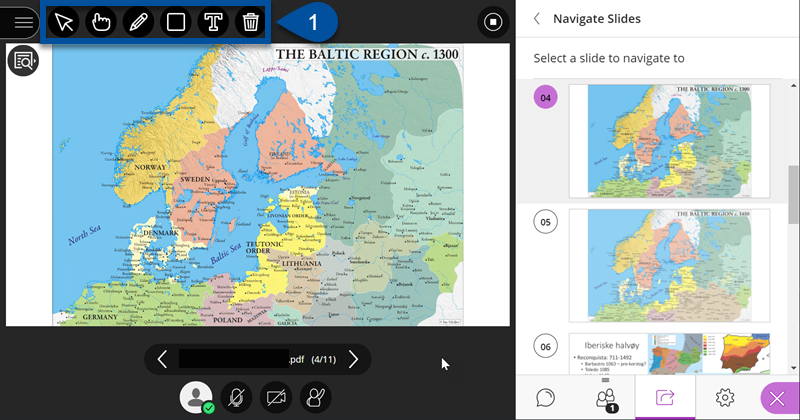
- The files will be shared with the same tools for drawing and writing as the Whiteboard function. (1)

Polls
You can make polls in Collaborate for the audience to answer.
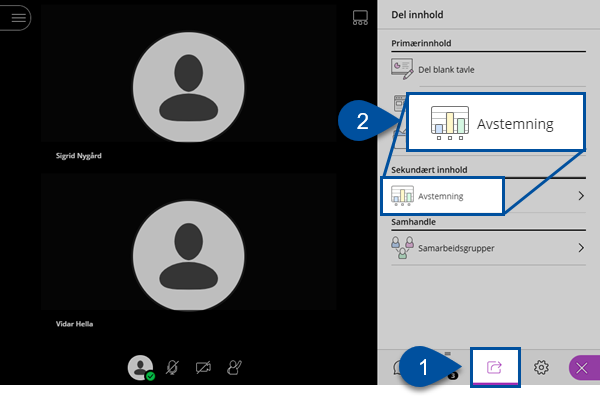
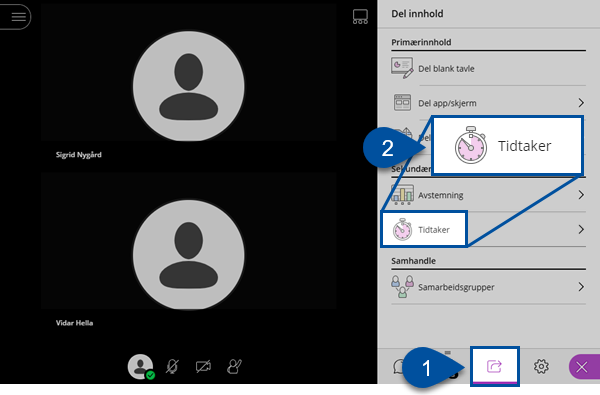
- Click on the Share Content icon (1) and choose the Polls button (2)

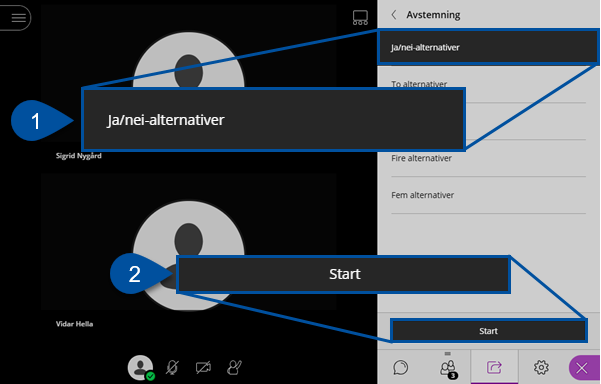
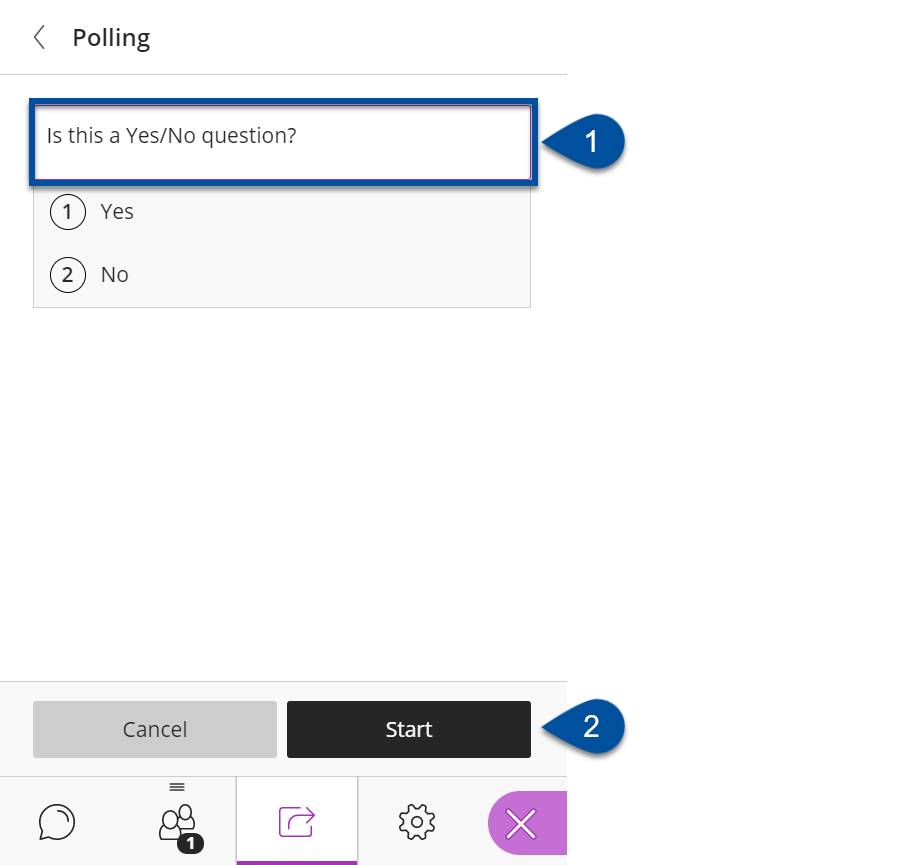
- Click on the type of question you want to use. This example uses the yes/no alternative (1). Once you’ve chosen your question-type click start (2)
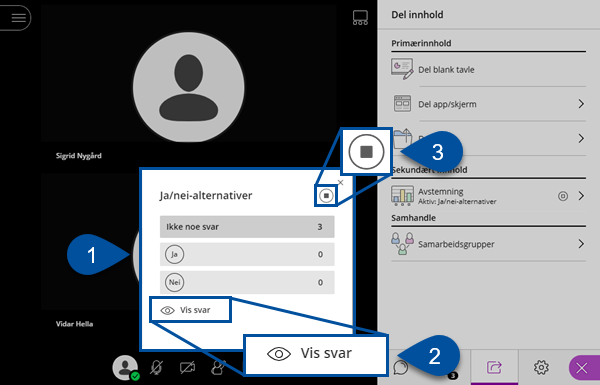
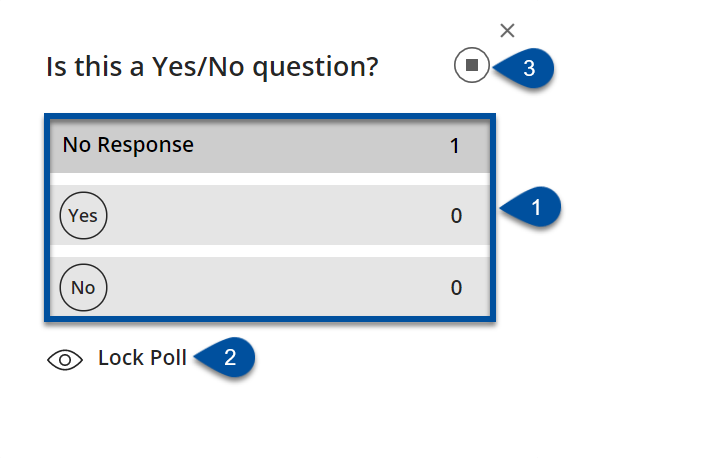
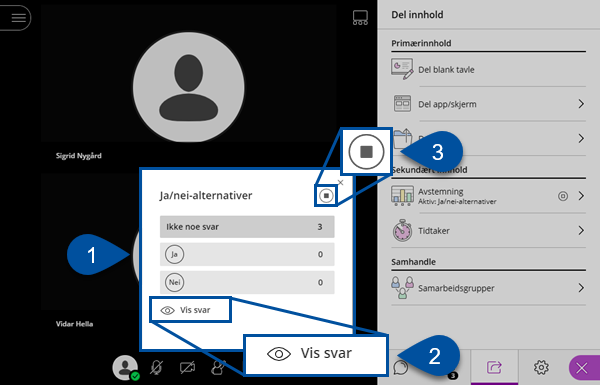
- A pop up with appear where you can see the answers participants give. (1) This box is updated automatically as participants answer. Participants can answer until you click Show Answers (2), then the results are shown. When you are finished, click on the stop symbol to stop the poll (3).

Break out groups
Inside the Collaborate room you can divide the participants into groups, you can also bring everyone back to the main group again afterwards. This can be a useful feature for discussing tasks in smaller groups during the session.
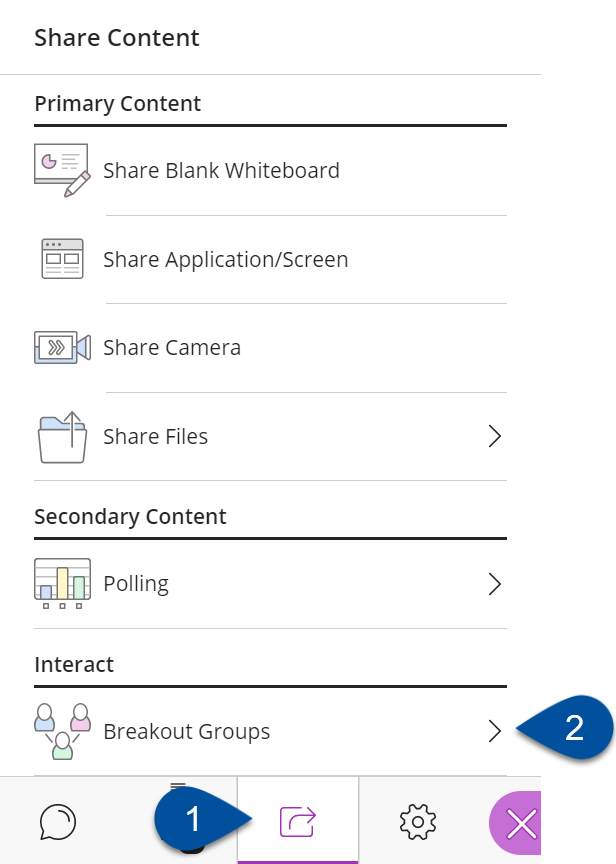
- Click on the Share Content icon (1), and then the breakout groups icon (2)

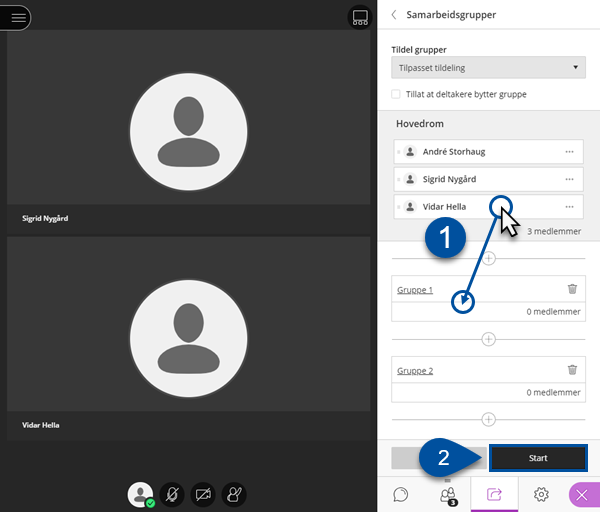
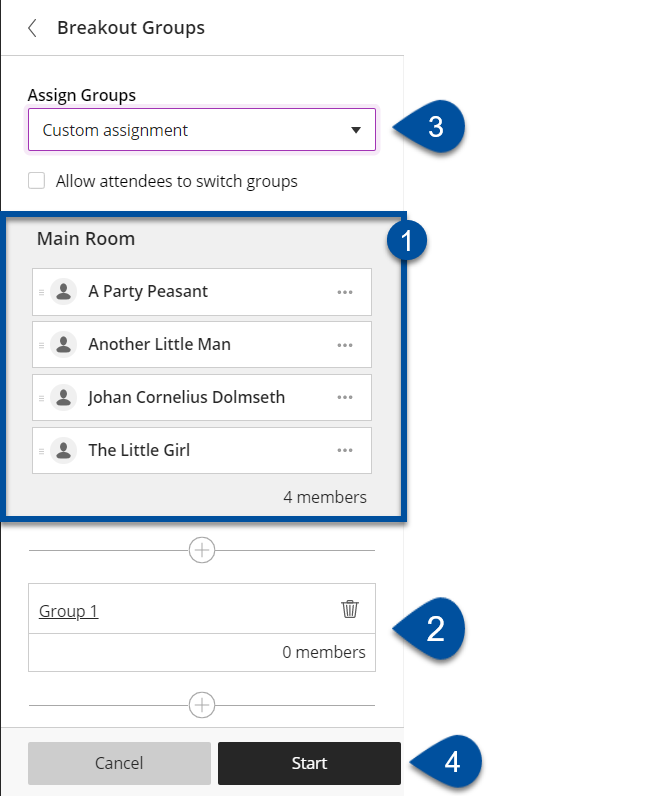
- Decide how you can to split the groups and how many groups you want to have. You can also let Collaborate decide how many groups and who is in each group. Whe you’re finished picking the groups click “start”.
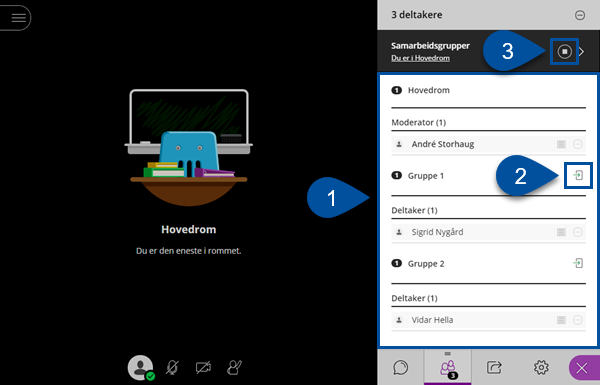
- You can see which groups you and the other participants are in the participant tab of the Collaborate panel (1). You, the moderator, can visit the breakout rooms. You can click on the door with a green arrow icon to enter the other groups (2). To end the breakout groups, you click the stop button (3).
Recording the session
You can record your session so that students who couldn’t see it live can see it afterwards.
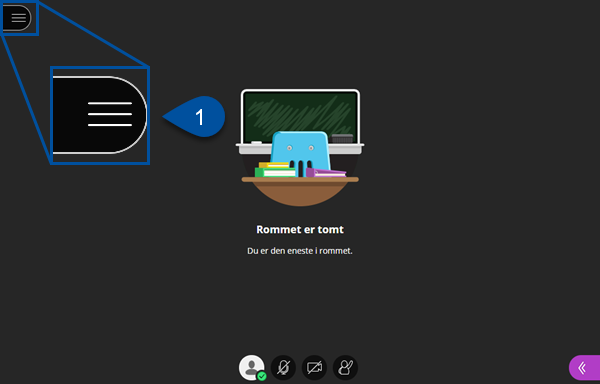
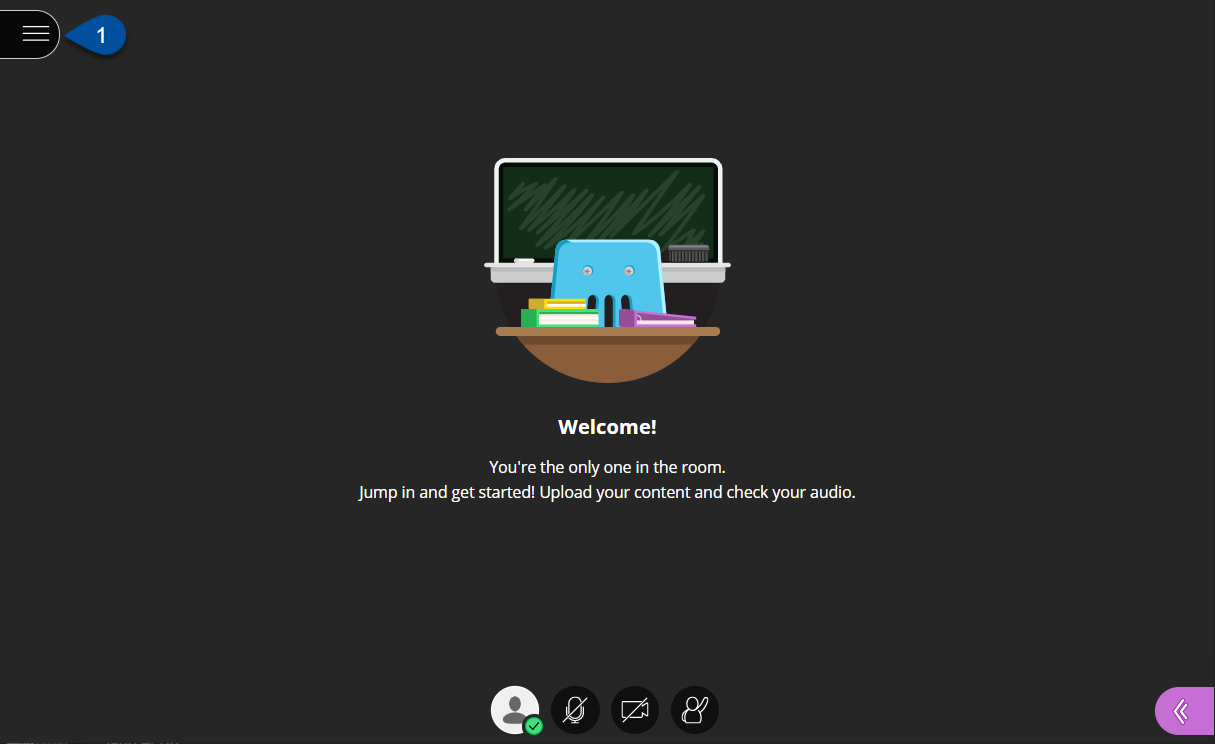
- In the room, open the hamburger menu on the left-hand side. (1)
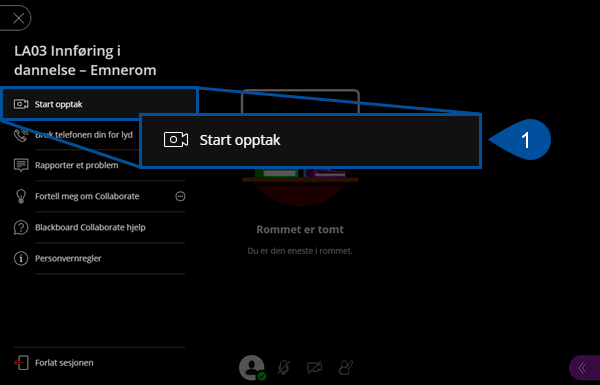
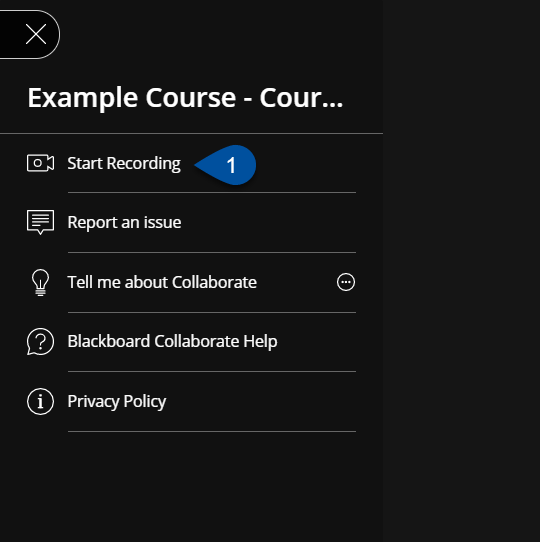
- To start recording click Start recording (1)
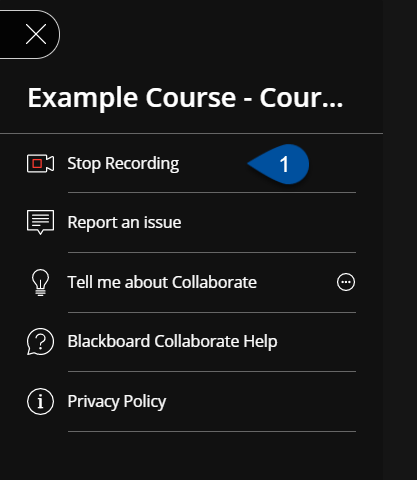
- You are now recording the session. To stop the recording, go back into the left-hand side menu and click Stop Recording (1)

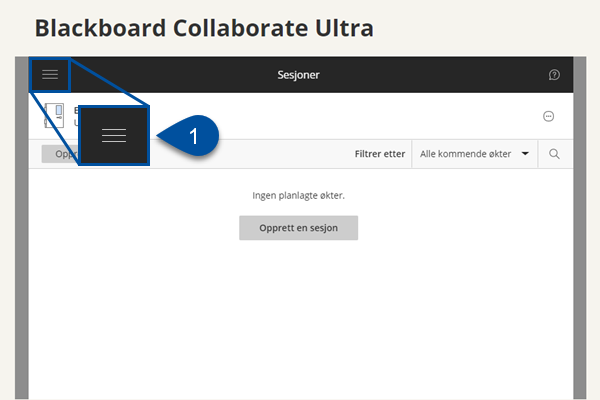
- The recording is now saved in the Collaborate tool. To see the recording you must first go back to the Collaborate tool page. When you are there, click on the hamburger-menu (1)
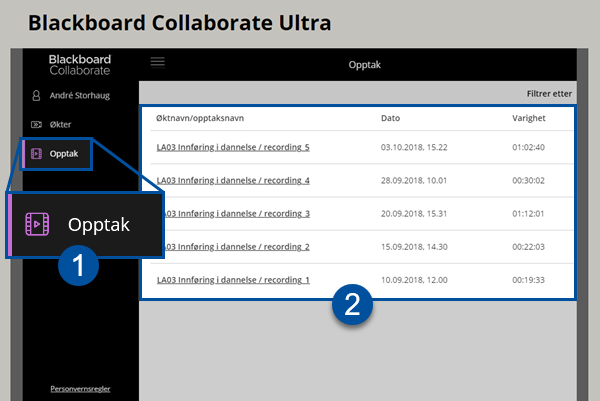
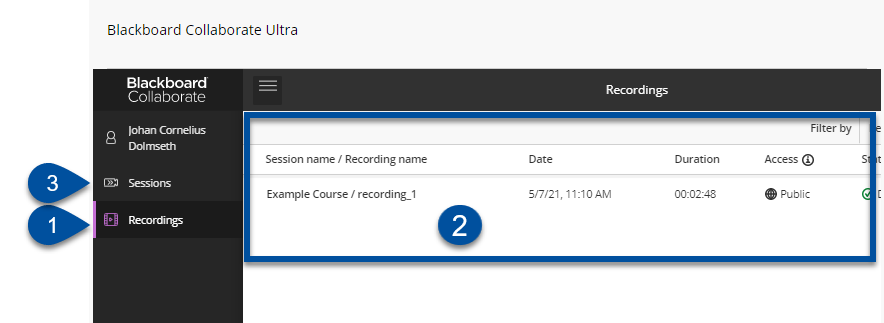
- Click Recordings (1). You will now see a list over your recordings (2). It can take a few minuets or hours for your recordings to appear here depending on the length of the recordings. To go back to the main Collaborate page click on Sessions.
Contact
Please contact Oracle Support Services via NTNU Help if you need any help.