Blackboard - Open courses and guest access - Kunnskapsbasen
Blackboard - Open courses and guest access
In Blackboard, you have the ability to give users access to courses they do not have an active role in, that is, allow guests in your course. Guests only have reading rights, and therefore do not have the opportunity to participate in the course as regular students can. Among other things, they do not have the opportunity to submit assignments or comment in forums.
Innholdsfortegnelse [-]
Norsk versjon - Åpne emner og gjestetilgang
Topic page on Blackboard | Pages tagged with Blackboard
Allow guest access
To have guests in your course, you must allow guest access.
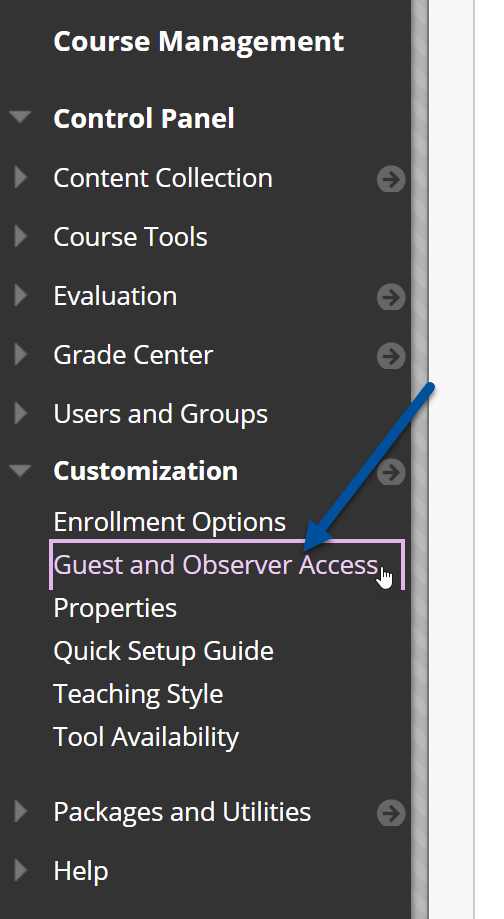
To do this, choose Customization i the Course menu and then Guest and Observer Access.

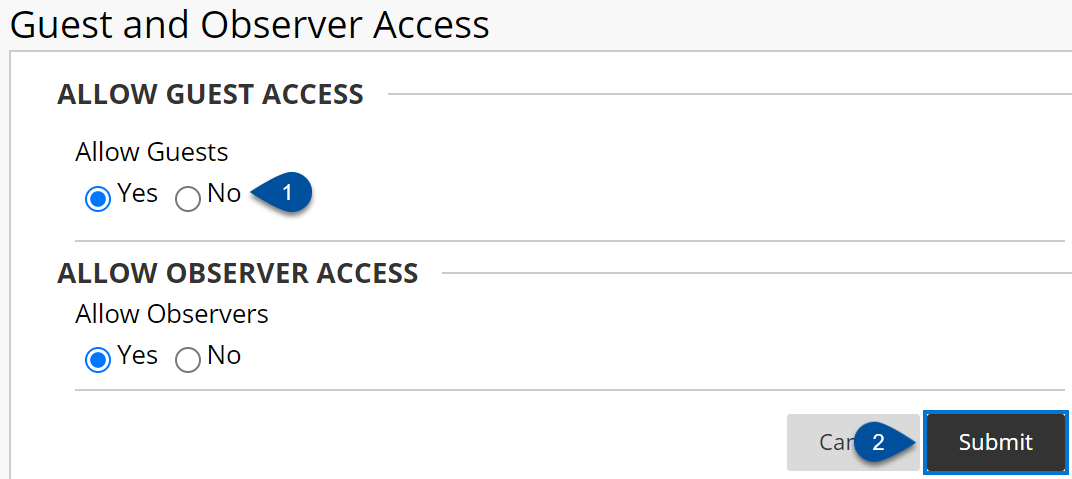
Check for Yes(1) to allow guests in the course, then click Submit(2) to save.
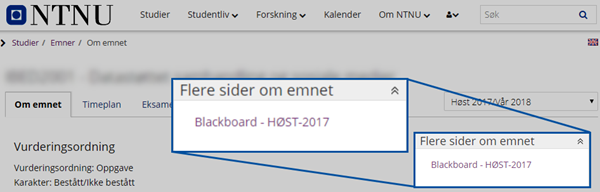
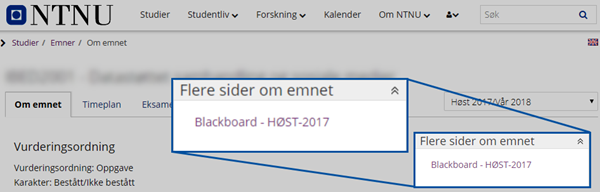
NOTE! It is important to note that when opening the course room for guests, a link to the course room will also be published on the course description on NTNU's website. This means that everyone who is inside and looks at the course description, also has the opportunity to visit the course room in Blackboard.
Share course areas with guests
Once the course is open to guests, you need to decide which parts of the course you want to be visible to guests. Note that only content areas you choose to share will be visible, and not all content in the course.

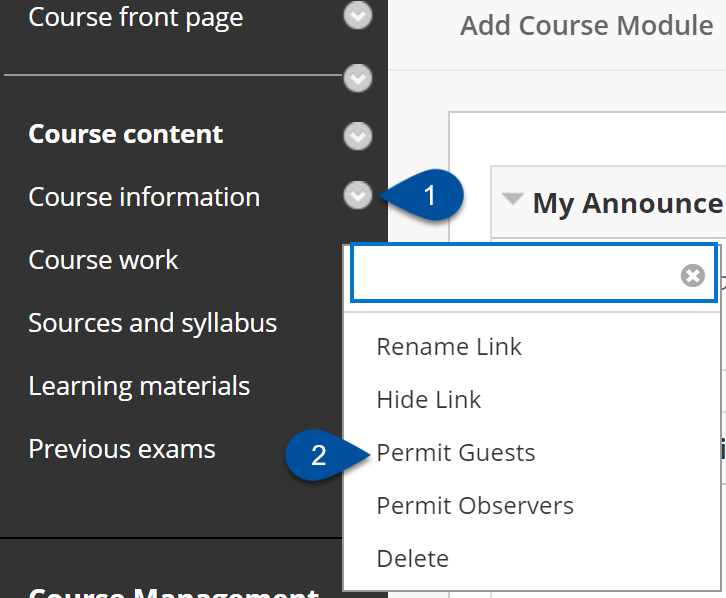
To open a content area for guests, hover over the name of the content area. Touch the small arrow that appears (1). This causes a new menu to appear. Touch Permit guests (2). Repeat this with all the content areas you want to share with guests.
Make tools visible to guests
Now that we have opened the course for guests, we can decide which tools they should have access to. The tools you can make visible to guests are limited - these tools are: Content Area, Contacts and Announcements.
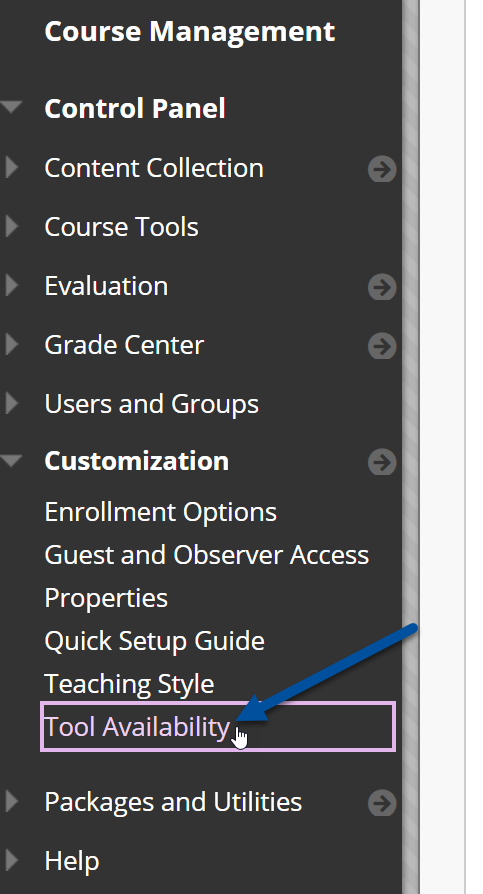
These tools will initially be visible to guests if you have allowed guest access, but they can be turned on and off. To do this, tap Customization in the course menu, then tap Tool Availability.

This will take you to the menu with an overview of all the tools available. Here you can choose which tools should be visible to guests.

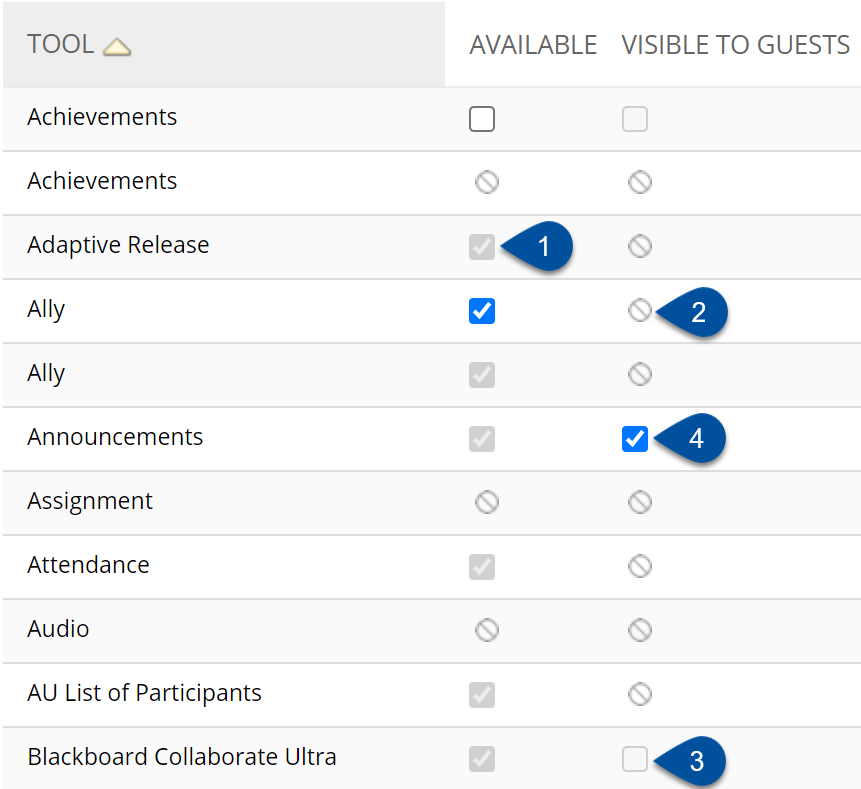
- This symbol indicates that the tool is available to teachers and students in the course, but not guests
- This symbol indicates that the tool is not available to students, teachers or guests
- This symbol indicates that the tool is not turned on for guests, but it can be turned on. To turn it on, click inside the square, and click send to save. (NOTE! If the icon is gray and not black, it is not possible to turn on the tool)
- This symbol indicates that the tool is visible to guests. You can turn it off by removing the check mark inside the square and pressing Send to save.
You must not allow guests to see the various tools in the course, in order for them to have access to the course areas inside your course.
See also
Contact
Orakel Support Services can help you if you encounter problems