Configuring LDAP
Tutorial on how to configure your email client for NTNU's LDAP service. This lets you access contact information in your e-mail client.
Norsk versjon - Oppsett av LDAP
Innholdsfortegnelse [-]
Topic page about email | Pages tagged email
Connection information
- Client: at.ntnu.no
- Encryption: TLS eller SSL
- Port number: 389 for TLS eller 636 for SSL
- Base DN: ou=people,dc=ntnu,dc=no
- Searchable attributes: mail, cn (navn), sn (etternavn)
Connect with Thunderbird
Step 1:
Start Thunderbird and open the Address book. Click on File - New - LDAP directory ...
If this step is not available:
Click instead Tools > Account Settings > Composition and Addressing > Use a different LDAP server > Edit Directories.
After step 3, you will have to select "NTNU" on the dropdown under "Use a different LDAP server".

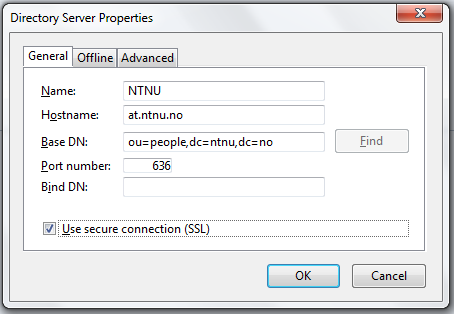
Step 2:
Fill in the following information. Hostname: at.ntnu.no, Port number: 636, check Use secure connection (SSL), Base DN: ou=people,dc=ntnu,dc=no

Note: If you are outside the NTNU network, you must either use VPN or enter authentication information in the LDAP setup. In the latter case, fill in the field "Bind DN" with information on the form: uid=yourusername,ou=people,dc=ntnu,dc=no. You will then be asked about credentials when searching.
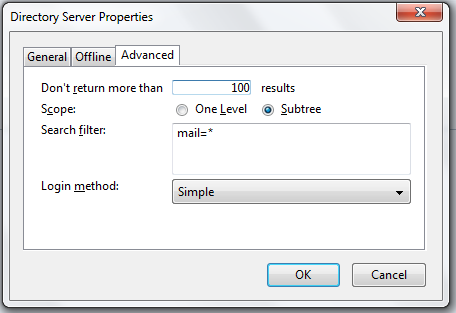
Step 3:
Open the Advanced tab and fill in "mail=*" as your search filter. Press OK. The address book is now configured. To use it, create a new email, click on View - Adress book in sidebar. Choose your new address book.

Connect with Outlook
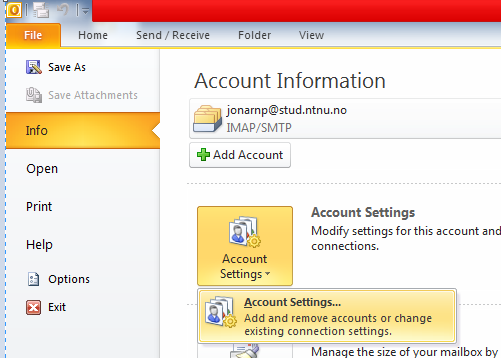
Step 1:
This guide only applies to students. Employees use Exchange as their e-mail system, which has integrated address book functionality. Click on File - Info - Account Settings
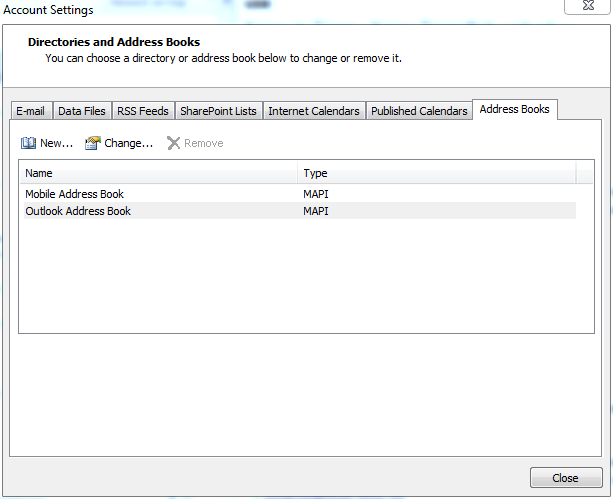
Step 2:
Click on the tab Address Books, and click on New ...
Step 3:
Click on Next, fill inn the server name "at.ntnu.no". Click on More Settings ... and click OK.
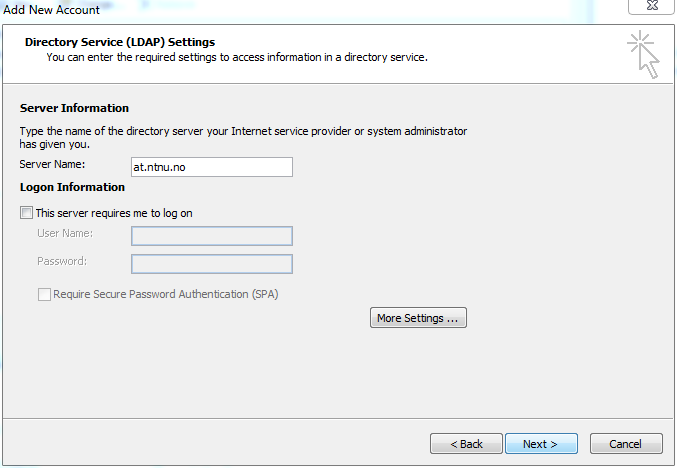
Note: If you are outside the NTNU network, you must either use VPN or enter authentication information in the LDAP setup. In the latter case, fill in "Logon Information" as well.
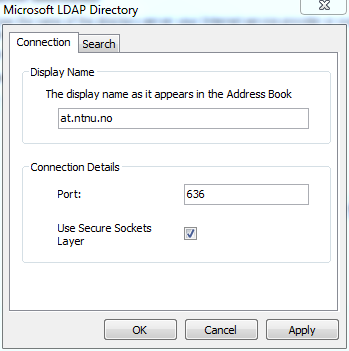
Step 4:
Fill in the connection information Port: 636, ande check Use Secure Sockets Layer.
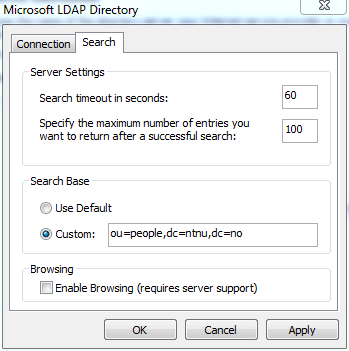
Steg 5:
Fill in the search base "ou=people,dc=ntnu,dc=no", when choosing Custom. Click on Apply - OK - Next - Finish - Close. Restart Outlook.
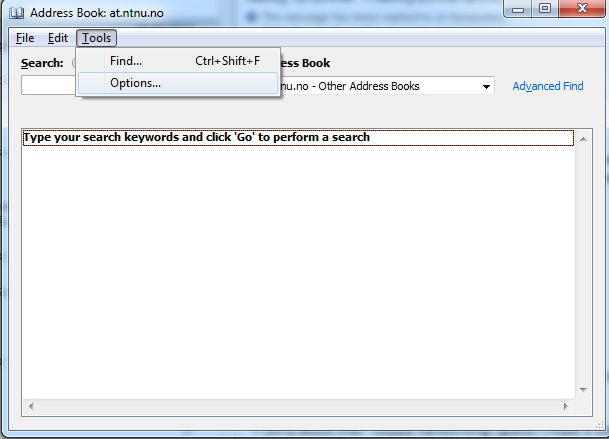
Step 6:
Click on home Home, and open the Address Book. Click on the tab Tools and click on Options ...
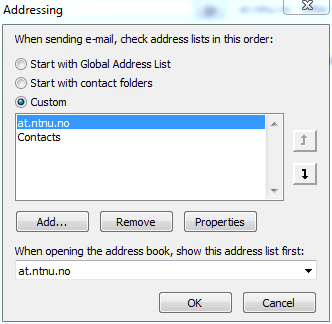
Step 7:
Choose Custom. Move the client address at.ntnu.no to the top of the list, choose this client in "When opening the address book, show this address list first"
Step 8:
Click on OK and restart Outlook. The address book is now ready to be used.
Contact
Orakel Support Services can help if you encounter difficulties.